Skoolie Plumbing: Everything You Need to Know!
Skoolie plumbing is one of those build topics that tend to make the most ambitious skoolie builder a tad bit nervous and apprehensive about jumping in and getting started.
If you are anything like us and most of all of the other skoolie enthusiasts who have decided to convert their very own school bus to a tiny house on wheels, your background in electrical, carpentry, and especially plumbing is either very limited or non-existent at all.
For us, our expertise and experience with plumbing were limited to plunging a toilet or pouring some Drano down the sink to remove the nasty shower drain hair monster.
The idea and concept of not just installing, but creating a self-contained functioning skoolie plumbing system on a retired school bus that will allow for cooking from fresh potable water, to taking a shower, washing clothes, and doing dishes all without allowing leaks that could cause irreparable damage and even health risk mold was, to say the least, somewhat intimidating.
All we can say, time and time again, is thank goodness for YouTube. That is the first place we looked to try and shed some light on what seemed like rocket science at the time.
Now, it really isn’t as complicated and mysterious as we thought. We knew what we wanted and needed for our skoolie plumbing, but how to make it happen and come together was the mountain we had to climb.
For us, it wasn’t just a matter of instantly becoming plumbers, it was becoming a skoolie plumber, creating and installing the plumbing system without any leaks that were the most intimidating aspect of this skoolie build project.
How To Plan My Skoolie Plumbing
Where do I start?
That is always the best question when tackling something you are not familiar with. You start at the beginning, which should always be planning and mapping out what your skoolie plumbing schematic will look like.
Plumbing Road Map
For us, we knew we wanted a kitchen sink, water heater, shower, and possibly a washing machine.
So, knowing what plumbing features you want water to be directed to, you will want to make a road map or flow chart of your water flow starting at your freshwater tank and your city water hookup.
Place your appliances that require water, and fixtures that require water, such as shower, sink, etc., on your skoolie floor plan. If you have yet to make your skoolie floor plan, read this post about getting that done.
Once you have mapped out where all of the things that will require plumbing sit on your floor plan, you can begin to map out your skoolie plumbing diagram.
For every turn or corner, you will add a 45’ or 90’ elbow connection. For every appliance or fixture, you will either add a t-split connector or a butt-end connector.
This is what ours looked like prior to installing our plumbing.
*INSERT PICTURE*
Once you have mapped out your skoolie plumbing diagram, it is simply a matter of purchasing the connections and plumbing pipe and connecting it all together.
Voila, you have your skoolie plumbing completed and ready to go for the next project!
What Goes Into a Skoolie Plumbing System?
When you think about a plumbing system for a house, it is quite different than skoolie plumbing. There are systems within traditional house plumbing that do not exist with a skoolie setup.
For instance, there is no city sewage that will take your wastewater magically away. Unless you are at a campground or RV park with hookups, there is no automatic pressurized freshwater feed.
Let’s take a look at what makes up the skoolie plumbing system in your bus.
Freshwater Tank
One of the first things we focussed on regarding our skoolie plumbing was, how much freshwater do we want to have available to us while we are boondocking or traveling down the road?
Deciding on what size your freshwater tank is an important decision and has certain implications.
The bigger your tank is, the heavier your load becomes. You want to be sure you have your water tank evenly distributed for weight.
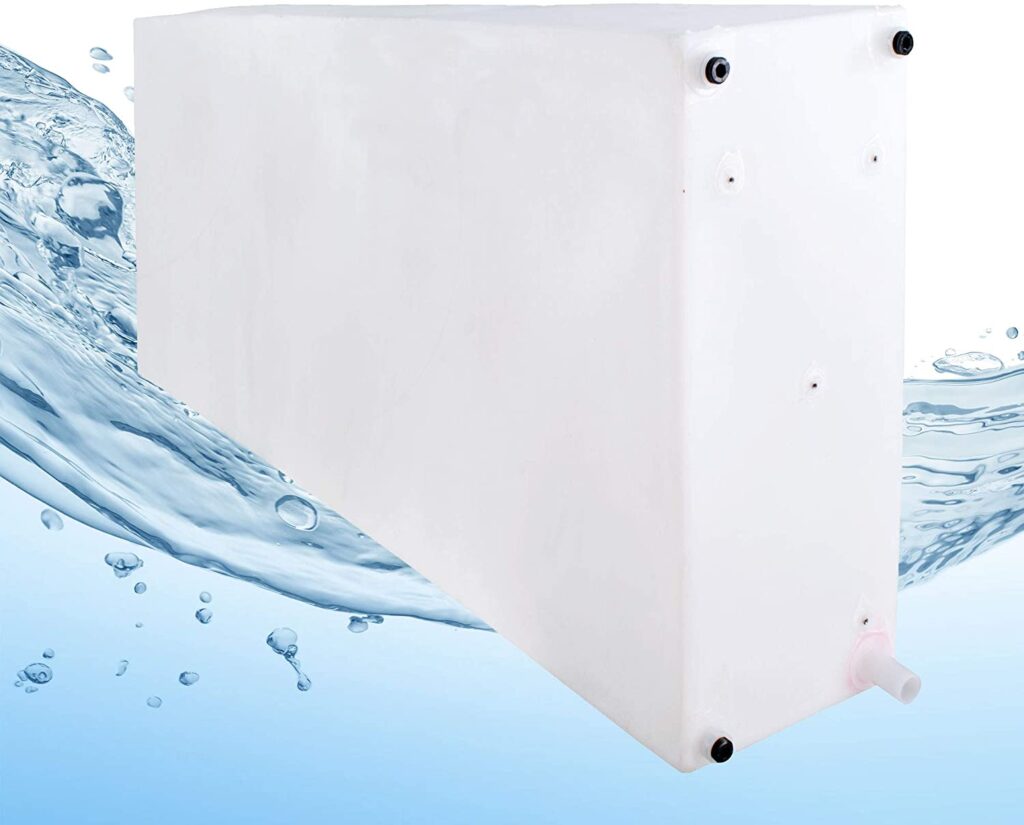
Also, be sure to purchase a freshwater tank that is FDA-approved for water consumption.
This is the fresh water tank we used in our first build. We used a smaller tank, 33 gallons, for our DIY Sprinter conversion made by the same manufacturer.
For our current build, we are going with a 40-gallon water tank. We know we want to travel lighter and based on our history of water consumption, we feel 40 gallons will last us about a month.
Fresh Water Fill Hose
When filling up your fresh water tank, you are going to want a garden hose that is intended for water consumption. Long gone are the days of freely drinking from any old garden hose without the consequences of ingesting harmful chemicals.
We recommend the Camco 35 ft drinking water hose. It is 20% thicker than a standard garden hose and anti-kink, so that means faster fill-ups and no frustration of a kinked hose for you.
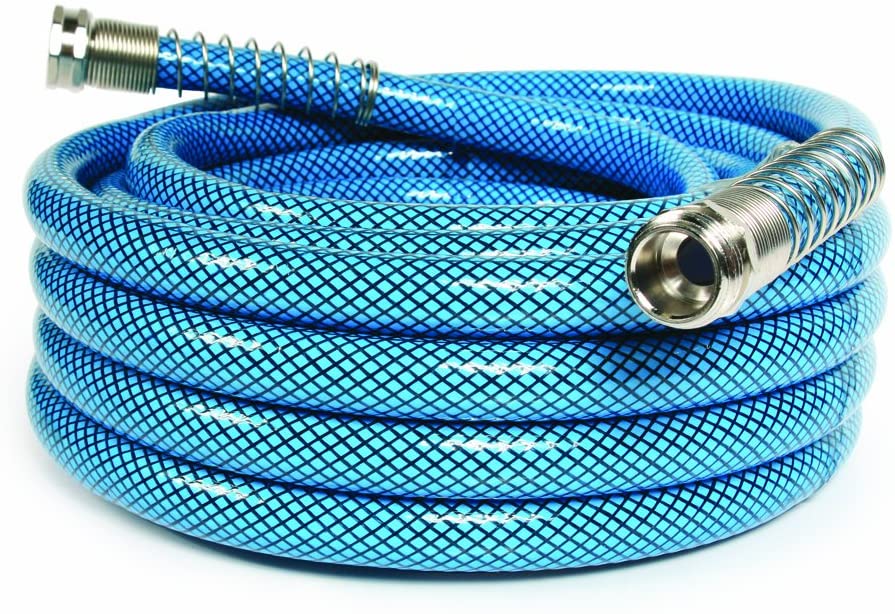
We actually carry two of these in the event we aren’t within 35 feet of the closest water faucet. That has saved us more than a few times!
How Much Freshwater Do You Need?
Your decision to decide on how much fresh water you want to haul around and have access to at any given moment will take in a few factors. A few important things to consider are:
Weight
Did you know that every 1 gallon of water weighs 8.34 pounds?
Keeping that in mind, you will want to consider how you are going to position your freshwater tank for weight distribution on your bus as you are rolling down the road going up and down mountains, and making sharp left and right turns.
If you are keeping 100 gallons of fresh water on your skoolie, that will equal 834 lbs.
Installing that freshwater tank on the left or right side of your skoolie, you may want to counterbalance all of that weight with some equal to or close to the same amount of weight on the opposite side of your freshwater tank.
Have it centered in the middle of the bus, then you are likely in good shape regarding the weight balance.
Position
One important factor before deciding where your freshwater tank is going to be is where your tank is positioned.
This decision should be factored in a couple of things that are already on your bus, one or two things you may have yet to install in your skoolie. Where is the fuel tank located and what is the capacity of that tank.
Are you planning on installing gray and/or blackwater tanks? What will the gallon capacity of those additional tanks be?
The location and capacity of those tanks must be considered prior to installing your freshwater tank. Weight distribution is the key factor here.
Consumption/Capacity
How much boon-docking are you planning on doing and what is your monthly water consumption?
The best way to determine how much water you are going to need to comfortably live and survive on your bus conversion can be accomplished well before moving onto your tiny house on wheels.
If you have a city water source for your water and plumbing needs, simply track your water consumption for a minimum of three months.
Live and use water in your home as if you were already living in your skoolie and be as conservative with your usage as you think you would be on your bus.
Track your water usage and average those three months and that will give you an accurate glimpse of how much water you are going to need to store on your bus.
Location
Here, we are addressing whether your freshwater tank(s) are going to be held on the inside or exterior of your bus. A couple of very important things to consider here.
First, are you planning on spending a considerable amount of time in sub-freezing weather during the colder or winter months?
If that answer is yes, or even maybe, then I would strongly encourage you to find a spot on the interior of your bus or van to install your freshwater tank(s).
Water freezes at 32’. When water freezes it expands by 9% of its volume.
On a side note, your gray/black waste tanks are most definitely going to be on the exterior, and highly likely, underneath your rig. Freezing wastewater can be avoided by adding a solution to your tanks.
Since this water is not going to be consumed then an additive or chemical may not be a concern.
*TIP*
Please be mindful of wild animals, insects, and the environment when considering adding any chemical or additive to water tanks that will eventually be expelled.
Once you have that part of your build decided, the rest of the plumbing really is quite simple.
Make a list of the plumbing features you want on your bus.
City Hookup
We had already decided that we wanted the option of having city water hookup available to us while we are visiting friends or parked where freshwater hook-up is available.
We decided to install a gravity-fed and city water hook-up intake on our bus that is one unit and had a lock on it.
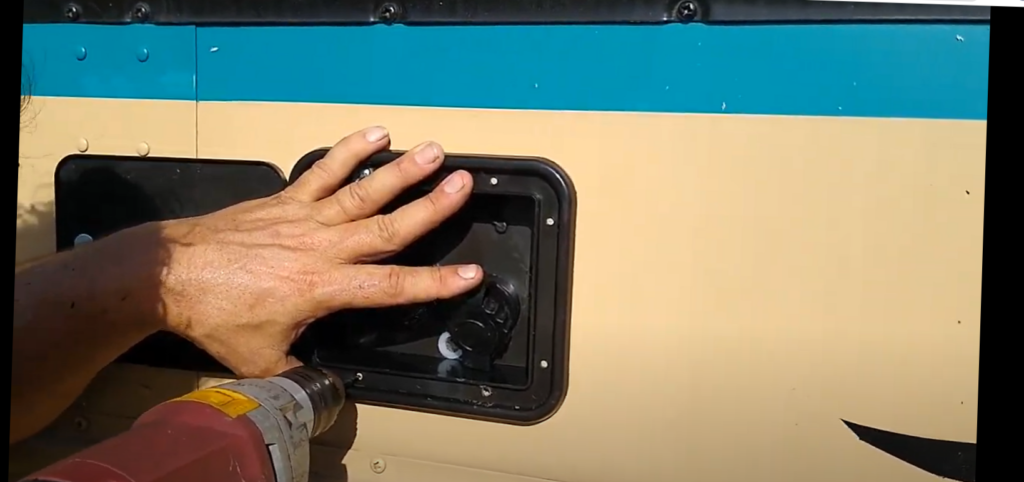
There are a couple of options you can go with to accomplish both hookups.
There are individual freshwater intake outlets that you can install and then tie together into your plumbing flow map. We decided that we wanted to have one exterior fill station that had both the city water intake as well as the gravity-fed intake.
We also wanted the ability and option for locking it. To us, being able to lock our exterior freshwater feed was very important. The security and assurance that no one would have access to gain entry to our freshwater inlets were high on our list.
We purchased ours off of Amazon and chose to purchase it in black instead of white. It was a personal choice. For us, knowing what our exterior color scheme was going to be. We knew that the black would blend in and seem more aesthetically pleasing to us.
Besides, we didn’t want to attract any unnecessary attention to any of the inlets on the exterior of the bus.
This is the water intake hatch we decided on for both of our builds.
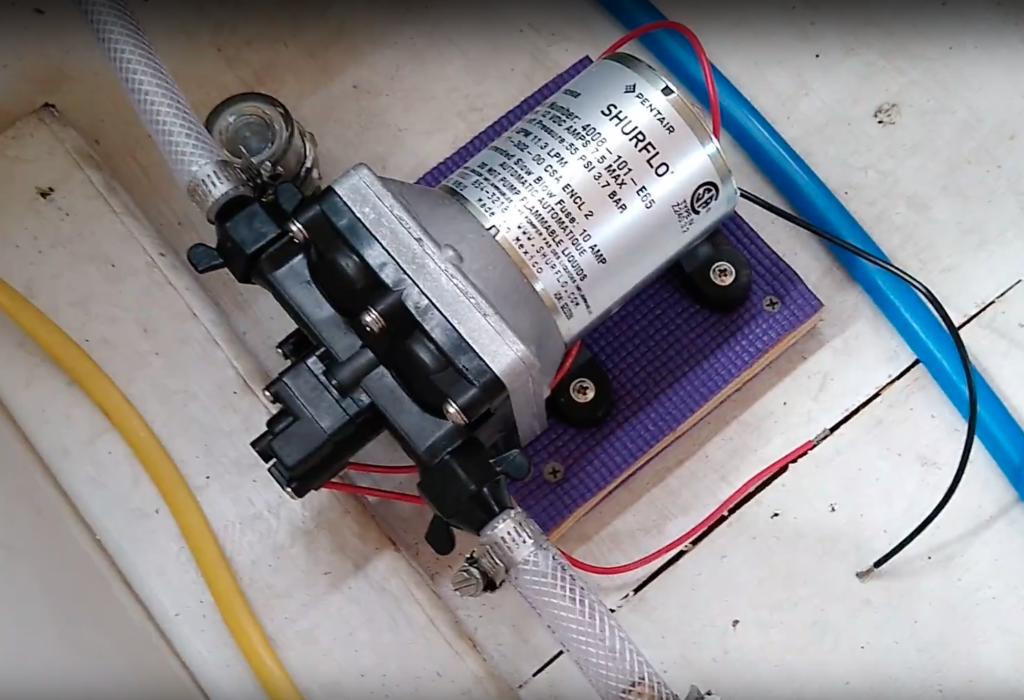
Water Pump
Having all of the freshwater tanks full of water waiting to be used is great, but worthless unless you have implemented a way to move that water through your Pex plumbing pipes.
Fortunately, there are a couple of methods for accomplishing this. You can either utilize a 12v electric water pump or you can go old school and use a manual or mechanical foot pump.
We will talk about each of these options a little more.
Electric Water Pump
An electric or 12v water pump is exactly what its name implies it is. It is an electric pump that will pull water from your fresh water tank and move it through your pipes to the device or faucet that has opened up the pressure to release it.
Foot Pump
A foot pump, although much simpler in design, is just as functional as a 12v or electrical water pump in getting water from your holding tank to your desired destination.
The foot pump however will not provide you with the water pressure an electric water pump will provide. In fact, the water from a foot pump basically “trickles” out of the faucet as you are pumping the water through your plumbing pipes.
Water Pump Filter
If you are going to be using a 12v water pump, then it is highly encouraged to place an inline water filter between your freshwater tank and your water pump.
It isn’t very likely that a foreign object in your freshwater tank will be large enough to damage your water pump, but it is always better to be safe than sorry.
Besides, the water filter should not cost you any more than $5 to $10 at the most. A new water pump will cost you around $150.00.
Accumulator
An accumulator is one of the skoolie plumbing pieces that aren’t necessary, but it is nice to have.
If you are not going to be running your sink faucet but for a few seconds, maybe to brush your teeth or a small cup of water, then the accumulator is nice as it actually stores the water after the water pump.
This will eliminate the water pump from turning on every single time you run your faucet.
Grey Water Tank
Where is the water from your shower or sink from washing dishes going to go? It has to go somewhere and it is not socially acceptable to allow it to just dump onto the ground below your bus.
In fact, in some states or city municipalities, it is actually a crime to dump gray water tanks onto the ground. So, you should make a plan to safely and legally dispose of your dirty shower and sink water.
Release
All gray tanks have a release valve to dump the dirty water into a disposal drain or a tank caddy. How you choose to empty that gray tank is entirely up to you.
We will say this, from first-hand experience, greywater can sometimes be almost as nasty as black water.
Food particles from your dirty dishes and if you have diverted your urine from your toilet to your gray tank, then there is that too.
Manual
A manual release for your dirty gray water tank liquids is the primary and “old school” way of releasing your liquids.
You manually have to open the valve, which is typically a PVC pipe valve, connect a gray tank hose to the coupling and dispose of your liquids.
This is what we had on our first skoolie build and it was not that bad, but occasionally a pain in the rear when we allowed our gray tank to get too full.
Electric
A friend of ours has an electric release valve on their bus. When we saw this, we immediately had electronic release valve envy!
It is a very clean way of disposing of your greywater liquids without having to get too involved in the process.
Black Water Tank
If you have ever had to empty, drain or clean a black water tank, then we are fairly sure you will agree with us that there is no room, or reason for a black tank on a skoolie.
If you choose to incorporate a black tank into your skoolie plumbing setup, then bless your heart and carry on soldiering!
Water Heater
Many of our friends have chosen not to use a hot water heater in their skoolie. We didn’t have one for the first few months of living and traveling in our first skoolie.
Now, we can not imagine not having a hot water heater. In our second DIY conversion, we used an instant propane ventless hot water heater and loved every minute of it!
For our current skoolie build, we will be using the same on-demand propane, ventless hot water heater.
Plumbing Pipe
For us, based on the research we had already completed by looking at hours of YouTube and researching on the internet, we made an easy and quick decision to use Pex plumbing piping along with Sharkbite plumbing connections.
Pex plumbing pipes were so eBay to use for our skoolie plumbing, we can not imagine using anything else.
After almost three years, we have never had a single leak or drip of water due to the plumbing we have installed. Mind you, we have traveled thousands and thousands of miles and through 30 states. In a skoolie, that is a lot of bumpy riding and jostling of skoolie plumbing pipes.
Pex
We have used Pex plumbing in every one of our DIY conversions. There are several advantages of using Pex pipes when installing your skoolie plumbing, but I have yet to come up with one negative.
One of the things we like about Pex plumbing is that it is very easy to work with. It bends very easily and is easy to manipulate. It is also relatively inexpensive as compared to traditional copper or PVC pipe.
PVC
PVC pipe is certainly cheap enough as well as easy to install. Although it is not as flexible as Pex pipes, it still has a little bit of giving as your skoolie is bouncing and chugging up the road.
Coppered
Copper plumbing is great if you live in a house, condo, or fixed structure. As far as piping for your skoolie plumbing, I would not recommend it all! The solder welds are eventually going to crack and loosen due to the constant vibrations on a skoolie.
Galvanized
Galvanized is not as popular for plumbing as it was in the 60s and 70s, but still a viable choice for your plumbing pipe. However, like copper pipe, galvanized pipe is not meant for mobile plumbing. Besides, it is very heavy metal as well.
Pipe connectors
Connecting your Pex plumbing pipe to appliances and faucets require connectors designed to connect and not leak. There are a couple of options you can choose to accomplish this.
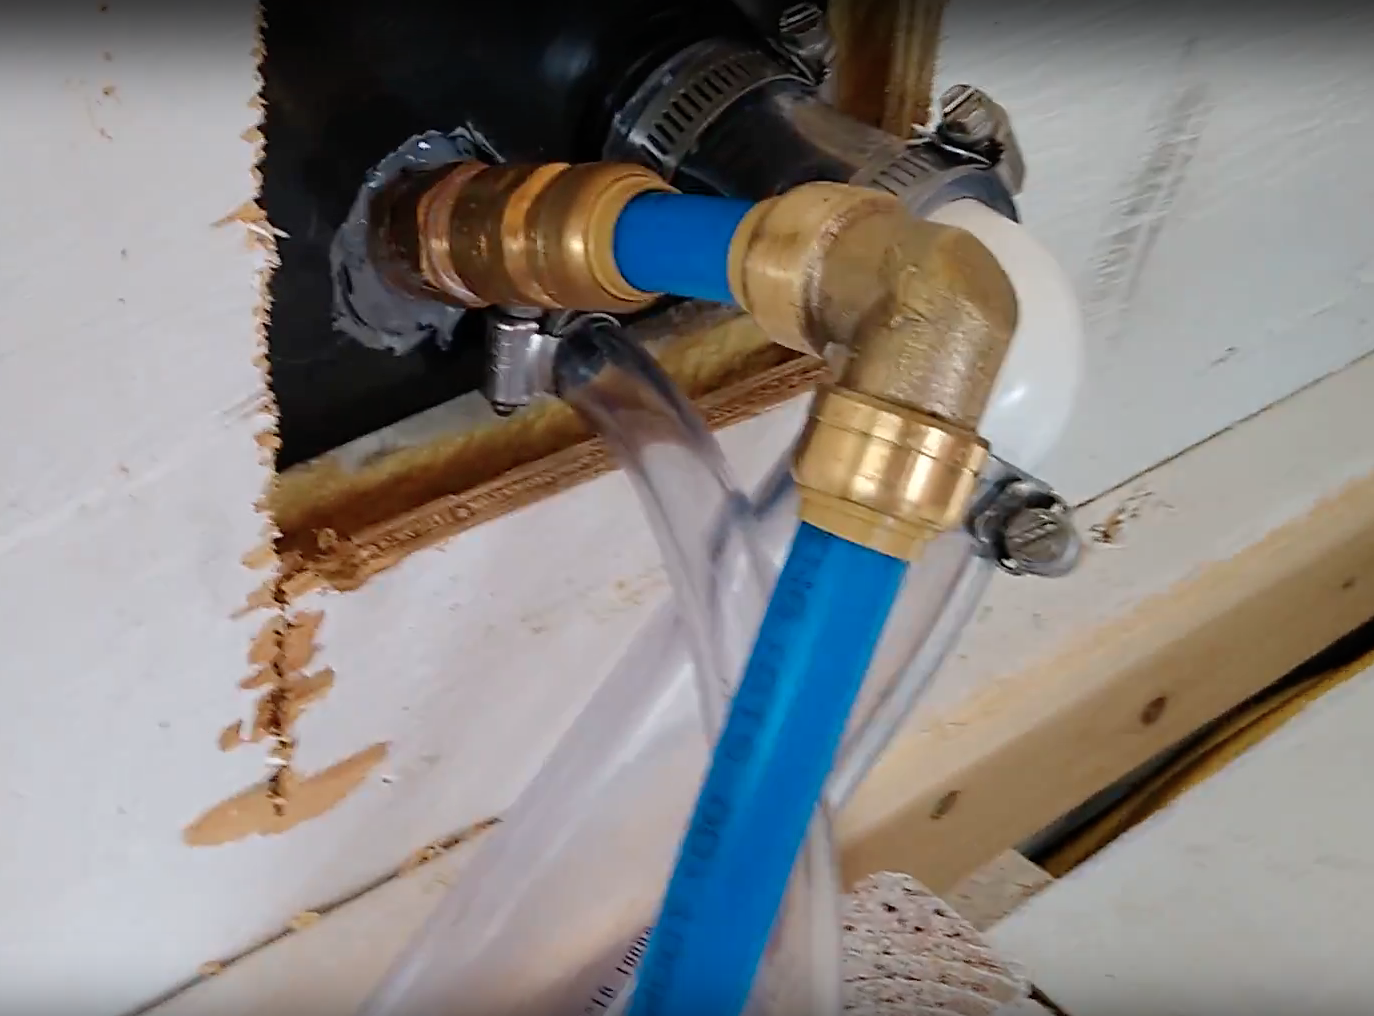
You may either use Pex connections or Sharkbite connections. Both are equally reliable, but we tend to prefer the Sharkbite connections due to their ease and simplicity.
Sharkbite
Sharkbite connections are reliable and very simple to use. If there were a downside to Sharkbite, I suppose it may be the cost. The cost can add up fairly quickly depending on the size and complexity of your plumbing system.
Aside from the cost though, there is nothing about Sharkbite connections we don’t love! They are very easy to connect and fairly easy to disconnect if you change your mind or plan about a connection.
Pex
Pex plumbing pipe has its own brand of Pex connectors. Much easier to use and install than traditional copper and even PVC, but still requires some practice and skill.
Faucets.
The only thing worthy of mentioning faucets and fixtures for the purpose of this subject is to be mindful of the connections at the end of the fixtures. Most kitchen faucet connections are ½” while the connections on Pex plumbing are typically ¼”.
Sink
It doesn’t really matter what kind of sink you choose to use in your skoolie, but how you drain the sink water does matter.
You basically have two choices when plumbing your sink for wastewater. You can either let it fall into a Jerry can by gravity, or have your sink plumbed into the gray water tank.
It’s good to know that plumbing your sink to the gray water tank is also gravity fed. It just ends up in a much larger container than a small Jerry can.
What Tools Will I Need To Install A Skoolie Plumbing System?
To make your plumbing go much smoother and easy, there are some specific tools you want to have on hand before starting this skoolie project.
If you are using Pex plumbing pipes, then you are going to want the following tools in your arsenal.
Pex Cutter
You can use a knife or even a PVC cutting tool, but a Pex cutter will not only give you a clean and even cut, but it will also bevel the edges that make a Sharkbite connection a better seal.
Pex End Cleaner
A Sharkbite deburring tool will bevel the ends of the Pex pipe to ensure a proper and tight fit into your Sharkbite connectors.
PVC Cement and Primer
There are going to be a few parts in your skoolie plumbing map that will utilize PVC. Primarily, the drains and connections to your gray and possibly freshwater tanks. For those applications, you will want to use PVC pipe cement and primer to make sure the connections are sealed and tight.
Pex Mounting Clips
If you are anything like us, we like to keep things tidy and clean when completing a project. Especially one we are going to be living in.
Pex clips will keep your skoolie plumbing secure and tight against your wall and prevent it from vibrating and rattling as you are driving down the road. We could not imagine completing a plumbing project with them.
Electrical Connections
These will be required for wiring your 12v water pump to a 12v fuse box.
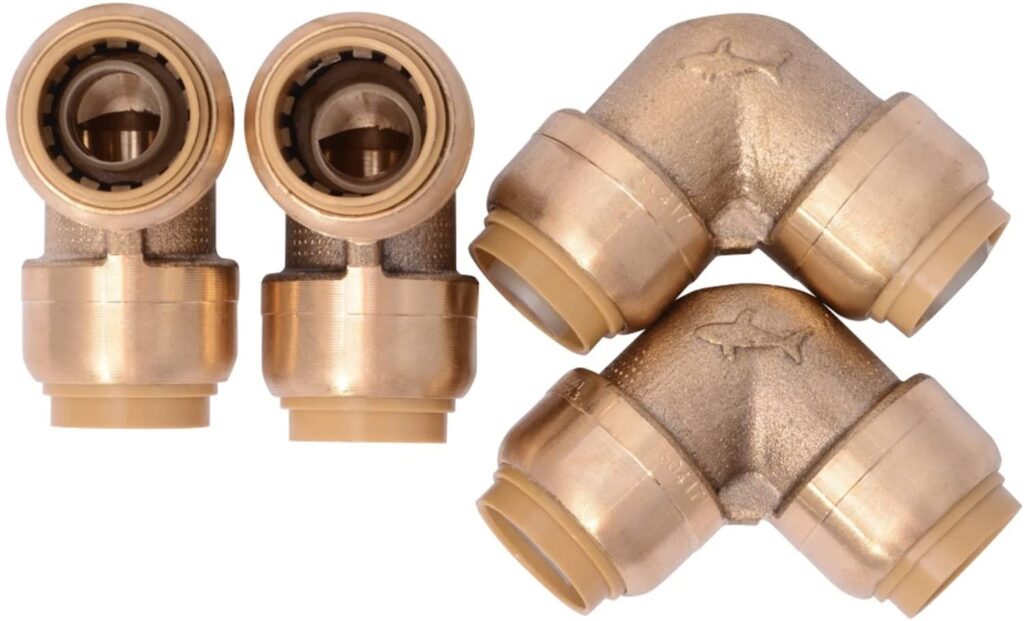
SharkBite Connections
These are the magical little connectors we have come to appreciate and trust when completing a skoolie plumbing project.
Simple to use and so reliable. We won’t go as far as to say that a Sharkbite connector will not leak, but we have yet to experience anything but reliable connections with them in all of our DIY projects.
One thing to note, however, when making the connection to a piece of Pex plumbing pipe, be sure you have secured it completely onto the pipe. You will feel it connect when you do it properly.
SharkBite Disconnector
There may be an instance where you cut your Pex plumbing pipe too short or too long and you have to make an adjustment.
Well, if you had already connected a SharkBite connector, it will not come off by pulling or tugging on it. You need a specific Sharkbite disconnector. Very inexpensive but worth its weight in gold.
It did not take us very long on our first skoolie project to realize a trip to Home Depot to pick up a Sharkbite disconnector was needed.
Plumbing Tape
This is another necessary tool that will keep your brass fitting connections leak-free and tight. Although there aren’t too many connections that are threaded in your skoolie plumbing map, there are going to be a few.
When you need some plumbing tape, you just need it and can’t do without it.
Plumbing Thread Sealant
Plumbing thread sealant is an alternative to using plumbing tape. Some like it better, some prefer old-school plumbing tape. We have found we prefer the plumbing putty over the tape. Easier to apply and for our experiences, just as reliable.
Pliers
A good pair of channel lock or wide-jaw pliers to hold fittings in place while screwing and tightening the other fittings to it. Simple pliers, but nothing compares when you have a simple job to do.
Hammer
You are going to want a hammer on hand when affixing those Pex clips to the wall or cabinets.
Skoolie Plumbing Wrap Up
Skoolie plumbing really isn’t as ominous as most think it is. It’s just like installing or building any other system in your skoolie. Planning, persistence and keep moving one step at a time.
We love having the ability to design our skoolie any way we want it. How complex or simple you design your skoolie plumbing map is up to your needs, wants, and budget.
Is there something here we didn’t address that you want answers to? Leave us a comment so we can update this post and do the research for you.
We look forward to connecting with you!