Skoolie Electrical
Skoolie Electrical
This is the one subject about building a Skoolie, renovating a bus or RV, or building a tiny home that gives most people apprehension, insecurity, and just overall the heebie jeebies.
It is conversely, one of the most exciting aspects of a build that we love to play around with. Customizing our bus with the type of lights we want to use, special electrical features, and original ideas.
Before you even start to think about getting your skoolie electrical ducks in a row, this is something you are going to want to do after you have decided on your skoolie floor plan and after you have completed your skoolie insulation.
Some people may argue that installing your skoolie electrical wiring before insulation is a good idea. We disagree. The reason you should install your wiring after insulation is if you decide to change some things, your wiring will be easy to access.
If you would like to read up on skoolie floor plans or skoolie insulation, check those blogs out by clicking on their links.
30amp, 50 amp, or 12v?
We decided to go with 30 amp service on our first skoolie project because most of our electrical use is 12v and we simply do not need the load to carry 50 amps.
On our second conversion, we used a 12-volt system powered by 620 watts of solar panels and 400 amp hours of Renogy AGM batteries.
For our current skoolie build, we are going to go with 1,500 watts of solar and 400 amp hours of lithium phosphate batteries.
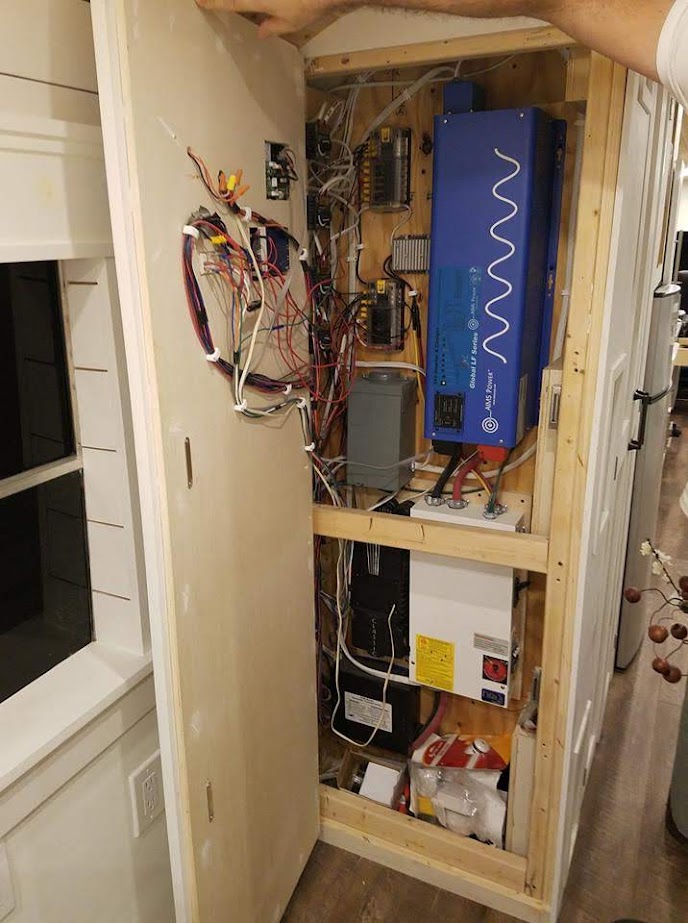
We will have a 12-volt system as we built in our Sprinter van conversion and add a 1000 watt inverter to run ourA television, Instapot, and computers.
If you need over 30 amps of power to operate your daily life, then you would need a 50 amp shore power hook up.
If 50 amp service is not available, then there would be some things or systems in your build that you would have to sacrifice the use of.
Without going too deep into detail, we will outline the different types of power to run the living quarters of your bus.
Volts, Amps & Watts Oh My!
We can recall when we would hear people talking about or trying to explain to us how to determine how much battery power we would need for our skoolie electrical, it was like listening to someone speak Russian.
There are many ways to explain some of the keep terminology and how the electrical terms all interact and work with one another.
We have found that the water analogy for explaining how volts, amps, watts, and resistance all work together is the best method.
The Water Analogy
The “Water Analogy” is a simple analogy to explain the basic electrical concepts of Volts, Amps, Watts, and Resistance.
When considering this analogy:
- Think of the wire as a simple garden hose.
- Think of the volts as the water pressure supplied to the hose.
- The amps are the rate at which the water runs through the hose.
- Watts represents the power of the stream of water.
- Resistance is when you crimp the hose to restrict the water flow
The power of the water’s stream (watts) is the direct result of the water pressure (volts) pushing water through the hose (wire) at a specific rate (amps) (think gallons of water per hour).
If there is no pressure (volts) then no water can be moved through the hose (wire) and no resulting work or result can be had.
Now, if the water is restricted from moving through the hose (wire) by being kinked (resistance) then no work can be done either despite the pressure (volts).
So, therefore, the work completed (watts) is a result of the pressure (volts) and the rate of flow (amps). Perhaps you recall from your high school physics class the formula for work done as Watts = Amps x Volts.
If you just remember this simple formula of Watts = Amps x Volts then it should be much clearer when deciding on how much battery bank or amp hours you need in your normal daily life of running electrical appliances and gadgets.
There are other factors to consider when calculating your voltage.
Resistance
Resistance is like having a kink or blockage in your water hose. If your wire is too small, then the volts at the end of the wire may be lower than needed to run the appliance.
Charged Batteries
Always keep your house batteries charged at over 12 volts. Once they drop below 125. To 12.0 volts, they become ineffective and may become damaged. Typically, they will max out at around 14.1 or 14.2 volts.
Poor Power Supply
If there is not enough power from your batteries to run the electric item, then you will not be able to deliver the full or required voltage needed to power the item.
This is like not having enough water pressure to take a good shower.
Too Heavy Load
Have you ever noticed when you are taking a shower and someone flushes the toilet, the water gets really hot or cold or simply drops in water pressure? The same thing happens with your electrical grid.
When you turn on an appliance your lights may flicker or dim for a quick second. What has occurred is that the voltage dropped.
AC/DC – For Those About To Rock Their Skoolie Electrical!
When considering your skoolie electrical, there are two important electrical terms to consider and understand. Alternating Current or AC and Direct Current or DC.
AC and DC refer to how your electricity travels through the wires in your skoolie electrical system.
Direct Current or DC
Direct current electricity is what most vehicles are already equipped with. The DC system when using the water analogy is like a water hose whose current flows freely through the hose or wire.
It is a very simple system.
The batteries in your skoolie provide you with DC power. Most, if not all of your electronic items in your skoolie can be run on DC power.
These house batteries will store the energy from your solar panels, battery isolator, or even a generator and hold that power until you turn on a light or appliance that runs or requires direct current.
If you have an item or appliance that needs AC or alternating current to operate, then you would need to get an inverter, to convert the electrical current from DC to AC.
Alternating Current or AC
In an alternating current or AC system, the electricity that flows through the wires is not as simple as the direct current. The AC flows back and forth through the wires very rapidly.
Another way to think of the electrical flow in an AC system is that the power “pulses” through the wires.
Most appliances, electronics, and lights in your home were designed to be run using alternating current. For one, it is a safer electrical current as well as a cleaner and more efficient electrical current.
If your skoolie pretty much stays in one spot or you plan on traveling and parking in RV resorts or campgrounds with electrical hookups, then an AC system would be sufficient for your skoolie electrical.
Wire Sizes
Depending on the types of electronics, distance between your power source and the device itself, you are going to be using various wire sizes, or more appropriately, wire gauges.
The wire gauge tells you how large or small the wire to be used is and this is defined by the AWG or American Wire system. As your gauge number decreases, the diameter or load ability of the wire increases.
So, a 12 gauge wire is larger or thicker than a 14 gauge wire and therefore can carry more amperage and wattage.
Tools Needed For Your Skoolie Electrical
Wire
You will need various gauges of wire depending on the distance of the item being powered to the energy source such as the bus bars or fuse block.
Wire Cutter
Having a good set of wire cutters and splicers will make this part of your skoolie electrical build so much easier. We recommend the Klein wire cutter and wire stripper.

Connectors
When wiring your skoolie, having a generous supply of wire connectors and butt ends is going to save you a lot of time and sanity!
You will get very good at splicing wires together and connecting them to terminals and other wires.
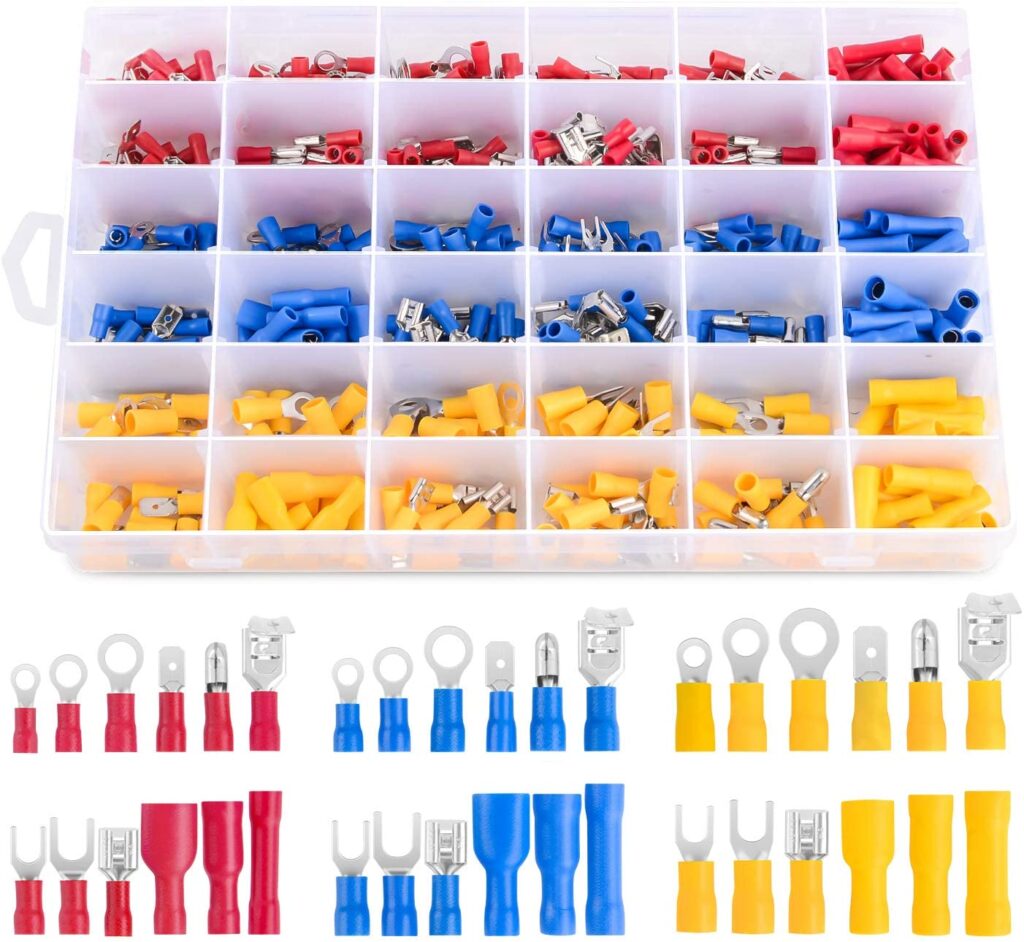
We recommend an assortment of sizes to accommodate the different gauges of wire you will be working with.
Terminal Lugs
Having a good assortment of lugs to attach wires to your batteries, bus bars and fuse blocks will save you a lot of time running back and forth to Lowes or Home Depot.
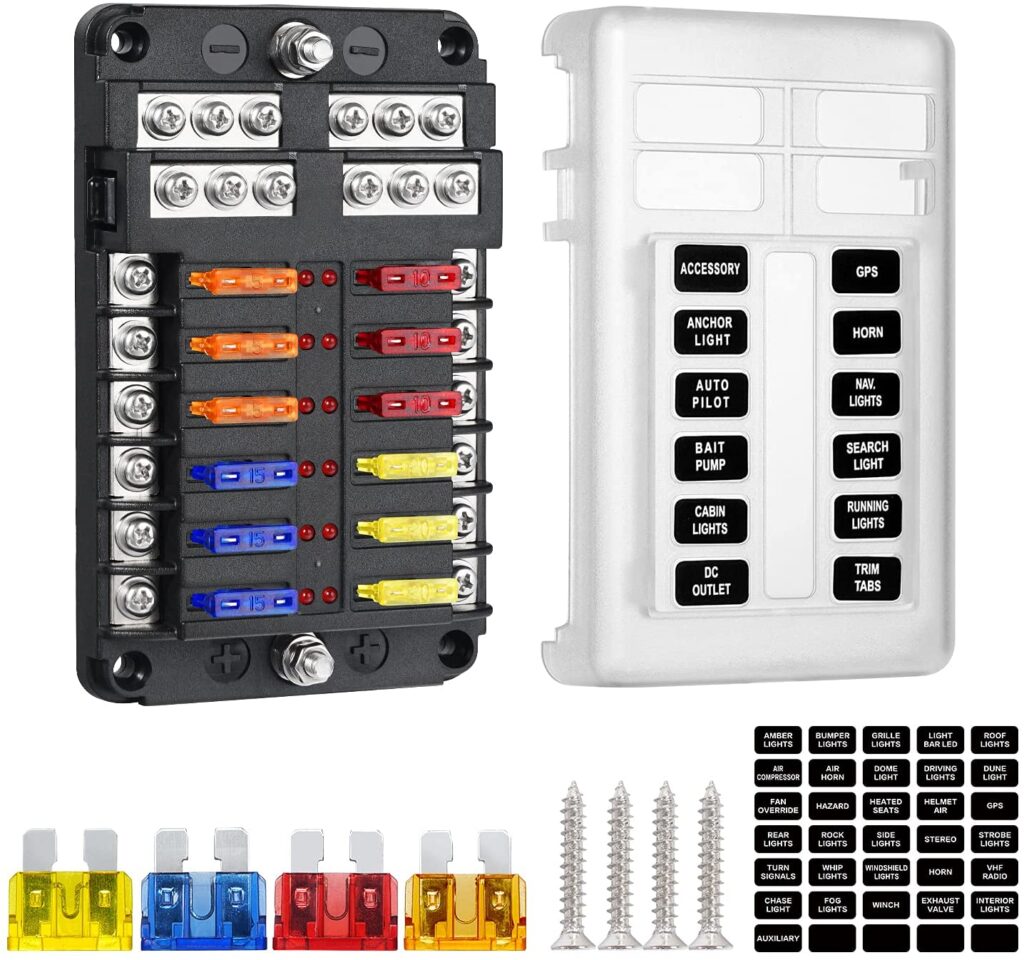
Fuses
If you plan on having any 12v wiring and electronics, it is a great idea to have a good pack or assortment of 12v fuses on hand and ready to go. Not that you should be popping fuses very often, if ever, but having the right size fuse on hand will keep you moving along when it comes to your electrical needs.
Fuse blocks
Having a reliable 12v fuse block makes connecting lights, alarms, speakers or anything else you may have that runs on 12 volts in your bus. These are the ones we have used and plan on using in our current skoolie electrical set up.
Crimping Tool
Having the right tools is all the difference from a simple and easy project and a frustrating project. A good wire connector crimping tool will make your wiring tasks seem like a piece of cake.
How Much Power Will I Need For My Skoolie Electrical?
This is the Golden Question when it comes to solar or generator ran skoolie electrical systems.
How do you know how many solar panels you will need? How many house batteries will be needed to keep them at their optimal performance at all times. Even when it is cloudy or rains for a few days in a row.
We have created a chart below showing typical household or skoolie electronics and appliances and their average or typical wattage use.
Your skoolie electrical grid may be different than others, but you are likely going to be running the same electronic devices inside of your bus.
What you will do is add up every electrical device you might have turned on at the same time to ensure that you have the adequate wattage available to you from your electrical system.
Be aware that circuit breakers and fuses are rated only up to 80% of their intended load capacity for ongoing load, so, you may want to consider adding a little more power to your system if you are getting close.
Otherwise, you will be tripping breakers and popping fuses on a regular basis. Not only is this inconvenient to you, but it also creates more stress on your electrical system and electronics than need be.
Electrical Usage Chart
| Electronic Device | Watts/hr |
| Small Flat screen television | 50 |
| Kids video game | 10 |
| Xbox One | 65 – 180 |
| Playstation 4 | 120 – 144 |
| Laptop computer | 100 |
| Desktop computer | 500 |
| Hairdryer | 1,500 |
| Toaster Oven | 1,500 |
| Induction Stove Top Burner | 1,500 – 3,000 |
| Small Microwave Oven | 1,200 |
| Incandescent light bulb | 40-120 |
| CFL (Compact Fluorescent Light) | 13 |
| Slow Cooker | 200 – 1,500 |
| Small space heater | 600 – 1,200 |
| Overhead LED Lights | 5 |
| Overhead Incandescent Lights | 20 |
| 15,000 BTU Air Conditioner | 2,000 watts running / 3,600 watts starting surge |
Skoolie Electrical – Lights
There is nothing much more empowering than having lights in your skoolie while driving down the road at night, parked out on some remote desert BLM land, or just parked at a Buccees or Flying J while taking a break from driving and getting a cold drink or snack from your skoolie refrigerator.
Having lights whenever you want or even more so, whenever you need them is a beautiful thing in a DIY Skoolie.
There are so many options when it comes to having electric lights installed as a part of your skoolie electrical grid.
We are going to look at a few options you may consider for your skoolie lights.
12 volt Marine Puck Lights
When choosing your house lights, consider marine 12v puck lights. They are very energy efficient and you can purchase them in a variety of hues to match your decor and preference.
We chose a color hue 3500, which is a more yellowish warm glow than the blue or white fluorescent hue. We also chose to add a dimmer to our lights so that we can tone the brightness now to a very faint glow.
LED Accent Lighting
LED color lights are a popular and very nice touch to your Skoolie or RV. They too run on 12 volts so you are not going to be pulling many watts while running them on your battery bank.
Fiber Optic Lighting
We added a very special lighting feature to our bus that has never been added to a Skoolie or RV. We incorporated 440 fiber optic light strands into our tongue and groove ceiling to simulate a night sky. It is run by two separate light engines and 12-volt power. We call it our Tiny Starry Ceiling.
If you are interested in having a Tiny Starry Ceiling in your skoolie or van, take a look at what they can do for you here.
Different Types of Skoolie Electrical Systems
It really doesn’t matter what type of skoolie electrical system you plan or have already installed on your skoolie. If you want some type of electrical system, you should base that electrical grid on your needs and wants for what you have planned while living in your tiny house on wheels.
Shore Power
When you go to an RV park, campground, or anywhere that offers shore power to your bus, there are three basic ways to connect to the grid.
- 15/20 amp service
- 30 amp service
- 50 amp service
• 20-amp outlet = 2,400 watts
• 30-amp outlet = 3,600 watts
• 50-amp outlet = 12,000 watts
If you use Ohm's law to determine how many watts you need:
amps x volts = watts
- 15/20 amp service = multiply 20 Amps times 120 Volts you get 2,400 watts.
- 30 amp service = multiply 30 amps x 120 volts = 3,600 watts.
- 50 amp service = multiply 50 amps x 120 volts = 12,000 watts
Wait a second! 50 amps x 120 volts should only equal 6,000 watts. Not so with a 50 amp service plug. The 50 amp service has two separate 50 amp conductors on a shore power outlet. Therefore, it is actually 100 amps x 120 volts = 12,000 watts.
In all fairness, a 50 amp service should actually be referred to as a 100 amp service.
The 15/20 amp connection is nothing more than a household extension cord. If you do use the 15/20 amp connection, then be mindful of the systems you are running on your bus to avoid tripping a circuit breaker.
* TIP *
An important tip when using the 15/20 amp household extension cord is the gauge of the extension cord. We do not recommend using anything less than a 12 gauge extension cord. This is a safety feature as most people will have more than one or two appliances or electronics connected at the same time.
Solar Power
One of the trending and popular additions to skoolies and RVs is the implementation of solar power to allow for off-grid boondocking, camping, and traveling.
While solar can be a great addition to your RV, there are so many variables to keep in mind when considering your solar options. We will not dive deeply into the technical aspects of solar, only that it is a viable option for your house battery's fuel.
Many people misunderstand that it is the solar panels that run the electrical for a bus or RV. It is actually the battery bank that powers the bus. The solar panels simply feed power to the batteries.
Your battery bank is the truest key to maintaining an off-grid lifestyle. Your solar panels are the primary source for sending power to your house batteries.
Other options for charging your house batteries are a generator or pulling power from your alternator while running the bus with a battery isolator.
Solar Power House Batteries
This is the area to really concentrate on if you are trying to live off-grid and disconnected from RV parks and shore power. A healthy battery bank to run the systems in your bus to maintain your life is freedom from the grid. There are several options to choose from when considering house batteries,
Lead Acid
The cheapest of the three is the lead-acid batteries. While they are the least expensive, they are also the least efficient. The money saved from paying for the lithium batteries upfront you will typically end up paying just as much on the back end.
Lead-acid batteries can not be drained past 50% of their capacity as they lose their ability to recharge 100% over time. They are very heavy and they will “off-gas”, so they must be well ventilated or kept underneath your bus for health/safety reasons.
You must also maintain the water levels in a lead-acid battery to maintain its optimum performance.
AGM
AGM or Gel batteries are more expensive than lead-acid, but they are also maintenance-free. Gel batteries can be stored in any position because they do not leak and typically last longer than lead-acid batteries.
We still recommend that the AGM as well as all other batteries be kept upright in the manner that the manufacturer recommends when storing or in use.
Even though AGM batteries are basically maintenance-free, you still should not allow your batteries to drain to or below 50% of their capacity. Like the lead-acid batteries, AGM batteries will lose their ability to recharge to 100% over time.
Lithium
Lithium is the most expensive for house batteries, but like the AGM gel batteries, they are virtually maintenance-free. Lithium Batteries typically last 3-4 times that of lead-acid batteries. A lithium battery can be drained down to zero before having to recharge.
They can be stored in any position and are much lighter than lead-acid and AGM batteries.
If you have the money to spend upfront, lithium batteries are the most effective battery bank to have.
Battery Isolator
A battery isolator is a great addition to your house battery setup. Just as solar panels will charge your batteries, the battery isolator also charges your house batteries.
However, unlike the solar panels, the battery isolator charges your house batteries from your bus alternator. The alternator in your bus or any vehicle is what keeps your vehicle’s battery charged.
The battery isolator simply runs from your alternator to your house battery set up and keeps your batteries charged up as you are driving down the road. It doesn’t matter if it is cloudy, raining or snowing, your house batteries will get charged up as long as you are running the bus.
Generators
If you plan on being on the road more than you are parked, it is a great idea to pick up a generator to power your systems when there is no shore power to hook up to. A generator can be your saving grace if you go through a stretch of cloudy skies and there is no solar to charge your house batteries,
Depending on the type of generator purchased, you only need to carry some spare gasoline, propane, or diesel fuel to make it go.
Keep in mind when choosing a generator, when you are parked and using it, there may be other campers, RVers, and Skoolie folk around you. Not everyone wants to hear your generator right next to their campsite.
That being said, if possible, choose a generator that has a low decibel output. There are several good 3000-3500 watt generators that run relatively quietly. Honda, Predator (Harbor Freight), and Champion are a few with a modestly low decibel output.
No Electrical
Perhaps you are the type who enjoys the term “off-grid” to the extreme. Perhaps your idea of living in a skoolie is by using candles, batteries for your devices, and lighting.
If that is you, then bypassing an electrical setup is the way to go. We have seen others build out their bus this way, and although it may not be our “cup of tea”, it is definitely doable and functional.
It’s all about how you want to live and experience your skoolie life!
Solar Generators for Skoolie Electrical
Solar generators are fairly new to the skoolie and nomadic or off-grid living scene. Although they have been around for a while, only until recently they began to gain momentum within the community.
The solar generator has commonly been used as a supplement or backup power system. Ideal for charging cameras, phones, laptops, and such items, they have not generally been used for primary skoolie electrical systems.
We have owned and used a solar generator. It was only intended to be used as a supplement or backup system.
We will take a brief look at the three most commonly used solar generators within the skoolie community.
Each of these solar generator manufacturers has several models available ranging from 250 watts to over 5000 watts of power.
We are going to be looking at the 1000 watts models for this blog post. We will do a deeper review of these solar generators in a later blog post.
Goal Zero Yeti 1000x
Price: $1,399.95
The Goal Zero Yeti 1000x has set the standard for solar generators. It utilizes a powerful lithium-ion battery for its core. This makes it a safe, clean, reliable, and portable power source for camping, skoolie life, and overall reliability for electricity.
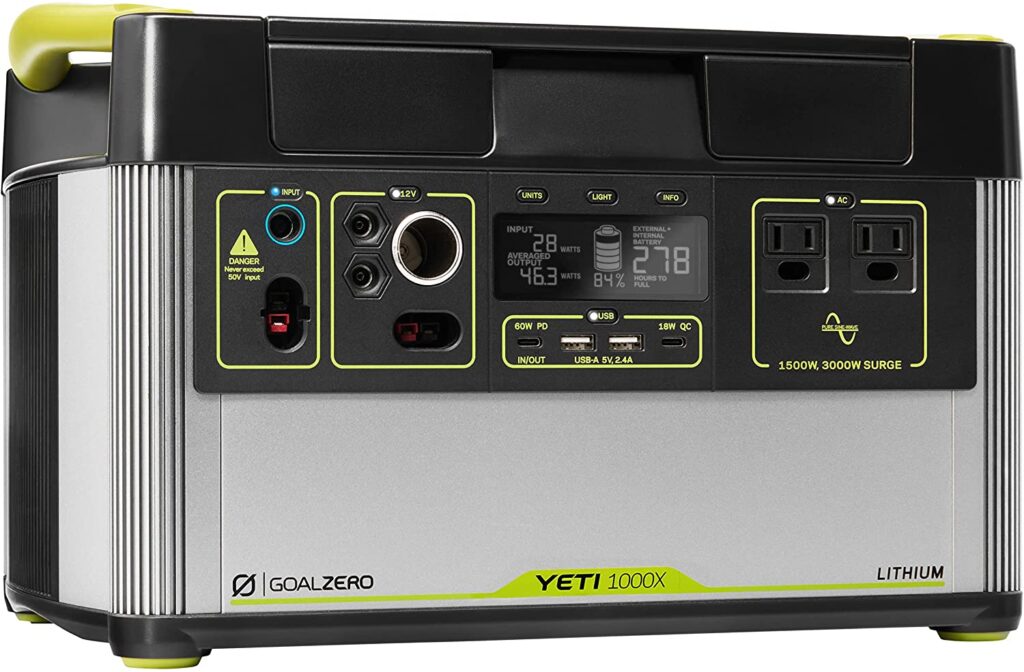
Versatile Port Options
The Goal Zero Yeti has a wide range of ports for various devices. It offers 7 different fast-charging 60w USB-C ports, multiple USB-A ports, regulated 12v, and two 120v AC ports.
The Goal Zero Yeti 1000x has a built-in inverter.
Multiple Charging Options
You can charge your Goal Zero Yeti with solar panels. A 120w power supply that connects to the 8mm charging port will charge the Goal Zero from 0% to 100% in 9 hours.
It also has an optional 600w high power port that will charge it from 0% to 100% in as little as 2 hours.
Unlimited Power
The Goal Zero Yeti 1000x has an optional portable solar panel option that allows you to charge it from the sun for unlimited power. As long as the sun is out, you can charge your Goal Zero Yeti.
It sports an integrated MPPT charge controller that will maximize the most efficient solar charge possible
Bluetti EB240 2,400wh/1,000w
Price $1,599
The Bluetti EB240 is a very well-built and useful solar generator. We purchased and used the Bluetti while traveling in our DIY Sprinter conversion for almost a year.
Although we had no issues with the performance of the Bluetti, we did have a horrible customer service experience during the initial shipping. No customer service support other than email.
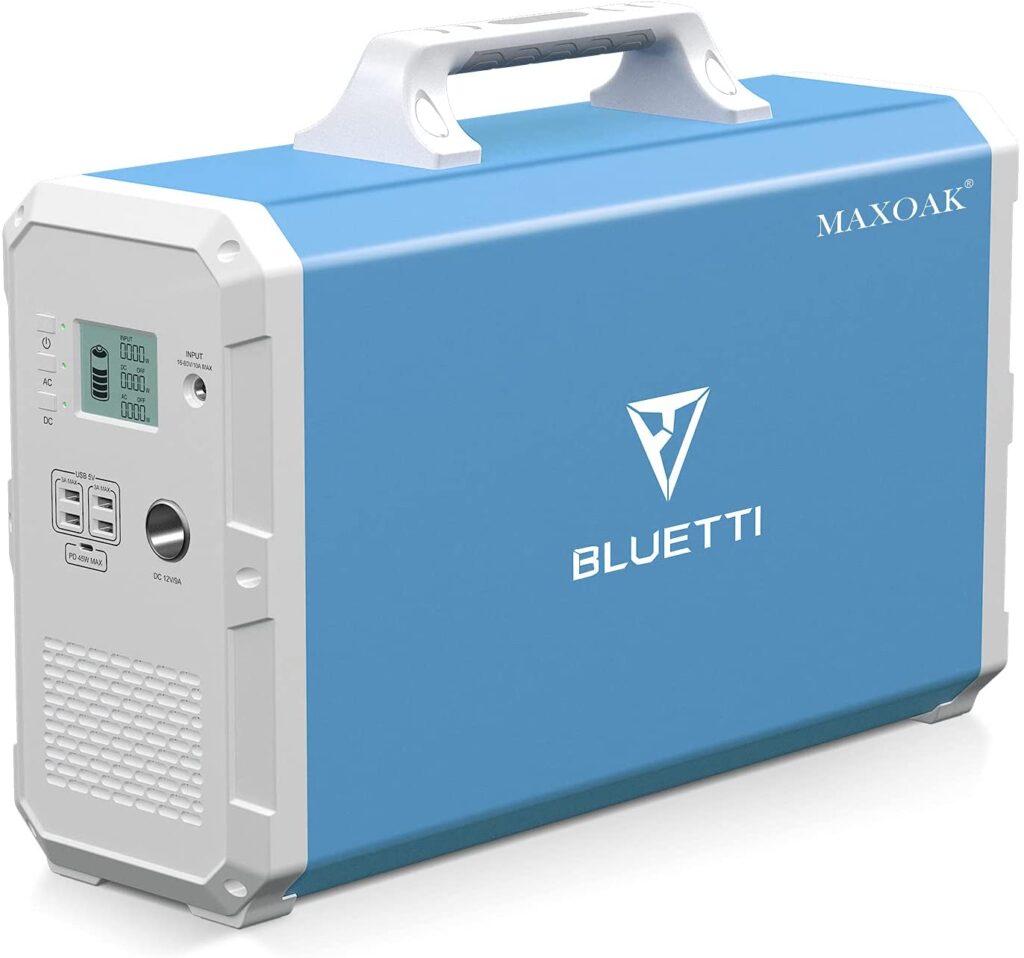
This is a China-based company with no dedicated dealers within the United States. For this reason alone, we would be apprehensive about purchasing another Bluetti product.
Versatile Port Options
The Bluetti EB240 is equipped with AC as well as a 45w USB-C port
Built-in inverter and MPPT charge controller.
Multiple Charging Options
Wall outlet – 12.5 hours
Solar – 9.5 hours
Generator – 12.5 hours
Unlimited Power
You can charge your Bluetti solar generator using any solar panel setup. Bluetti has its own branded portable solar panels at 100w per panel. You will need at least three panels in order to reach the required volts for the generator to take a solar charge.
Jackery Explorer 1000
Price: $999.00
We saved what we feel is the best for last. The Jackery Explorer 1000 is rated as the best solar generator on the market by Best Offers.
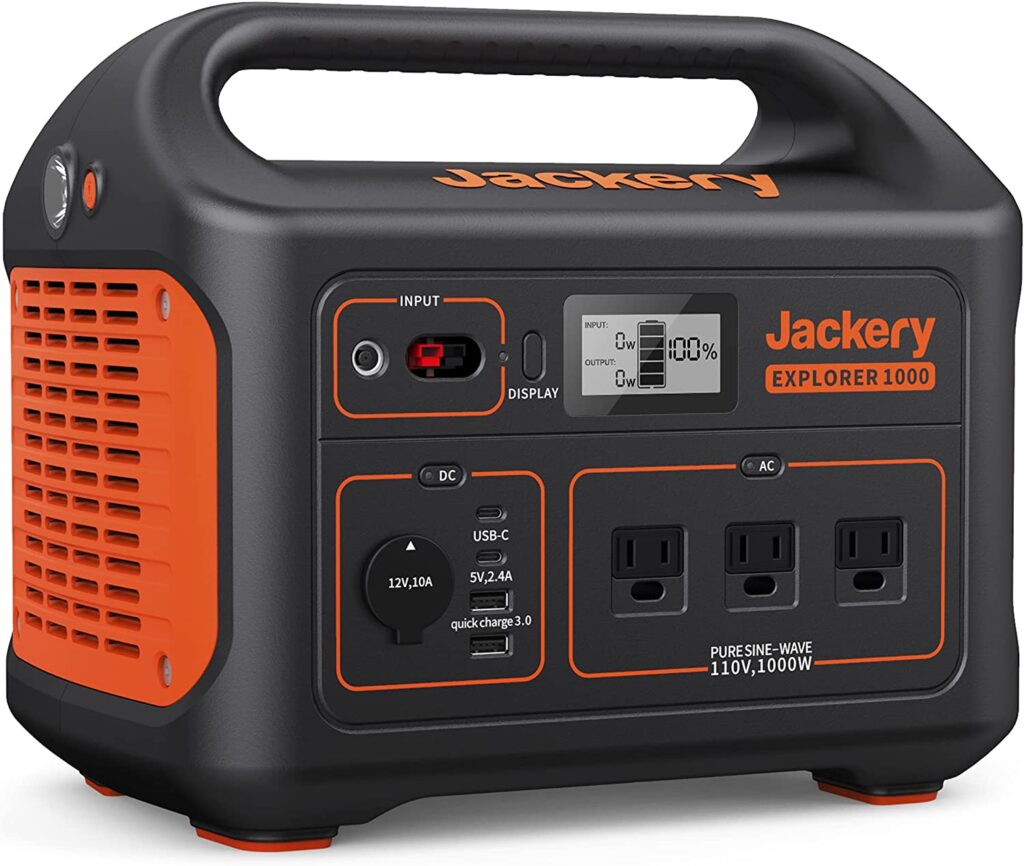
Versatile Port Options
The Jackery Explorer 1000 can support up to 8 devices simultaneously.
Multiple Charging Options
Wall outlet,
12v cigarette outlet
Solar panels
Unlimited Power
Being able to charge your Jackery Explorer 1000 with portable solar panels ensures you will always have the power.
Skoolie Electrical Wrap Up
How you choose to build your skoolie electrical setup is entirely up to you. Your needs and budget or any other factor you would like to throw at it is your choice.
Bottom line, your skoolie, your rules!
Don't be so intimidated that it keeps you from moving forward. Thinking about having someone else complete your skoolie electrical setup? We highly encourage you to learn as much as you can from the person doing the installation.
Understanding your skoolie’s electrical system can save you lots of headaches down the road. It will also save lots of money should something stop working the way it is supposed to.
We all chose to build, live and travel in a skoolie. If you know your skoolie systems, you will always be able to problem solve all on your own!
We would love to hear about your skoolie electrical system. Leave us a comment after this blog post so we can get in touch!
FTC affiliate disclosure:
We only recommend products we would use ourselves and all opinions expressed here are our own. This post may contain affiliate links. If you purchase a product, at no additional cost to you, we may earn a small commission.