
2023 Best Guide To Skoolie Solar Power
This blog post will focus on skoolie solar power.
In recent years, there has been a growing movement among adventure enthusiasts and minimalists to embrace a nomadic lifestyle that offers both freedom and simplicity. Skoolie solar power is a key ingredient to that movement.
Enter the skoolie— a converted school bus that serves as a versatile and cozy living space on wheels. What was once a conventional means of transportation for students has transformed into a symbol of adventure and independence.
Skoolies have captured the imaginations of people worldwide who seek an alternative way of living—one that breaks free from the constraints of traditional housing and embraces the open road.
These meticulously crafted homes on wheels allow individuals and families to design their own unique living spaces, tailored to their specific needs and desires.
From cozy bedrooms and functional kitchens to creative workspaces and efficient storage solutions, skoolies are a testament to the limitless possibilities of tiny living. By adding skoolie solar power into the formula, it takes things to a whole notha level!
The Power of the Sun: Benefits of Skoolie Solar Power
One of the most exciting aspects of skoolie living is the opportunity to harness the power of the sun through solar energy. By installing a skoolie solar power system, you can unlock a multitude of benefits that align perfectly with the principles of adventure, sustainability, and financial freedom.
- Energy Independence: When you rely on skoolie solar power, you free yourself from the grid, no longer bound by the availability of electrical hookups. Whether you're traversing remote landscapes or parking in urban areas, you can enjoy electricity wherever the sun shines. This newfound energy independence of skoolie solar power allows you to venture off-grid and explore places that traditional RVs or homes simply cannot reach.
- Environmental Friendliness: With the planet's well-being in mind, embracing skoolie solar power significantly reduces your carbon footprint. Solar panels harness the sun's abundant energy, a renewable resource that produces clean electricity without harmful emissions or pollution. By choosing sustainable energy, you contribute to the preservation of our environment for future generations.
- Cost Savings: Let's face it—traditional energy sources can take a toll on your wallet. By adopting skoolie solar power, you'll experience long-term financial benefits. Once your skoolie solar power system is installed, the sun's energy becomes your main source of electricity, significantly reducing or even eliminating monthly utility bills. Furthermore, maintenance costs are minimal compared to the expenses associated with conventional power sources.
Preview of Topics Covered in this Blog
In this comprehensive guide, we will walk you through the process of setting up a skoolie solar power system, empowering you to embark on a sustainable and independent journey. We will cover a range of essential topics, including:
- Understanding the basics of skoolie solar power and how it functions in skoolie setups.
- Assessing your energy needs to determine the ideal solar system for your skoolie.
- Choosing the right solar panels, charge controllers, batteries, and inverters for optimal performance.
- Step-by-step instructions for installing solar panels on your skoolie's roof.
- Setting up and managing your battery bank to store and efficiently utilize solar energy.
- Exploring charge controllers and inverters and their role in regulating and converting power.
- Designing and implementing a safe and efficient wiring and electrical system.
- Monitoring and optimizing your skoolie solar power system to maximize efficiency and troubleshoot common issues.
- Essential maintenance tasks and troubleshooting tips to ensure the longevity of your skoolie solar power setup.
With each topic, we'll provide detailed insights and practical advice to help you navigate the world of skoolie solar power. So, let's dive in and unlock the boundless potential of sustainable energy for your skoolie adventures!
Understanding Solar Power Basics:
Before we dive into the exciting world of setting up a skoolie solar power system for your tiny house on wheels, let's take a moment to understand the foundational principles behind solar energy.
By grasping the basics, you'll gain a deeper appreciation for the magic happening on your roof as sunlight transforms into electricity.
Picture this: a clear blue sky stretching overhead, sunlight pouring down on your skoolie's solar panels.
These photovoltaic (PV) panels are the heart of your skoolie solar power system. Composed of multiple interconnected solar cells, they absorb photons from the sun's rays.
As these photons strike the surface of the solar cells, they generate an electric field, initiating a flow of electrons—an essential component of electricity.
But how does this electricity get harnessed and utilized within your skoolie? That's where charge controllers step in.
Charge controllers play a crucial role in regulating the flow of power from the solar panels to your batteries. They ensure that the batteries receive an optimal charge while protecting them from overcharging or discharging, thereby extending their lifespan.

Speaking of batteries, they act as your skoolie's energy reservoir. As the sun's energy is converted into electricity, the surplus power is stored in these batteries for later use.
This enables you to have a steady supply of electricity, even when the sun is not shining. Choosing the right type of battery—whether it's traditional lead-acid or the increasingly popular lithium-ion—depends on factors such as capacity, weight, and cost.
Now, imagine you want to power your skoolie's appliances, electronics, and lighting, which typically run on alternating current (AC) power. That's where inverters come into play.
Inverters convert the direct current (DC) power stored in your batteries into usable AC power, ensuring compatibility with your household devices. With the help of inverters, you can enjoy the same conveniences and comforts on the road as you would in a traditional home.
The beauty of skoolie solar power lies in its ability to transform the sun's abundant energy into usable electricity, all while reducing your environmental impact. By embracing solar energy in your skoolie, you become an active participant in the transition towards sustainable and renewable energy sources.
You're not only reducing reliance on fossil fuels but also gaining the freedom to roam and explore without being tethered to traditional power sources.
So, as you embark on this journey to power your skoolie with solar energy, remember the incredible process happening atop your roof—where sunlight becomes electricity, charge controllers regulate the flow, batteries store the energy, and inverters convert it into AC power.
It's like having your own personal power station on wheels, enabling you to experience a greener and more independent way of life.
Now that we've uncovered the magic behind solar energy, let's delve into the practical aspects of setting up a skoolie solar power system for your skoolie.
Assessing Your Energy Needs:
Now that you're ready to embark on your solar-powered skoolie journey, it's crucial to assess your energy needs before diving into the installation process. Understanding how much electricity you'll require on a daily basis allows you to determine the size and capacity of your skoolie solar power system, ensuring it meets your unique lifestyle and power requirements.
Make a List of Appliances and Electronics:
- Start by creating a comprehensive list of all the appliances, electronics, and devices you plan to power in your skoolie. Consider the essentials such as lighting, ventilation fans, and water pumps, as well as larger appliances like refrigerators, stoves, microwaves, and air conditioning units. Don't forget about charging your mobile devices, laptops, and any other personal electronics you rely on. This list will serve as a foundation for calculating your energy needs.
Electrical Usage Chart
| Electronic Device | Watts/hr |
| Small Flat screen television | 50 |
| Kids video game | 10 |
| Xbox One | 65 – 180 |
| Playstation 4 | 120 – 144 |
| Laptop computer | 100 |
| Desktop computer | 500 |
| Hairdryer | 1,500 |
| Toaster Oven | 1,500 |
| Induction Stove Top Burner | 1,500 – 3,000 |
| Small Microwave Oven | 1,200 |
| Incandescent light bulb | 40-120 |
| CFL (Compact Fluorescent Light) | 13 |
| Slow Cooker | 200 – 1,500 |
| Small space heater | 600 – 1,200 |
| Overhead LED Lights | 5 |
| Overhead Incandescent Lights | 20 |
| 15,000 BTU Air Conditioner | 2,000 watts running / 3,600 watts starting surge |
Determine Power Consumption:
- Next, research and find the power consumption specifications for each item on your list. Most appliances and devices have their power requirements listed in watts (W) or kilowatts (kW). These specifications can usually be found on product labels, user manuals, or manufacturer websites. Make a note of the power consumption in watts for each item.
Estimate Daily Usage:
- Consider how frequently you'll be using each appliance or device throughout a typical day. Some devices may be used continuously, while others may only be used intermittently. Estimate the number of hours you expect to use each item daily. Multiply the power consumption in watts by the estimated usage hours to calculate the daily energy consumption for each appliance or device.
Add Up Total Daily Energy Consumption:
- Sum up the daily energy consumption of all the appliances and devices on your list. This will give you an estimate of your total daily energy requirements in watt-hours (Wh) or kilowatt-hours (kWh).
Account for Efficiency and Margin:
- Keep in mind that not all the energy consumed by your appliances is efficiently converted into usable power. There are losses in the conversion process, and it's essential to account for these inefficiencies. As a general rule of thumb, adding a margin of 10-20% to your total daily energy consumption will help accommodate these losses and provide some extra capacity for unexpected power needs.
Consider Seasonal Variation:
- Consider the seasonal variations in energy consumption. You may use more power for heating or cooling during extreme weather conditions. If you plan to travel to regions with significant temperature variations, it's advisable to consider these factors when estimating your energy needs.
By following these steps and taking the time to assess your energy needs, you'll have a clear understanding of the total daily energy consumption required to power your skoolie. This information is invaluable in determining the appropriate size and capacity of your skoolie solar power system, ensuring it can meet your energy demands and provide a reliable source of electricity for your adventures on the road.
Remember, it's always better to overestimate your energy needs slightly to avoid any potential power shortages.
Having a solar power system that comfortably meets your requirements ensures you can enjoy the comforts of home while maintaining the freedom to explore off-grid locations with confidence.
Choosing the Right Skoolie Solar Power System:
When it comes to selecting the perfect solar power system for your skoolie, there are several crucial factors to consider. From solar panels to charge controllers, batteries, and inverters, each component plays a vital role in ensuring a reliable and efficient power supply for your adventures on the road.
Solar Panels:
- The heart of your solar system lies in the solar panels themselves. Consider the wattage, size, and efficiency of the panels. The wattage determines the amount of power the panels can generate, so choose panels with a wattage that matches or exceeds your daily energy requirements. Size is important too, as you'll need to ensure the panels fit snugly on your skoolie's roof. Efficiency refers to the panels' ability to convert sunlight into electricity, so look for high-efficiency panels to maximize power production.
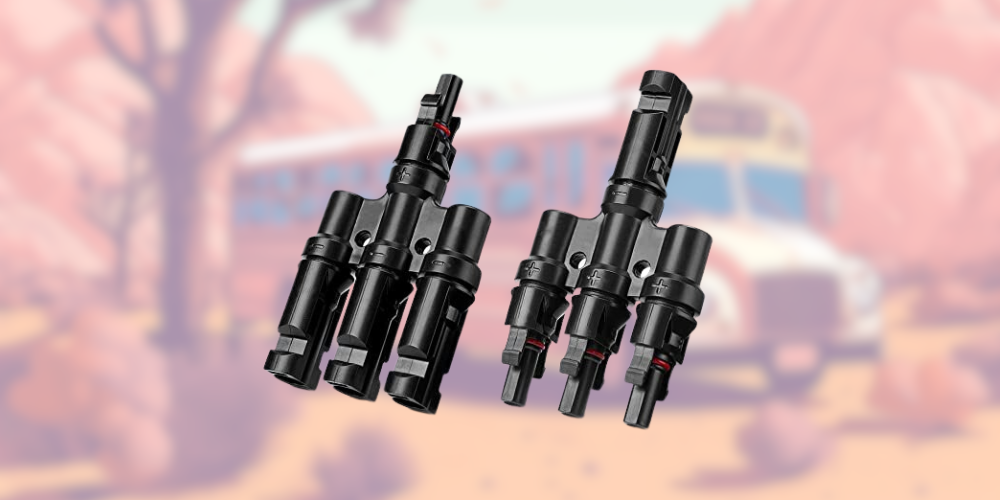
When connecting several solar panels and connecting in parallel, it is good to use a solar Y Branch connector like the one below. The one below is for three solar panels. If you we installing four solar panels in parallel, then it would have a four to one connection.
Charge Controllers:
- Charge controllers are essential devices that regulate the flow of power from the solar panels to your batteries. When choosing a charge controller, consider the panel voltage and battery type. The charge controller's specifications should match the voltage of your solar panels, and it should be compatible with your battery type—whether it's a traditional lead-acid battery or a lithium-ion battery. Some charge controllers also offer additional features like advanced monitoring, battery temperature compensation, and MPPT (Maximum Power Point Tracking) technology, which enhances the efficiency of your solar system.
Batteries:
- Selecting the right type of battery is crucial for storing and utilizing the solar energy generated by your panels. There are two main types to consider: lead-acid batteries and lithium-ion batteries. Lead-acid batteries are more affordable but have a shorter lifespan and lower depth of discharge compared to lithium-ion batteries. On the other hand, lithium-ion batteries are lighter, have a longer lifespan, and can be discharged more deeply, but they come at a higher cost. Assess your energy requirements, budget, and desired lifespan to determine which battery type is the best fit for your skoolie.
Inverter:
- An inverter is an essential component that converts the direct current (DC) power stored in your batteries into alternating current (AC) power, which is compatible with most household appliances. Consider the inverter's capacity to handle the peak power demands of your appliances. It should have sufficient wattage to power all your devices simultaneously. Additionally, look for features like surge capability, which allows the inverter to handle brief power surges, and pure sine wave output, which provides cleaner and more stable power for sensitive electronics.
By carefully considering these factors and ensuring compatibility between components, you can create a solar system that maximizes energy production, storage, and usage for your skoolie.
Remember to prioritize quality, efficiency, and reliability when selecting each component, as they will determine the overall performance and longevity of your solar power setup.
Let's explore the world of solar technology and build a system that will power your adventures on the road!
Installing Solar Panels on Your Skoolie:
Now comes the exciting part of your skoolie solar power journey—installing those sleek and powerful solar panels on the roof of your skoolie. With careful planning and attention to detail, you can set up a secure and efficient solar panel system that maximizes sunlight exposure and ensures a reliable source of renewable energy for your adventures on the road.
Determine the Optimal Placement:
- Before installing your solar panels, carefully assess your skoolie's roof to identify the best location for maximum sunlight exposure. Consider any obstacles like roof vents, air conditioning units, or skylights that may affect panel placement. Aim for an area that receives direct sunlight for the majority of the day. Keep in mind that tilting your panels to match the angle of the sun's position throughout the day can further optimize energy production.
Choose the Mounting Option:
- There are various mounting options available to secure your solar panels to the roof of your skoolie. Fixed mounts provide a sturdy and permanent installation, while tilt kits allow you to adjust the angle of the panels for optimal sunlight capture. Consider your needs and preferences when selecting the mounting option that best suits your skoolie's roof design and your desired flexibility.
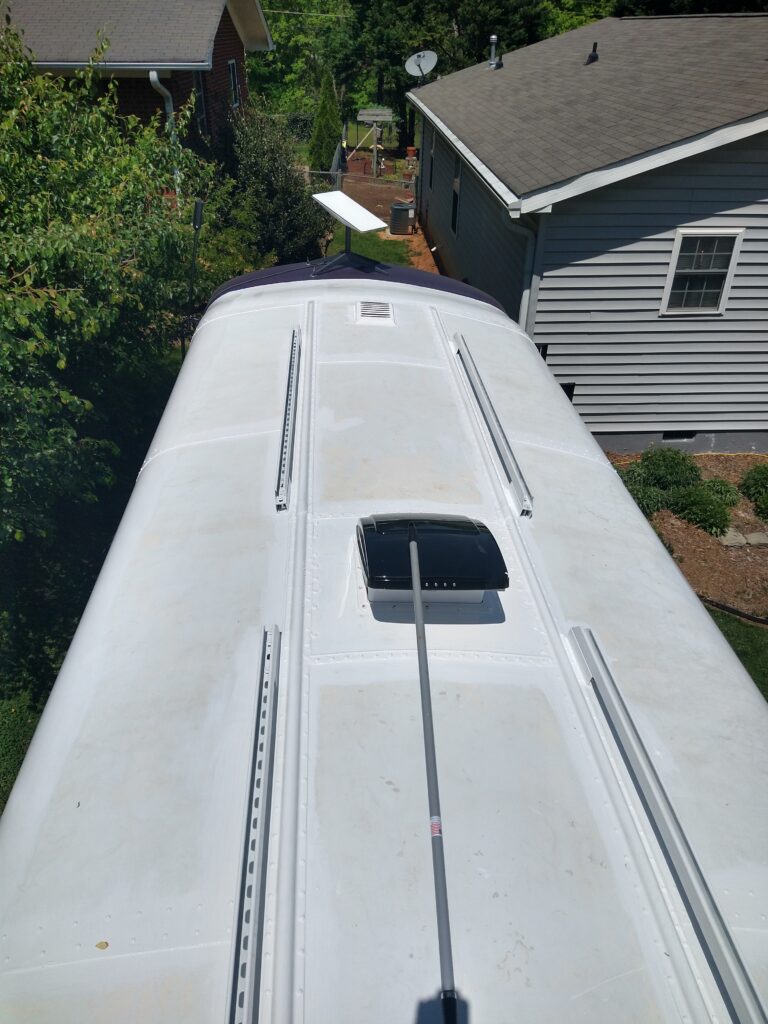
There are many different companies that will offer their solar panel mounting options for thousands of dollars.
We utilized super strut and strut for our solar panels and it has worked out beautifully. At a fraction of the cost of the fancy solar racks, (less than $200 for the rails and mounting hardware), it will allow you to invest your money in other aspects of your skoolie project.
Ensure a Secure Installation:
- Properly securing your solar panels is crucial to ensure they withstand the vibrations and movements encountered during your travels. Follow the manufacturer's instructions and use the recommended mounting hardware to secure the panels firmly to your skoolie's roof. Be mindful of weight distribution and evenly distribute the panels to avoid placing excessive stress on any specific area of the roof.
Wiring and Sealing:
- Once the solar panels are securely mounted, it's time to connect them to your skoolie's electrical system. Plan the routing of the wiring carefully, ensuring that the cables are protected and properly secured to prevent damage while driving. It's essential to follow electrical safety guidelines and use appropriate wiring and connectors for a secure and reliable connection.
Additionally, pay close attention to weather sealing. Properly seal around the mounting brackets and entry points of the wiring to protect against moisture intrusion. This will help safeguard your panels and ensure their longevity, even in challenging weather conditions.
Safety Considerations:
- During the installation process, prioritize safety to protect yourself and your skoolie. Use appropriate safety equipment, such as gloves and safety goggles, when handling the panels and working on the roof. Take precautions to avoid falls or accidents by using ladders or scaffolding that are stable and secure. If you're unsure about any aspect of the installation, consult with a professional or seek guidance from experienced DIYers or skoolie conversion communities.
Test and Verify:
- After the installation is complete, it's crucial to test and verify the functionality of your solar panels. Ensure that the wiring is properly connected, the charge controller registers incoming power, and the batteries are charging. Monitor the energy production and verify that it aligns with your expected output.
Once you've successfully installed your solar panels on your skoolie's roof, take a moment to appreciate the sight of those sun-soaking panels.
They represent your commitment to sustainable living and provide the fuel for your off-grid adventures. With each ray of sunlight that hits those panels, you're one step closer to achieving energy independence and experiencing the freedom of the open road.
In the upcoming sections, we'll delve into other essential components of your solar power system, such as charge controllers, batteries, and inverters. So let's continue on this exciting journey to unlock the full potential of solar power for your skoolie!
Battery Bank Setup and Management:
Your battery bank is the heart of your skoolie's solar system, storing the energy generated by your solar panels for later use.
Properly sizing and managing your battery bank is crucial to ensure you have enough stored energy to power your adventures on the road.
Let's dive into the world of battery setup, wiring configurations, and maintenance techniques to optimize their performance and longevity.
Sizing Your Battery Bank:
- The size of your battery bank depends on your energy needs and desired level of autonomy. Calculate your daily energy consumption in watt-hours (Wh) or kilowatt-hours (kWh) and consider the number of days you want your batteries to sustain you without receiving solar input. This will help determine the capacity (in ampere-hours, Ah) required for your battery bank. It's important to note that it's recommended to discharge lead-acid batteries to a maximum of 50% of their capacity for longer battery life, while lithium-ion batteries can be discharged more deeply, typically up to 80%.
Parallel vs. Series Wiring:
- Once you have determined the battery bank capacity, you can configure the batteries in parallel or series to achieve the desired voltage and capacity. Wiring batteries in parallel increases the overall capacity while maintaining the voltage. This means you can store more energy, but the voltage remains the same.
Wiring batteries in series, on the other hand, increases the voltage while maintaining the capacity. This can be useful if you need a higher voltage for certain appliances or if your inverter requires a specific voltage input.
Battery Maintenance:
- To ensure the longevity and optimal performance of your battery bank, proper maintenance is essential. Regularly inspect the batteries for any signs of corrosion or damage and clean the terminals as needed. Monitor the water levels in lead-acid batteries and top them up with distilled water if necessary. Keep the batteries in a cool and well-ventilated area, avoiding extreme temperatures. Follow the manufacturer's guidelines for maintenance and make sure to use the appropriate charging parameters to avoid overcharging or undercharging.
Battery Monitoring:
- Monitoring the state of charge (SOC) of your batteries is crucial to ensure you have a clear understanding of their available capacity. There are various methods for monitoring battery SOC, ranging from simple voltage measurements to more advanced battery monitoring systems that provide detailed information about the battery's state. Regularly check the voltage of your batteries using a multimeter or invest in a battery monitor that can provide real-time data on voltage, current, capacity, and more.
Safety Considerations:
- When working with batteries, it's important to prioritize safety. Always follow the manufacturer's guidelines and safety recommendations. Wear appropriate safety equipment, such as gloves and goggles, when handling batteries or working with electrical connections. Take precautions to avoid short circuits and ensure proper grounding. If you're unsure about any aspect of battery setup or maintenance, seek guidance from professionals or experienced individuals who can provide expert advice.
By correctly sizing your battery bank, configuring the batteries in parallel or series, and implementing proper maintenance and monitoring techniques, you can ensure a reliable and long-lasting power supply for your skoolie.
Your battery bank will serve as the backbone of your off-grid adventures, providing the energy you need to enjoy the comforts of home while exploring remote locations.
In the next section, we'll explore another couple of critical components of your solar power system: the charge controller and the inverter.
So let's continue on this empowering journey to harness the full potential of solar energy for your skoolie!
Charge Controllers and Inverters:
Charge controllers and inverters are essential components of your skoolie's solar power system. Together, they ensure efficient energy transfer, protect your batteries from damage, and provide usable power for your household appliances.
Let's delve into the functions and differences between charge controllers and inverters, helping you make informed choices for your skoolie setup.
Charge Controllers:
- Charge controllers play a crucial role in regulating the flow of electricity from your solar panels to your battery bank. They ensure that your batteries are charged efficiently and protected from overcharging or discharging, prolonging their lifespan. There are two main types of charge controllers to consider: PWM (Pulse Width Modulation) and MPPT (Maximum Power Point Tracking).
- PWM Charge Controllers: PWM controllers are the more traditional and cost-effective option. They regulate the charging process by rapidly switching the solar panels' current on and off, effectively maintaining a constant voltage output to the batteries. While PWM controllers are generally suited for smaller solar systems, they may experience slight power loss compared to MPPT controllers.
- MPPT Charge Controllers: MPPT controllers are more advanced and efficient, making them suitable for larger solar systems or situations where maximizing power output is crucial. They utilize advanced electronics to track the maximum power point of the solar panels, allowing them to extract the maximum amount of energy under varying conditions. MPPT controllers can convert higher panel voltages to lower battery voltages, resulting in increased charging efficiency and potential power gains.
Consider your skoolie's energy requirements, panel voltage, and budget when choosing between PWM and MPPT charge controllers.
If you have limited roof space or plan to expand your solar system in the future, investing in an MPPT controller may offer better long-term efficiency and performance.
Inverters:
- Inverters play a vital role in converting the direct current (DC) power stored in your batteries into alternating current (AC) power, which is compatible with most household appliances. They enable you to power laptops, kitchen appliances, lighting, and other devices you rely on during your skoolie adventures. There are two main types of inverters to consider: modified sine wave inverters and pure sine wave inverters.
- Modified Sine Wave Inverters: Modified sine wave inverters are more affordable and can handle most basic appliances. However, their output waveform is a close approximation of a sine wave, which may cause compatibility issues with some sensitive electronics. While they are suitable for simple loads like lights, fans, and basic power tools, it's important to check the compatibility of specific devices before using them with a modified sine wave inverter.
- Pure Sine Wave Inverters: Pure sine wave inverters produce a clean and smooth waveform that mimics utility grid power. They offer a higher quality and stable AC power output, making them compatible with a wider range of appliances, including sensitive electronics like laptops, televisions, and refrigerators. If you plan to power devices with motors, variable speed controls, or audiovisual equipment, investing in a pure sine wave inverter is recommended.
Consider the wattage capacity, surge capability, and the number of AC outlets when selecting an inverter for your skoolie. Ensure that the inverter can handle the peak power demands of your appliances while providing a reliable and stable power supply.
By choosing the right charge controller and inverter for your skoolie's solar power system, you can optimize energy efficiency, protect your batteries, and power your favorite appliances on the road.
In the next section, we'll explore additional considerations and tips to enhance the performance and durability of your skoolie's solar setup. So let's continue our journey toward solar-powered adventures!
Wiring and Electrical System:
Designing and installing the electrical system in your skoolie may seem like a daunting task, but with the right guidance and understanding of the basics, you can create a safe and efficient electrical setup for your skoolie adventures.
Let's the wiring and electrical systems, including electrical diagrams, safety considerations, grounding, and circuit protection.
You can learn a little bit more about our skoolie electric system in this post we wrote.
Electrical Diagrams:
- Electrical diagrams are essential tools for planning and visualizing the layout of your skoolie's electrical system. They provide a clear representation of how components are connected and help you understand the flow of electricity within your system. Familiarize yourself with common electrical symbols and learn to read and interpret diagrams. This will help you accurately wire your skoolie and troubleshoot any potential issues in the future.
Safety Considerations:
- Electrical safety should be a top priority when designing and installing your skoolie's electrical system. Here are a few key safety considerations to keep in mind:
- Grounding: Proper grounding is crucial to protect against electrical shocks and ensure the safety of your system. Follow electrical codes and guidelines to establish a solid grounding system, connecting all necessary components to a grounding rod or other appropriate grounding points.
- Circuit Protection: Install circuit breakers or fuses at strategic points in your electrical system to protect against overloads and short circuits. Choose the right amperage rating for each circuit to match the capacity of the wiring and components.
- Wiring Size and Type: Select the appropriate wire gauge and type for each circuit based on the current load and length of the wire run. Thicker wires are required for higher current loads to prevent voltage drop and overheating. Use stranded wire for flexibility and ensure that all connections are securely crimped or soldered.
- Junction Boxes: Use junction boxes to house electrical connections and protect them from accidental damage. Securely mount the junction boxes and ensure that all connections are properly insulated and organized within the box.
Planning the Wiring Layout:
- Careful planning is essential for a clean and organized wiring layout. Consider the locations of your appliances, outlets, switches, and other electrical components, and plan the routing of wires accordingly. Keep wires away from potential sources of heat, moving parts, or sharp edges that could cause damage. Use cable ties or wire looms to secure and bundle wires, promoting a tidy and well-organized wiring system.
Power Distribution:
- Determine the best way to distribute power within your skoolie. This involves deciding on the location of your main electrical panel or distribution center and considering subpanels or smaller distribution boxes for specific areas or circuits. Plan the distribution of power outlets, lighting circuits, and other electrical loads to ensure a balanced and efficient system.
Testing and Inspection:
- After completing the wiring and electrical installation, it's crucial to perform thorough testing and inspection to verify the functionality and safety of your system. Use a multimeter to check voltages, test outlets, and ensure proper wiring connections. Inspect all electrical components, connections, and circuit breakers for any signs of damage or loose connections.
If you're unsure about any aspect of designing or installing your skoolie's electrical system, consult with a professional electrician or seek guidance from experienced DIYers or skoolie conversion communities.
Prioritizing safety and following electrical codes and guidelines will help you create a reliable and safe electrical system for your skoolie adventures.
In the next section, we'll explore additional tips and considerations to optimize your skoolie's solar setup and make the most of your off-grid lifestyle.
So let's continue our journey toward a self-sufficient and sustainable adventure on the road!
Monitoring and Optimizing Your Solar System:
To ensure the optimal performance and efficiency of your skoolie's solar power setup, it's important to monitor and optimize the system. By monitoring energy usage, system performance, and making strategic adjustments, you can maximize the benefits of your solar system. Let's explore the key aspects of monitoring and optimizing your solar setup.
Monitoring Energy Usage:
- Monitoring your energy usage helps you understand how much power your skoolie consumes on a daily basis. This knowledge allows you to make informed decisions regarding energy conservation and load management. You can monitor energy usage by using energy meters or smart energy monitoring systems that provide real-time data on your power consumption. By identifying high-energy-consuming appliances and finding ways to minimize their usage or replace them with energy-efficient alternatives, you can reduce your overall energy demand and maximize the effectiveness of your solar system.
Monitoring System Performance:
- Keeping an eye on your solar system's performance is crucial to ensure it's operating at its full potential. Solar monitoring tools and technologies allow you to track the power output of your solar panels, monitor battery levels, and identify any potential issues or inefficiencies. Many charge controllers and inverters have built-in monitoring capabilities, providing you with valuable data on energy production, battery charge status, and system health. Additionally, there are external monitoring systems available that offer more detailed insights and remote monitoring capabilities.
Tilt and Alignment Optimization:
- Maximizing the sun exposure of your solar panels is essential for optimal energy production. Depending on your location and the time of year, adjusting the tilt and alignment of your panels can significantly impact their performance. Tilting your panels towards the sun at the correct angle allows them to capture more sunlight and generate more electricity. There are adjustable mounting systems and tilt kits available that enable you to easily adjust the angle of your panels. Additionally, regular cleaning of your panels to remove dirt, debris, or snow can further enhance their efficiency.
Minimizing Power Loss:
- To maximize the efficiency of your solar system, it's important to minimize power loss throughout the system. Here are a few tips to consider:
- Use appropriately sized wires: Using wires with the correct gauge and minimizing wire lengths reduces voltage drop and power loss.
- Optimize battery charging: Ensure that your charge controller is properly configured to efficiently charge your batteries without overcharging or undercharging them.
- Efficient energy storage: Consider the type of batteries you're using and their charge/discharge efficiency. Lithium-ion batteries, for example, tend to have higher charge efficiency compared to lead-acid batteries.
- Minimize shading: Ensure that your solar panels are not shaded by objects like branches, buildings, or other obstructions. Even partial shading can significantly reduce the energy output of your panels.
Regular Maintenance:
- Performing regular maintenance on your solar system is crucial for optimal performance and longevity. Inspect and clean your solar panels, check all connections for tightness and signs of corrosion, and ensure that all components are functioning as intended. Regularly monitor the water levels in lead-acid batteries and follow the manufacturer's recommendations for maintenance and upkeep.
By actively monitoring and optimizing your solar system, you can maximize energy production, prolong the life of your system components, and ensure a reliable power supply for your skoolie adventures.
The combination of efficient energy usage, proper monitoring, and strategic adjustments will allow you to fully embrace the benefits of your solar power setup.
In the final section, we'll wrap up our skoolie solar journey by summarizing the key points covered and inspiring you to embark on your own sustainable and off-grid adventures. So let's conclude this empowering blog post and get ready to hit the road with renewable energy!
Maintenance and Troubleshooting:
To keep your skoolie's solar system operating smoothly and efficiently, regular maintenance is essential. By performing routine tasks and being prepared to troubleshoot any issues that arise, you can ensure your solar power setup continues to shine brightly.
Let's delve into the maintenance tasks and troubleshooting tips to keep your system running like a solar power superhero.
Maintenance Tasks:
Cleaning Solar Panels:
- Regularly cleaning your solar panels is important to maximize their efficiency. Dust, dirt, pollen, and other debris can accumulate on the surface of the panels and reduce their ability to capture sunlight. Use a soft brush, sponge, or a gentle jet of water to remove any dirt or grime from the panels. Be mindful of safety when cleaning, especially if accessing the roof of your skoolie. Ensure that the panels are dry before reconnecting them to the system.
Inspecting Connections:
- Periodically inspecting the connections in your solar system helps identify any loose or corroded connections that may impact performance. Check the wiring connections between the solar panels, charge controller, batteries, and inverter. Tighten any loose connections and clean off any corrosion using a wire brush or a contact cleaner specifically designed for electrical connections.
Checking Battery Health:
- If you have lead-acid batteries, regularly monitor their water levels and top up with distilled water as needed. Ensure that the battery terminals are clean and free of corrosion. For lithium-ion batteries, follow the manufacturer's recommendations regarding maintenance and monitoring.
Verifying System Performance:
- Monitor your solar system's performance regularly to ensure it is generating the expected amount of energy. Compare the actual energy production to your estimated energy needs and make adjustments if necessary. Use the monitoring tools and technologies discussed earlier to keep track of energy production, battery levels, and system performance.
Troubleshooting Tips:
Panel Shading Issues:
- If you notice a significant drop in energy production, it could be due to shading on your solar panels. Identify any objects or structures that may be casting shadows on the panels throughout the day. Trim overhanging branches, reposition your skoolie, or use shade sails or awnings to mitigate shading issues and improve energy production.
Battery Drainage:
- If your batteries are draining faster than expected, it could indicate a problem with your system. Check for any appliances or devices that are consuming more power than necessary. Verify that your charge controller is properly configured and charging your batteries efficiently. If the issue persists, there may be a fault with your batteries, and it's advisable to consult a professional for further assistance.
Wiring Problems:
- If you experience a complete loss of power or notice flickering lights, there may be a wiring issue in your system. Inspect all wiring connections and ensure they are securely fastened. Look for any signs of damage or exposed wires. If you're uncertain or unable to identify the problem, it's best to consult with a qualified electrician or solar system technician to ensure safety and proper resolution.
Remember, troubleshooting can vary depending on the specific components and configuration of your skoolie's solar system. It's always important to refer to the manufacturer's instructions and guidelines for maintenance and troubleshooting specific to your equipment.
By performing regular maintenance tasks and having a troubleshooting mindset, you can keep your skoolie's solar system running smoothly and address any issues that may arise.
The ability to maintain and troubleshoot your system ensures you can continue your off-grid adventures with confidence and uninterrupted renewable energy.
This blog post has taken you on a journey through the world of skoolie solar setups.
From understanding the basics of solar power to assessing your energy needs, choosing the right components, and installing and optimizing your system, you are now equipped with the knowledge to embark on your own sustainable and off-grid adventures.
With regular maintenance and troubleshooting skills in your arsenal, you can enjoy the benefits of energy independence and environmental friendliness as you travel the open road in your skoolie, powered by the sun.
So, go forth and embrace the freedom of solar-powered living!
Wrap Up
Congratulations, my fellow adventurer! You've embarked on a remarkable journey through the essentials of setting up a solar power system for your skoolie.
By harnessing the power of the sun, you've taken a significant step towards reducing your carbon footprint and embracing a more sustainable way of living. But this is just the beginning of your solar-powered odyssey.
As you continue your skoolie adventures, remember that knowledge is key. If you find yourself hungry for more information or seeking professional guidance, there are abundant resources available to support you on your solar journey.
Dive deeper into solar power through books, online forums, and video tutorials. Connect with experienced solar enthusiasts and seek their wisdom. And if you feel the need for expert assistance, don't hesitate to consult with solar professionals who specialize in mobile applications.
Now, armed with the knowledge you've gained, it's time to hit the road and let the sun fuel your wildest dreams. Embrace the freedom and flexibility that your sustainable skoolie haven provides.
Explore breathtaking landscapes, connect with nature, and create memories that will last a lifetime. With your solar-powered system, you have the ability to venture off the beaten path, chase new horizons, and truly embrace the nomadic spirit.
But remember, safety always comes first. Be vigilant in maintaining and monitoring your solar setup.
Regularly inspect the system, check the connections, and ensure everything is in proper working order. Stay informed about best practices for solar power usage and be mindful of your energy consumption to maximize efficiency and prolong the life of your system.
As you embark on this solar-powered adventure, may your travels be filled with awe-inspiring sunsets, starlit nights, and the joy of living sustainably. Cherish the freedom, embrace the responsibility, and savor every moment of your skoolie journey.
Safe travels, my friend, and may the sun always guide your path as you chase your dreams and make a positive impact on our beautiful planet. Your sustainable skoolie haven awaits.