Demystifying the Skoolie Conversion Process: A Simple Step-by-Step Overview
Welcome, adventurers and dreamers, to an extraordinary guide that will demystify the captivating process of converting a school bus into a magnificent home on wheels—a Skoolie. The skoolie conversion process is not as arduous and intimidating and it seems.
In this blog post, we will take you on a journey through the various stages of the Skoolie conversion process, offering you a comprehensive step-by-step overview. Whether you're a seasoned DIY enthusiast or simply curious about the Skoolie lifestyle, this guide will equip you with valuable insights, inspiring you to embark on your own transformational adventure.
The allure of the Skoolie lifestyle lies in the freedom it affords, the boundless possibilities it presents, and the chance to redefine the concept of home.
Picture a life where your surroundings change as effortlessly as the wind, where breathtaking landscapes become your backyard, and where the open road becomes your ultimate playground.
A Skoolie allows you to break free from the conventional constraints of a stationary existence and embrace a nomadic spirit that thrives on exploration and discovery.
However, the Skoolie conversion process is not without its challenges. It requires careful planning, resourcefulness, and a dash of creativity. That's where this guide comes in.
Our aim is to provide you with a bird's-eye view of the entire conversion journey, empowering you to understand the process holistically and inspiring you to transform your vision into reality.
Stage 1: Planning and Design: the Skoolie Conversion Process
The first stage of the Skoolie conversion process sets the foundation for a successful and well-executed transformation. Planning and design are crucial steps that require careful consideration and thoughtful decision-making. In this stage, you'll lay the groundwork for your Skoolie dream, ensuring that your vision aligns with practicality and functionality.
The initial step in planning and design is creating a comprehensive floor plan. Take the time to assess your needs and envision how you want your Skoolie to function as a living space. Consider factors such as the number of occupants, desired amenities, and storage requirements. Sketch out a floor plan that optimizes space utilization, balancing functionality and comfort.
Setting a realistic budget is another essential aspect of the planning process. Determine how much you're willing to invest in your Skoolie conversion, considering both the initial costs and the ongoing expenses. Research the prices of materials, appliances, and necessary components to estimate a budget that suits your financial capabilities. Remember to allocate funds for unforeseen circumstances or unexpected challenges that may arise during the conversion.
With your floor plan and budget in place, it's time to compile a materials list. Research the types of materials required for each stage of the conversion, from insulation and framing to electrical and plumbing components. Consider factors such as durability, weight, and cost-effectiveness when selecting materials. Explore sustainable and eco-friendly options if environmental consciousness is important to you.
During the planning and design stage of the skoolie conversion process, it's also beneficial to gather inspiration and ideas from reliable sources. Browse Skoolie conversion blogs, social media groups, and online forums to explore the creativity and ingenuity of others who have embarked on similar journeys. Take note of design elements, storage solutions, and innovative features that resonate with your vision.
Additionally, consider consulting with experienced Skoolie owners or professionals who specialize in bus conversions. Their expertise can provide valuable insights, practical advice, and guidance throughout the planning process. They can offer recommendations for reputable suppliers, share their own conversion experiences, and help you navigate potential challenges.
Remember that planning and design are iterative processes. Be prepared to revise and refine your initial ideas as you gather more information and gain a deeper understanding of the conversion process. Flexibility and adaptability are key as you strive to strike a balance between your dreams and the practical realities of converting a school bus into a functional home on wheels.
By dedicating time and effort to the planning and design stage, you'll lay a solid foundation for a successful Skoolie conversion. This initial groundwork will save you time, money, and frustration down the road, ensuring that your vision becomes a reality. So, grab a pen and paper, let your imagination run wild, and set the stage for an awe-inspiring Skoolie transformation.
Stage 2: Demolition and Preparation: the Skoolie Conversion Process
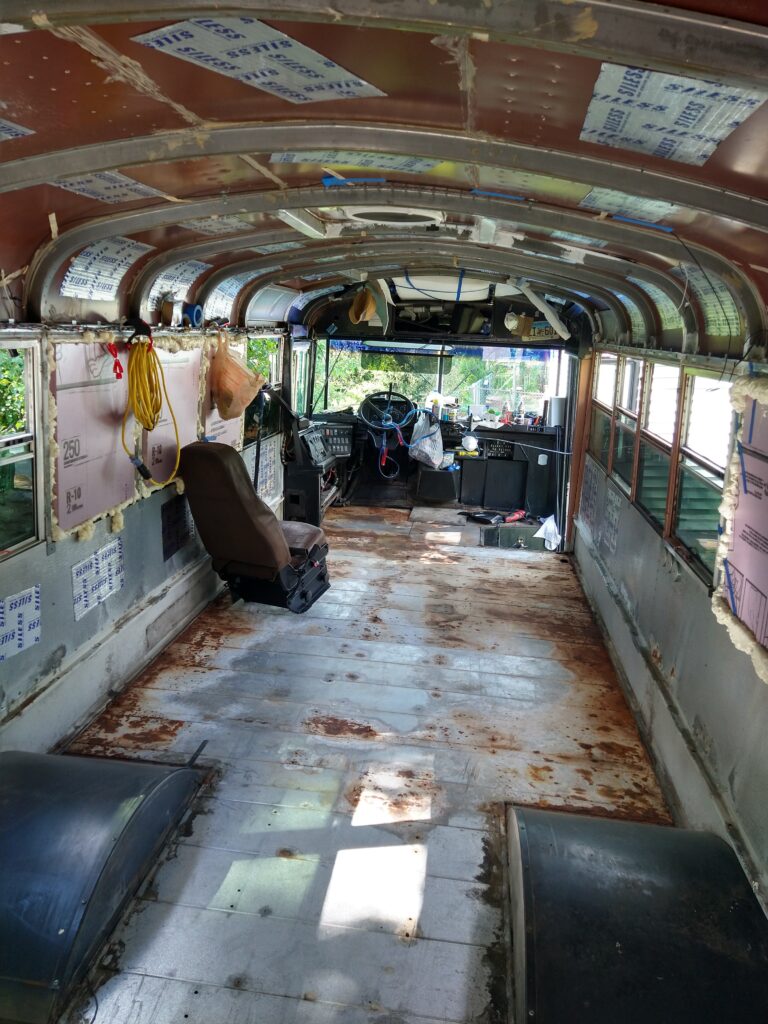
As you embark on the Skoolie conversion journey, stage 2 of the skoolie conversion process involves the essential step of demolition and preparation.
This phase sets the stage for the transformation by removing the existing interior of the school bus and creating a blank canvas for your vision to come to life. This stage requires careful planning, effective techniques, and a keen eye for salvaging materials.
The first step in the demolition process is to clear out the bus by removing any existing seats, flooring, and fixtures. This task may involve using various tools such as drills, wrenches, and pry bars to dismantle and detach these components.
It's important to approach this process systematically, ensuring that you keep track of the removed items and their respective locations for potential reuse or disposal.
Professional Tip:
In many cases, removing the seats will require two people to accomplish.
One person will need to be underneath the bus with a wrench or socket to hold the nut in place where the seat is bolted through the floor.
The second person will be inside of the bus where they will do the same with the head of the bolt.
If the bolt and nut are seized or rusted, it may require using an angle grinder to cut the bolt loose from the seat mounting bracket.
On another side note, if your school bus is equipped with wheelchair or handicap tracked, then you may need to drill the attachment bolt out to remove the tracks.
During the demolition process, it's beneficial to salvage materials that can be repurposed in the Skoolie conversion. Look for elements such as windows, metal framing, or interior paneling that can be reused in your design.
Salvaging materials not only reduces waste but also adds a unique touch to your Skoolie, incorporating the history and character of the original bus.
However, it's crucial to keep safety in mind during the demolition phase. School buses may contain hazardous materials such as insulation, adhesives, or wiring.
Take appropriate precautions, such as wearing protective gear and ensuring proper ventilation, to minimize exposure to harmful substances. If you're unsure about handling certain materials, consult with professionals or seek expert advice.
Another important aspect of this stage is addressing potential challenges that may arise during the demolition process. You might encounter structural obstacles, hidden wiring, or rusted components that require additional care and attention.
It's essential to approach these challenges with patience and problem-solving skills, seeking appropriate solutions to ensure the integrity and safety of the bus.
Throughout the demolition and preparation stage, maintaining organization and documenting your progress can be immensely helpful.
Label and categorize salvaged materials, create an inventory of removed components, and take photographs to serve as references during the conversion process.
This level of organization will save you time and frustration when it comes to reconstructing and installing new elements.
As you proceed with the demolition and preparation stage, keep in mind that it's not just about removing the old but also preparing the bus for the new. This includes assessing the bus's structural integrity, inspecting the flooring and walls for any repairs or reinforcements needed, and addressing any necessary maintenance tasks. By ensuring a solid foundation, you'll create a safe and reliable platform for the subsequent stages of the conversion.
In conclusion, stage 2 of the Skoolie conversion process is all about demolition and preparation. Through careful planning, effective demolition techniques, salvaging materials, and addressing potential challenges, you'll clear the way for your Skoolie's transformation.
Remember to prioritize safety, organization, and attention to detail during this stage, as it lays the groundwork for the exciting stages to come.
Stage 3: Framing and Insulation: the Skoolie Conversion Process
In stage 3 of the Skoolie conversion process, we shift our focus to framing and insulation. These two components are crucial for creating a comfortable and livable space within your Skoolie, providing temperature control, soundproofing, and structural support.
Let's delve into the process and explore key considerations to achieve an optimal living environment.
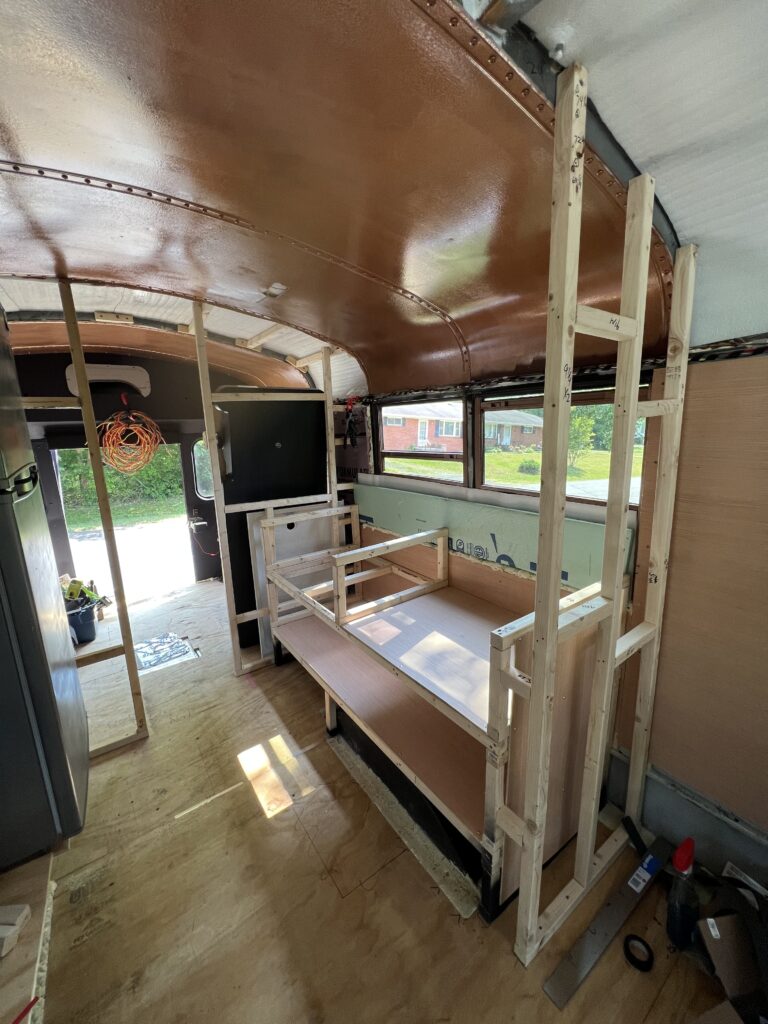
Framing: the Skoolie Conversion Process
Framing the interior walls is a fundamental step in creating the layout and structure of your Skoolie. It involves constructing the framework that will support the walls, ceiling, and other components of the interior build-out.
The framing process begins by carefully measuring and marking the desired locations for walls, windows, doors, and any other structural elements you plan to incorporate.
To build the framework, you will need to select appropriate materials such as dimensional lumber or metal studs. The choice of material depends on factors like personal preference, budget, and the desired level of structural stability.
Each piece of framing material should be precisely cut and fitted together, using techniques like measuring, cutting, and joining using screws or nails.
It's crucial to ensure the accuracy and stability of the framing, as it forms the skeleton of your Skoolie's interior. A properly framed structure provides stability during transit and supports the weight of various fixtures and furnishings. Taking the time to plan and execute the framing process with precision will result in a solid foundation for the rest of the conversion.
Insulation: the Skoolie Conversion Process
Once the framing is complete, it's time to focus on insulation.
Insulation plays a vital role in creating a comfortable living space by regulating temperature and reducing noise transmission. It helps to keep the interior warm in cold weather and cool in hot weather, making your Skoolie a cozy and energy-efficient home on wheels.
Choosing the right insulation material and technique is essential to achieve optimal results.
There are several insulation options available, such as fiberglass batts, rigid foam boards, spray foam, or natural alternatives like wool or recycled denim.
Consider factors like R-value (the insulation's ability to resist heat flow), moisture resistance, and ease of installation when making your selection.
Installing insulation involves fitting the chosen material between the studs or framework, ensuring a snug and continuous coverage throughout the interior walls and ceiling. Proper insulation installation also includes sealing any gaps or joints to prevent air leakage and maximize the insulation's effectiveness.
During the insulation process, it's important to pay attention to areas that are prone to thermal bridging, such as metal framework or windows.
Thermal bridging occurs when heat easily transfers through materials with high conductivity, leading to energy loss.
To mitigate this, you can add insulation layers or use thermal break materials to minimize heat transfer.
In addition to temperature control, insulation also helps with soundproofing, reducing the transmission of noise from both inside and outside the Skoolie. This is especially important if you plan to live or travel in noisy environments.
The choice of insulation material and its thickness can contribute to effective sound insulation.
By investing time and effort into framing and insulation, you'll create a comfortable and well-insulated living space within your Skoolie. It's a stage that significantly contributes to the overall comfort, energy efficiency, and acoustics of your converted home on wheels.
In conclusion, stage 3 of the Skoolie conversion process focuses on framing and insulation. Through careful planning, precise execution, and the selection of suitable materials, you'll establish a sturdy framework and create a well-insulated interior.
By considering factors like structural stability, insulation material, and techniques for temperature control and soundproofing, you'll lay the groundwork for a comfortable and cozy living space within your Skoolie.
Stage 4: Electrical and Plumbing: the Skoolie Conversion Process
In stage 4 of the Skoolie conversion process, we dive into the electrical and plumbing aspects of your project.
This stage focuses on installing the necessary systems to provide power, lighting, and water within your Skoolie.
Safety, functionality, and adherence to relevant codes and regulations are paramount considerations as you tackle these essential components of your conversion.
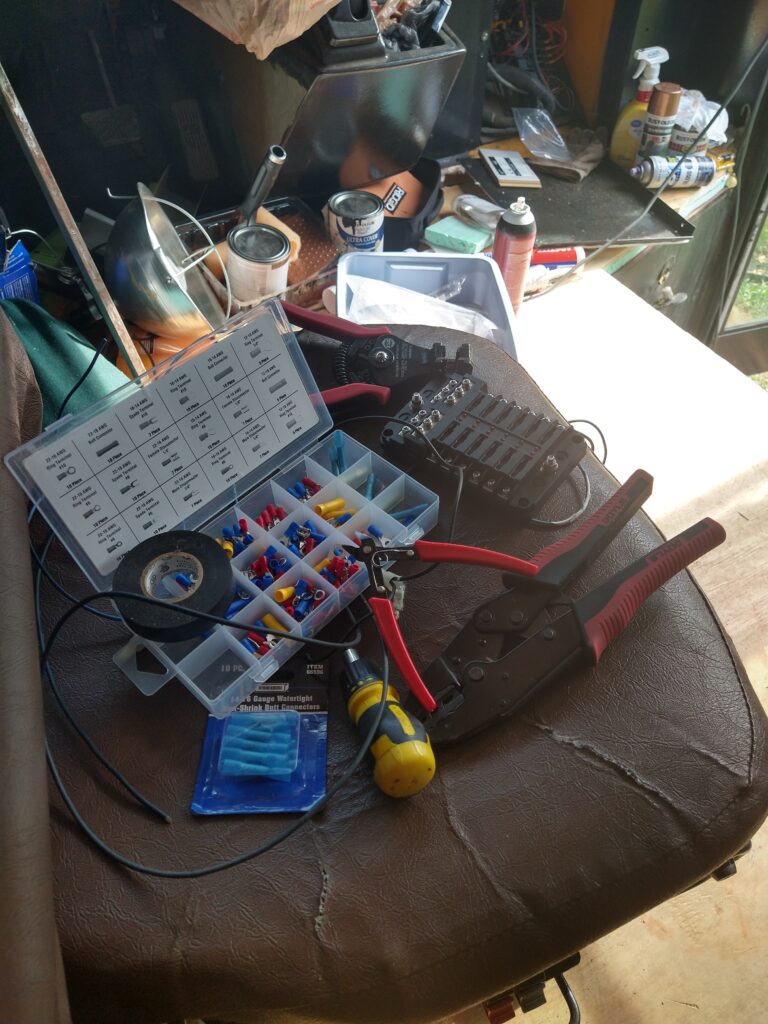
Electrical Installation: the Skoolie Conversion Process
The electrical system of your Skoolie is responsible for powering your appliances, lighting, and other electrical devices. It's crucial to approach the electrical installation with caution and prioritize safety at all times.
If you're not experienced with electrical work, it may be advisable to consult with a professional electrician to ensure proper installation and compliance with electrical guidelines and safety procedures..
The first step is to create a detailed electrical plan that outlines the desired placement of outlets, switches, lights, and any other electrical components. This plan should consider your power requirements, appliance usage, and overall electrical load.
Next, you'll need to run electrical wiring throughout your Skoolie to connect all the desired electrical points. This involves carefully routing the wires, protecting them with conduit or appropriate wiring channels, and ensuring secure connections.
It's important to follow safety guidelines to prevent hazards such as electrical shorts or fires.
Installing outlets, switches, and lighting fixtures follows the wiring process.
Determine the locations for outlets and switches based on your interior layout and functional needs. Consider both AC (alternating current) and DC (direct current) power requirements, as your Skoolie may utilize a combination of both.
Lighting fixtures should be chosen to provide adequate illumination while being energy-efficient.
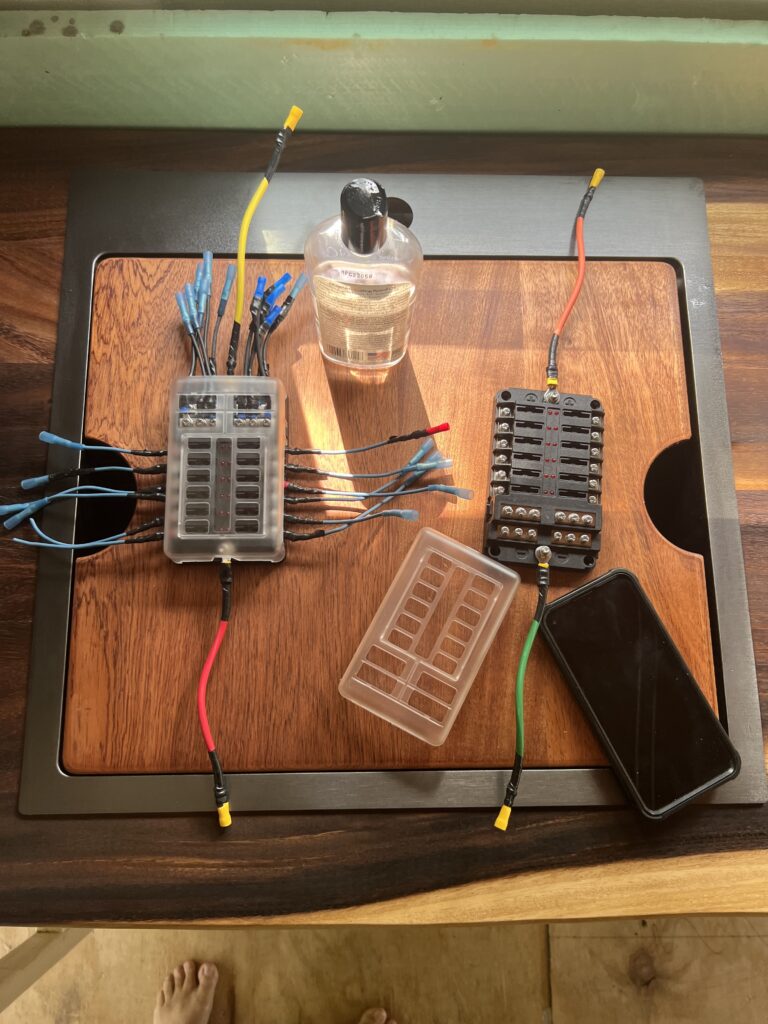
Remember to incorporate safety features like circuit breakers and ground fault circuit interrupters (GFCIs) to protect against electrical overloads and ensure the safety of occupants. These devices help to detect and prevent electrical faults, reducing the risk of electrical shock or damage to equipment.
Solar or Shore Power?
We discuss at length the benefits and disadvantages of solar vs. shore power in another blog post. Be sure to read about it on our blog. Our post on Solar may be helpful as well.
Plumbing Installation: the Skoolie Conversion Process
The plumbing system of your Skoolie enables access to water for drinking, cooking, cleaning, and bathing. Installing a functional and reliable plumbing system requires careful planning, proper materials, and attention to detail.
Start by determining the layout and placement of water tanks, pipes, and fixtures within your Skoolie. Consider factors such as water capacity, space utilization, and access for maintenance and repairs. Common components of a Skoolie plumbing system include freshwater tanks, gray water tanks, pumps, faucets, sinks, showers, and potentially a toilet.
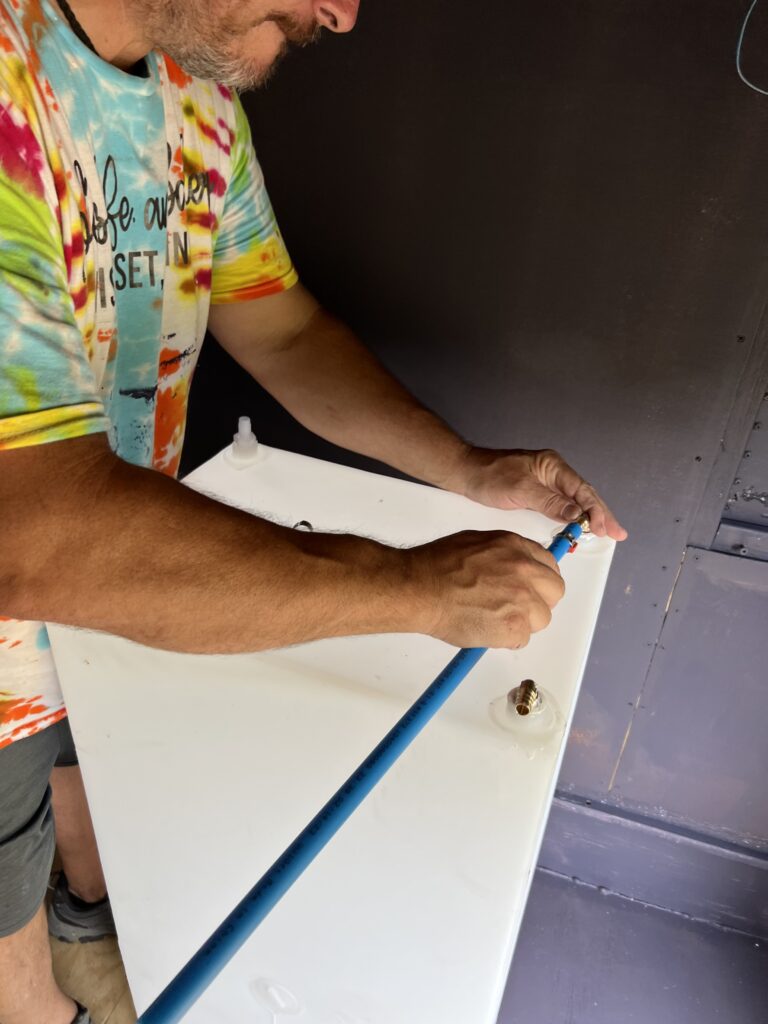
Ensure that you choose appropriate plumbing materials such as PEX (cross-linked polyethylene) or copper pipes, fittings, and valves. These materials are durable, resistant to corrosion, and suitable for the demands of a mobile home. It's important to follow plumbing procedures and the physics that apply therein to ensure proper installation and prevent leaks or other plumbing issues.
Professional Tip:
We do not recommend using copper piping for your skoolie plumbing! It is too rigid and is prone to cracking at the solder joints while absorbing road vibrations and bumps.
We do recommend PEX plumbing. We have used both SharkBite push connectors as well as PEX crimp connectors and have great success with both applications.
The Sharkbite push connectors are 4-5 times more expensive than the crimp connectors, but simpler and easier to install.
Connect the plumbing fixtures with the water supply and drainage system. This involves running pipes from the water tanks to the faucets, sinks, and showers, as well as connecting drain pipes to direct wastewater to the gray water tank or an external sewage system.
Consider installing a water pump to provide adequate water pressure for the various fixtures in your Skoolie. The pump helps to ensure a consistent flow of water and can be powered by either electricity or a separate water pump system, such as a manual hand pump or gravity-fed system.
When working on the plumbing system, it's essential to prioritize water conservation and waste management. Consider incorporating water-saving fixtures, such as low-flow faucets and showerheads, and implementing gray water recycling systems for environmentally friendly practices.
Throughout the electrical and plumbing installation processes, it's crucial to perform thorough testing to identify and address any issues. Conduct electrical tests to verify proper connections, grounding, and functionality of outlets, switches, and lighting.
Test the plumbing system for leaks, proper water flow, and drainage.
By approaching the electrical and plumbing aspects of your Skoolie conversion with care and attention to detail, you'll create a safe and functional living space.
Whether you're powering your appliances or accessing water for everyday tasks, a well-designed and properly installed electrical and plumbing system is essential for a comfortable mobile lifestyle.
In conclusion, stage 4 of the Skoolie conversion process focuses on electrical and plumbing installation. By carefully planning your electrical layout, running wiring, and installing outlets, switches, and lighting fixtures, you'll create a safe and efficient electrical system.
Similarly, by considering the layout, materials, and functionality of your plumbing system, you'll ensure access to water for your daily needs. Remember to prioritize safety, adhere to relevant codes, and perform thorough testing to verify the functionality and reliability of both systems.
Stage 5: Interior Build-Out: the Skoolie Conversion Process
It's finally time to transform the interior of your Skoolie into a livable and personalized space. This is where your vision for a comfortable and functional home on wheels comes to life.
This is our favorite part of the build!
One of the things we love so much about skoolie conversion is the uniqueness and individual personalities that shine through the build design.
No two skoolies are the same! Each has its own flair, personality, and character. Making your skoolie an extension of yourself will allow you to live in a space that is comfortable and provide a feng shui designed just for you.
From flooring installation to cabinetry construction and furniture placement, the interior build-out stage is where you can truly make your Skoolie reflect your unique style and preferences.
Flooring Installation: the Skoolie Conversion Process
- Choosing the right flooring for your Skoolie involves considering factors such as durability, ease of installation, maintenance requirements, and aesthetic appeal. Popular flooring options for Skoolie conversions include vinyl planks, laminate flooring, engineered hardwood, or even durable and easy-to-clean tile.
Before installing the flooring, ensure that the subfloor is clean, level, and free of any damage. Repair or replace any damaged subflooring to provide a solid foundation for the new flooring material.
Follow the manufacturer's instructions for installation, which may involve adhesive, click-lock systems, or floating floor methods.
Cabinetry Construction: the Skoolie Conversion Process
- Cabinetry plays a vital role in maximizing storage space and organizing your Skoolie's interior. Designing and constructing functional cabinets require careful measurements and attention to detail. Consider both upper and lower cabinets to optimize storage capacity.
If you have woodworking skills, building custom cabinets allows you to tailor them to your specific needs. Alternatively, you can repurpose or modify pre-built cabinets to fit your Skoolie's dimensions.
Optimize space by incorporating features like slide-out drawers, adjustable shelves, and hidden compartments.
When constructing or modifying cabinets, choose lightweight yet durable materials such as plywood or medium-density fiberboard (MDF) to minimize the overall weight of your Skoolie.
Securely fasten the cabinets to the walls or floor, ensuring they are sturdy and capable of withstanding movement during travel.
Furniture Placement: the Skoolie Conversion Process
- Selecting the right furniture is crucial for creating a comfortable living space within your Skoolie. Consider multifunctional furniture pieces that can serve multiple purposes to maximize space utilization. For example, opt for a convertible sofa bed or a dining table that can be folded away when not in use.
When placing furniture in your Skoolie, prioritize functionality and traffic flow. Ensure there is enough space for comfortable movement throughout the interior, especially in high-traffic areas like the kitchen and living area. Secure furniture pieces to prevent movement during transit, using methods such as brackets, straps, or bolting them to the floor.
Storage Solutions: the Skoolie Conversion Process
- Maximizing storage is essential in a small space like a Skoolie. Look for creative storage solutions that utilize every available inch. Utilize vertical space by installing shelves or overhead cabinets.
Don’t overlook or forget about the under-bed storage or build storage compartments beneath seating areas. Consider utilizing wall space for hanging items with hooks or baskets.
Personalization and Aesthetics: the Skoolie Conversion Process
- Make your Skoolie truly feel like home by adding personal touches and reflecting your unique style. Consider painting the walls in your favorite colors or using wallpaper to create an accent wall. Incorporate decorative elements like curtains, throw pillows, rugs, and artwork to add warmth and personality to the space. Remember to choose materials and furnishings that are not only aesthetically pleasing but also functional and suitable for a mobile lifestyle.
Throughout the interior build-out stage, keep in mind the weight distribution and balance of your Skoolie. Ensure that heavy furniture or equipment is properly secured and doesn't exceed the weight capacity of your vehicle.
By carefully selecting materials, maximizing storage solutions, and infusing your personal style, the interior build-out stage allows you to create a welcoming and functional living space within your Skoolie.
Let your creativity shine as you bring your vision to life, and remember to prioritize comfort, practicality, and durability in your design choices.
Stage 6: Finishing Touches: the Skoolie Conversion Process
Congratulations! You've reached the final stage of your Skoolie conversion journey.
Stage 6 is all about adding those final touches that will truly make your Skoolie feel like a home on wheels. From painting techniques to trim work and other aesthetic enhancements, this stage allows you to showcase your creativity and attention to detail.
Let's dive into the various aspects of the finishing touches that will elevate your Skoolie to the next level.
Painting and or Staining: the Skoolie Conversion Process
- Painting and staining your wood is a transformative process that can completely change the look and feel of your Skoolie's interior.
Choose colors that resonate with your personal style and create a welcoming atmosphere. Lighter colors can make the space appear more open and spacious, while darker tones can add a cozy and intimate feel.
Before painting or staining, make sure to properly clean and prepare the surfaces. Sand any rough areas and fill in any holes or imperfections with putty or spackle.
Consider using low VOC (volatile organic compounds) or eco-friendly paints to ensure a healthier indoor environment. Apply multiple coats of paint for a smooth and even finish, allowing each coat to dry thoroughly before applying the next.
Trim Work: the Skoolie Conversion Process
- Trim work adds a polished and professional look to your Skoolie's interior. It involves installing baseboards, crown molding, window trim, and other decorative elements that enhance the visual appeal of the space.
Choose trim materials that complement the overall design aesthetic of your Skoolie, such as wood or PVC.
Measure and cut the trim pieces to fit accurately, ensuring clean and tight joints. Use adhesive or nails to secure the trim in place, and fill any gaps or nail holes with wood filler. Sand the trim surfaces for a smooth finish before painting or staining them to match your desired color scheme.
Aesthetic Enhancements: the Skoolie Conversion Process
- In addition to painting and trim work, there are various other aesthetic enhancements you can incorporate to personalize your Skoolie. Here are some ideas to consider:
- Window Treatments: Install curtains, blinds, or shades to control privacy, natural light, and temperature inside your Skoolie.
- Lighting Fixtures: Choose lighting fixtures that match your interior design style and provide adequate illumination. Consider energy-efficient LED lights for optimal power consumption.
- Decorative Elements: Add personal touches such as wall decals, framed artwork, or photographs that reflect your interests, family, friends, and memories.
- Upholstery and Textiles: Select fabrics and textiles for upholstery, cushions, and curtains that add texture and comfort to your Skoolie. Consider durable and easy-to-clean materials suitable for a mobile lifestyle.
- Flooring Accents: Incorporate rugs or floor mats to add warmth and comfort to your Skoolie's flooring. Opt for non-slip options that can withstand the movement of the vehicle.
Be sure to check out these 20 Accessories that will make your skoolie conversion process complete.
Attention to Detail: the Skoolie Conversion Process
- During the finishing touches stage, pay attention to even the smallest details. Take the time to ensure that all fixtures are properly installed, that surfaces are clean and free of blemishes, and that everything is in good working order.
Double-check that all electrical and plumbing connections are secure and meet safety standards. A thorough inspection and attention to detail will ensure that your Skoolie is ready for adventures on the road.
Remember, the finishing touches are an opportunity to infuse your Skoolie with your unique personality and style. Let your creativity soar as you add those final elements that will make your Skoolie feel like home.
In stage 6, the finishing touches bring your Skoolie conversion project to completion.
Painting, trim work, and other aesthetic enhancements allow you to showcase your personal style and attention to detail. These final steps truly transform your Skoolie into a welcoming and personalized home on wheels.
Enjoy the satisfaction of a job well done as you embark on new adventures in your beautifully finished Skoolie.
Wrap Up to Demystifying the Skoolie Conversion Process: A Step-by-Step Overview
By following this comprehensive step-by-step overview of the Skoolie conversion process, you should have gained a solid understanding of the tasks and considerations involved in transforming a school bus into a comfortable and personalized living space.
Each stage of the conversion presents its own set of challenges and opportunities for creativity, allowing you to shape your Skoolie according to your unique vision.
However, this overview merely scratches the surface of the vast possibilities and intricacies of the Skoolie conversion journey.
To further support you on this exciting adventure, we encourage you to stay tuned for future blog posts and podcast episodes where we will delve deeper into each stage, providing you with more in-depth guidance and practical tips.
Read through some of our other posts on the skoolie conversion process.
In these upcoming resources, we will explore each stage of the conversion process in greater detail, discussing specific techniques, tools, and materials that can enhance the quality of your Skoolie conversion.
We will address common challenges that may arise and offer expert advice to help you overcome them.
You'll also gain insights from experienced Skoolie enthusiasts who have successfully completed their own conversions, learning from their firsthand experiences and lessons.
Our future blog posts will feature step-by-step tutorials, detailed product recommendations, and creative ideas to inspire your Skoolie transformation. Through our podcast episodes, you will have the opportunity to listen to interviews with experts in the field, hear captivating stories of Skoolie adventures, and gain valuable insights into the lifestyle and community surrounding the Skoolie movement.
With this ongoing support, you can embark on your Skoolie conversion journey with confidence and excitement. We are committed to being your trusted resource, providing you with the knowledge and inspiration you need to create a remarkable Skoolie home that aligns with your dreams and aspirations.
So, get ready to embrace a life of freedom and adventure as you hit the road in your very own Skoolie home. The possibilities are endless, and the journey ahead is filled with discovery, exploration, and unforgettable experiences.
Let the Skoolie community and our future resources be your companions on this remarkable journey.
Happy travels!