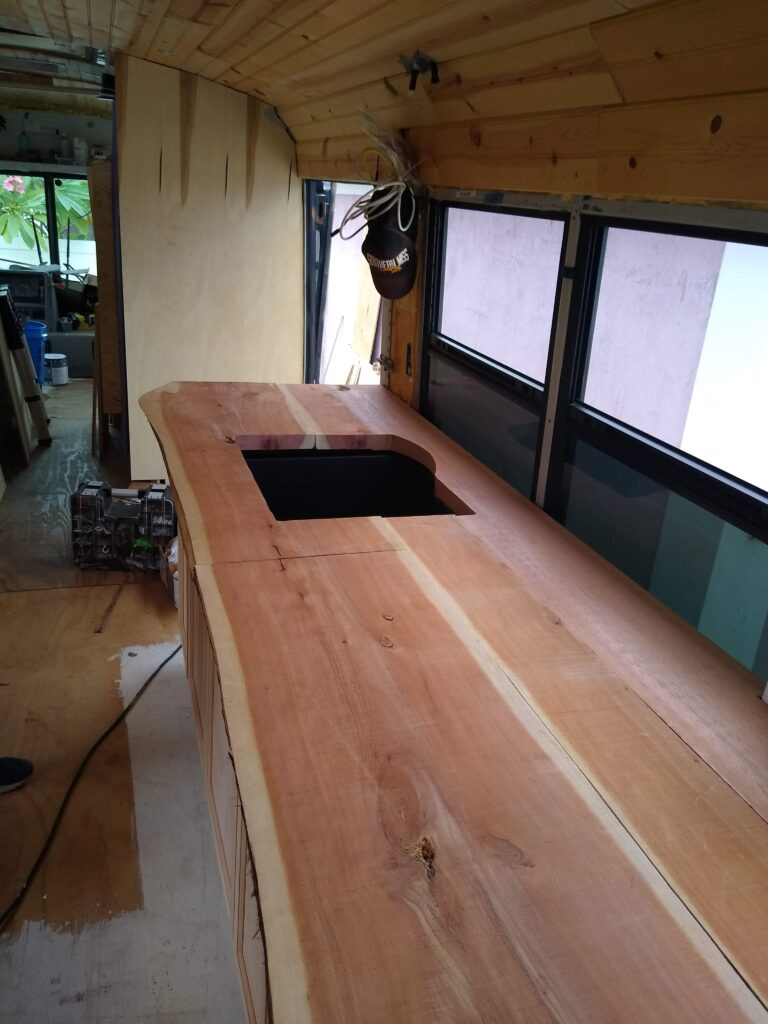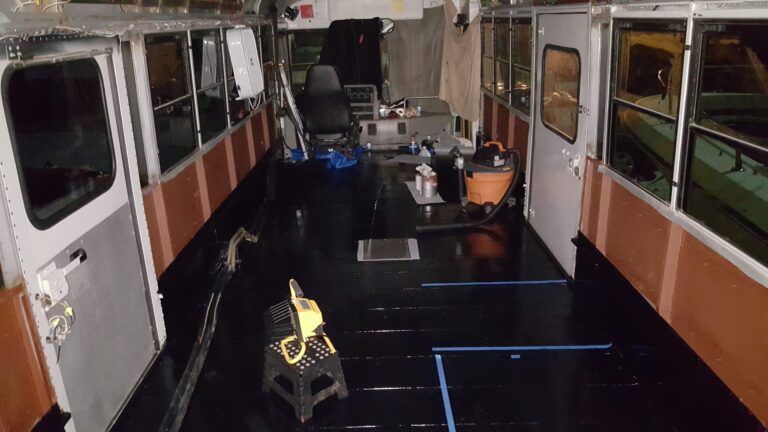
Skoolie Solar
Skoolie Solar
Skoolie solar is a generic term used to describe an alternative power source for your schoolies’ electrical needs. There are several different power options you can choose to install in your Skoolie Project.
Shore power, generator power, solar power, solar generator power, or no power at all, and living a very basic off-grid experience.
If you choose to install a skoolie solar system in your bus completely depends on your needs, wants, and budget.
For our first skoolie project back in 2018, we chose not to install a solar system at the advice of a friend. Besides that, we thought it was too intimidating and seemed to be out of our budget at the time of what we wanted to spend.
We thought we could get along just fine with shore hookup and a generator only. Unfortunately, we were wrong and so was our friend.
In this blog, we are going to take a deep dive into the skoolie solar setup and how it all works together. How simple it actually is and how affordable it can be for a basic setup. You can always add and upgrade as your budget and needs expand.
*Disclaimer*
Everything we are sharing with you today is based on our own personal experience and knowledge that we have either learned off of the internet or skoolie friends who have more knowledge than we do.
We are not licensed electricians nor licensed or certified solar installation technicians. You should do your own research or hire a licensed or certified solar expert to install or verify your system is set up and functioning safely.
We do not accept any liability for your actions of setting up your own solar system without taking due diligence and precautions to ensure your and others’ safety.
Why Solar?
Thinking back on our first experience when we realized a self-sufficient solar system was much better than just having shore power and a generator.
Our plan was to go from Central Florida up to Wisconsin to visit with some friends and continue to ride out the whole COVID debacle.
We'd stopped for the evening for some sleep at a Pilot Truck Stop. We parked and began to settle in for the evening. We were doing our best despite doing so in total darkness.
No solar battery bank meant no power unless we hooked up to an external power source such as shore power or a generator.
So, that meant getting the generator hooked up and going. Well, it didn’t take but a few short minutes of realizing how much a pain in the ass that was going to be going forward.
Having a solar system in place and operational in your skoolie means power anytime you want it. As long as the sun is shining and you are able to charge those house batteries, you will have power.
That is why a skoolie solar system is the best way to power your bus. Electricity anytime you want or need it. Not dependent on hooking up to the grid and asking or paying for permission to do so.
It also means, not relying on a generator with another fuel source to have to contend with on an ongoing basis.
We can not imagine completing a DIY skoolie project without having an adequate solar system set up now.
How Much Will a Skoolie Solar System Cost?
How much will a skoolie solar system cost you? Well, that’s like asking someone how much it is going to cost to go out to dinner at a restaurant.
The cost of your solar setup is going to cost exactly how much you want to put into it!
Of course, there are some basic costs of the essential and basic components, but it simply boils down to how much room you have for solar panels on your roof and how many amp-hours of electricity you want to store with your house batteries.
Let’s take a look at a very basic solar set up with 400 watts of solar panels, 200 amp hours of lithium phosphate batteries, a 750-watt inverter, and a Victron charge controller.
Renogy 200w Monocrystalline Solar Panel $254.00 x 2 = $508.00
Battle Born 100ah 12v Deep Cycle Battery $799.00 x 2 = 1,598.00
Battery Disconnect Switch $13.45
Renogy 1000w Pure Sine Wave Inverter $162.05
Victron MPPT Charge Controller $137.70
Victron Battery Monitor w/shunt $204.00
Buss Bars, negative & positive – $39.49
12v Fuse Box $20.99
60amp Circuit Breaker $26.99
30amp Circuit Breaker $26.99
Battery and solar cables * $200.00
//////////////////////////////////////////////////////////////////////////////////////////
Total Set Up Cost $2,937.66
This is a conservative estimate for what we would consider a minimal solar setup.
You aren’t going to be running a mini-split air conditioner, electric appliances, or playing a PS5 or Xbox One all day long on it, but it will power your lights, water pump, 12v refrigerator, and some fans with no problem.
How Much Skoolie Solar Will I Need?
So now you have an idea of what a minimal solar setup will cost you, but of course, you can reduce this price by purchasing and installing less expensive components. We listed the components we use and trust, but they do cost more than other name brands.
We believe in the mantra, “You get what you pay for.”
Let’s address one of the most commonly asked questions when talking about a skoolie solar system.
How much solar do I need? It’s a great question. The answer is a little more complicated than one might think though.
For us, we have adapted to skoolie life by how we consume electricity and how we consume water. We have become very conservative when it comes to how much we use a resource we used to take for granted.
When deciding on how many solar panels and house batteries you are going to require to live a comfortable life in your skoolie, there is some homework we are going to give you.
You are going to add up all of the electrical devices you use on a daily basis to determine how many watts per day you use.
You can then add everything up to determine how many watts of solar you will need to power your battery bank.
*INSERT WATTS/HOUR GRAPH
What Do I Need For A Skoolie Solar System?
There are specific components you are going to need to have a functional and useful skoolie solar system. There are some components that will add to the overall usefulness and efficiency of your solar setup.
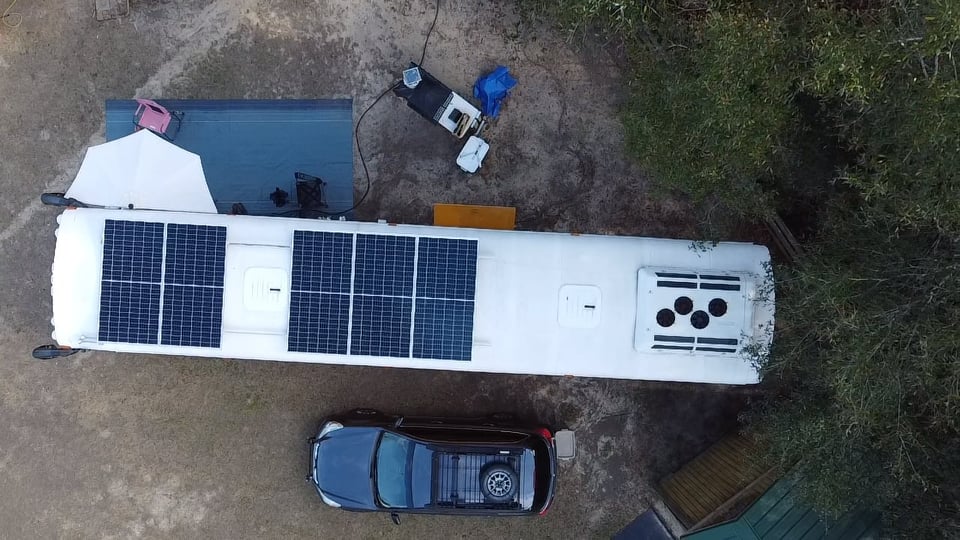
Solar Panels
Your solar panels that are going to be attached to the roof of your skoolie are the devices responsible for absorbing the energy from the sun and transferring that energy to your house batteries.
There are three different types of solar panels you can choose from. For our second DIY conversion, we used monocrystalline solar panels and they performed as expected.
For our current skoolie project, we are using bifacial solar panels. Let’s take a look at the difference between the three types of solar panels.
Bifacial
Bifacial solar panels work just like monocrystalline solar panels do. However, they have an advantage over traditional or conventional solar panels.
Bifacial solar panels have energy cells both on top and on the bottom. So, when sunlight hits the top of the panel, some of the solar cells absorb the light and convert it to energy. Sometimes the sunlight is refracted throughout the glass of the panel and reflected throughout the panel until a cell absorbs it and converts it to energy.
The advantage is this though. Some of the sunlight will pass right through the bifacial panel and hit the roof of your skoolie. It then reflects back up into the bifacial panel where the reflected light is also captured and turned into electricity.
Here are some pros and cons of using bifacial panels over mono or poly panels.
Pros
- Increased efficiency of the sunlight
- Lower costs over time per watt of energy
- Uses less space per watt
- Aesthetically pleasing
- Reduced PID
- UV resistant
- Don’t need grounding
- Efficient in diffused light
- Durable and weather-resistant
Cons
- More expensive
- More expensive to have installed by someone
- Heavier than mono or poly panels
- Must be mounted properly to take advantage of ground albedo (the reflection of the material underneath the solar panel – i.e. the roof of your skoolie)
Monocrystalline
Monocrystalline solar panels are constructed so that each PV (photovoltaic) cell is made up of a single silicon crystal. Hence the term, mono for single.
Monocrystalline panels have a higher conversion efficiency than poly panels. What this means for you is that they produce more electricity per square foot than poly panels.
They are also better to have if you are going to be in an area where it is often cloudy. The panels will still be able to absorb a good bit of energy to be converted into electricity.
Polycrystalline
Polycrystalline solar panels are constructed so that each PV cell is made up of multiple silicon fragments that have been fused together. Hence the term poly for multiple crystal fragments.
These panels have a lower efficiency so it will take more poly panels to reach the efficiency of a typical mono or bifacial panel.
Poly panels are less expensive, but the drop in efficiency is not worth the money you will save in the long run.
Skoolie Solar House Batteries
Lithium
The clear front runner as far as efficiency, size, and weight. The lithium phosphate batteries are by far the better choice for using in conjunction with a solar array in a skoolie project.
Several advantages to the Lithium phosphate batter over the AGM and Flooded batteries is that they are virtually gas-free. These are safe and recommended to be stored in a temperature-controlled interior compartment.
Unlike the AGM or Flooded batteries, it is safe and acceptable to drain the battery past the 50% load. In fact, you can safely drain the lithium batteries down to 0% with no consequence of damaging the cells inside.
It is recommended though to try your best to not drain them to below 20% of their charge capacity. This will ensure the maximum life of the battery which is estimated to be 10 years over 2-3 years for an AGM or Flooded battery.
AGM
Gel batteries are also known as AGM, are lead acid-based batteries. AGM, or absorbed glass mat, batteries are maintenance-free, which means you do not have to maintain the water levels in them.
The AGM battery off-gasses very little, so storing them inside of your living area is a viable solution.
AGM batteries are a great cost-effective solution compared to Lithium batteries.
However, understand that while the upfront cost of the AGM battery is less than the Lithium, you will indeed end up spending more on AGM batteries in the long run due to their shorter life than the Lithium.
Flooded
These are your basic lead-acid batteries. Sometimes found in golf carts, older model cars, and trucks. The Flooded lead-acid battery is the least expensive, but also the most volatile of the batteries.
These batteries are best stored underneath or outside of the living area of your skoolie project. They do off-gas and could be dangerous if kept in a sealed and confined area.
The flooded batteries have to be constantly maintained with water and can not be drained more than 51% of their capacity. Doing so will damage the cells and significantly decrease the life of the battery.
Charge Controller
A charge controller, or more appropriately named, a charge regulator, is an electronic device that is used to maintain, monitor, and regulate the voltage or current charging your house batteries from your solar panels.
Basically, it regulates a high amount of voltage coming from your solar panels down to 14.5 volts needed to charge your 12v batteries.
MPPT
Most good charge controllers are now also equipped with a built-in MPPT. MPPT stands for Maximum Power Point Tracker. It is a DC to DC power converter that optimizes the electricity or power from the solar array to your battery bank.
Basically, it gives the biggest bang for your buck in solar energy efficiency.
Inverter
An inverter is an essential part of your skoolie solar set up if you have any plans of running any kind of electronic device that requires AC, or alternating current.
The inverter converts the DC or Direct Current, electricity which is what your solar panels produce, to AC or Alternating Current, so that you can run items like a television, Xbox or Playstation, or a computer.
Without an inverter, you would not be able to run any type of electronic appliance or device that is not 12v only.
Converter
While having a converter as a part of your skoolie solar setup is not necessarily a requirement, we would recommend you have one installed all the same.
While an inverter converts DC to AC to run appliances inside of your skoolie, a converter converts or changes AC current to DC current.
A converter is good to have while you are hooked up to shore power you can simultaneously charge your house batters. Since the converter will change the AC from the shore connection to DC which is required for your 12v house batteries, it is a fast and simple way to charge up overnight or when the weather is rainy or snowy.
DC to DC Converter
A DC to DC converter is another piece of electrical solar component that will allow you to charge your house or solar batteries from your vehicle’s engine’s alternator.
As you are driving down the highway from one destination to another and it is raining or overcast, you can be simultaneously charging your solar batteries off of the alternator from your running engine.
This is a great backup charging source for your house batteries. If you are in an off-grid location and do not have a generator to charge your solar batteries when there are several days of poor weather, this is a great alternative charging source.
How Do I Charge My House Batteries?
Skoolie Solar
The simplest and most cost-effective way of charging your house batteries is with solar power. Let that huge star of infernal gasses that is 93 million miles away do all of the work.
There is a reason why so many people are turning to solar power over the conventional electrical grid. It’s cleaner, more efficient, and much less expensive in the long term.
Alternator
Having a DC to DC converter to charge your house batteries directly from the alternator of your vehicle’s engine is a brilliant way to put a charge on those house batteries. You have to drive from one destination to the other, why not get a little more bang out of that alternator while you are driving?
Keep in mind, it is critical that you size your vehicle’s alternator so that it can handle the additional charging duties. Trying to charge both your vehicle’s starting batteries along with your skoolie house batteries may be more than a typical alternator can handle.
So, before installing that alternator charger or DC to DC converter, be sure your alternator is large enough to handle the extra load.
Generator
Using a generator to power your electrical system or charge your house batteries is a viable solution. However, think about that for just a moment. You have to first, run your generator to charge your batteries.
Now you are burning fuel to operate the generator and you have to deal with the noise from the generator on top of it all.
While a generator makes for an excellent backup source to charge your batteries or power your skoolie electrical system, it is not the ideal primary solution.
AC to DC Converter or Shore Power
If you are thinking you are likely to occasionally camp in an RV campground or at a friend or relative’s place, then having an AC to DC converter or Shore Power is an excellent choice.
This supplement device to your skoolie solar set up is a fast and efficient way to charge those solar batteries.
If you are traveling and run into a stretch of multiple rainy, snowy or cloudy days and your house batteries are draining quicker than they are charging, then spend a night at a campground with shore hookups and get those solar batteries back to 100% charge!
Skoolie Solar Terms and Definitions
There are so many terms and acronyms when it comes to solar that sometimes it can seem confusing or overwhelming.
Here is a list of terms and acronyms with their definitions. Hopefully, this will make understanding your skoolie solar system a little easier to understand and comprehend.
Parallel Configuration
Wiring your solar panels in a parallel configuration will allow you to maximize your solar panels even if part of your solar array is shaded.
In series, when one panel has shaded cells, the entire panel and array will only perform to the shaded cells intake. With a parallel configuration, the shaded cell is “ignored” and the rest of your array will perform at optimal levels.
Note the example below, there are 4 100w solar panels wired in parallel. Notice the volts and amps as compared to a series configuration.
4 100w solar panels wired in Parallel
The voltage of 16.77v stays the same
The amperage of 6.26a x 4 (panels)
4 100w panels
6.26 amps
16.77 volts
100 watts
The array is 400 watts
16.77 volts
25.04 amps
Series Configuration
Having your solar panels wired in series the voltage of your solar panels stays the same. It is the lowest voltage of any one panel multiplied by the number of panels with that voltage.
When wiring your solar panels in series, you will be able to use a lower gauge wire. Since the voltage will be high, you know that the amperage will be low.
Therefore, you can use a lower gauged wire which will also be less expensive.
You will not need to use extra branch connectors or combiner boxes than if you wiring in parallel.
One of the biggest advantages of wiring in series is that your panels will be better equipped to absorb light in lower light situations. (overcast, sunset, and sunrise)
Let’s take a look at a real scenario. There are four solar panels wired in series and how it affects the numbers.
4 100w solar panels wired in Series
The Voltage is 16.77v x 4 (panels)
The amperage of 6.26a stays the same
4 100w panels
6.26 amps
16.77 volts
100 watts
The array is 400 watts
6.26 amps
67.08 volts
Series/Parallel Configuration
In a series-parallel solar panel configuration, the interior panels will be wired in series while the end panels will be wired in parallel. In a series-parallel configuration, you are getting the benefits from both series and parallel.
You are benefitting from doubling both the voltage as well as the amperage of both wiring configurations into one.
Wattage
A watt is a measurement at which energy is consumed or generated by an electrical appliance or device.
Amperage
A unit of electrical current is equal to a flow of one coulomb per second. Simply put, it is the strength of a unit of electricity measured in amperes.
Voltage
Voltage is the pressure from an electrical circuit’s power source that pushes the electricity or charged electrons through the source being used.
There is a good analogy we wrote on how watts, amps, and volts all work together along with an added variable of resistance in this post on Skoolie Electrical.
Amp Hours
An amp-hour is a unit of charge or current flow over time.
LifePO4
Lithium Iron Phosphate. Or better known simply as a lithium-ion battery.
AGM
Absorbent glass mat.
Pure Sine Wave
We see this term as it relates to inverters. A pure sine wave inverter is one that has a steady and continuous wave of electrical current that provides a smooth and continuous periodic oscillation.
Direct Current or DC
An electrical current that flows in one direction only.
Alternating Current or AC
An electrical current in which the flow of electrons switches back and forth at regular cycles or intervals.
Skoolie Solar Wrap Up
We can not emphasize enough that solar should be your number one priority when considering how to power and utilize electricity in your skoolie.
Do not take the advice of others who argue for shore power and or generator power and your primary power sources. Having solar panels powering and charging up your battery bank is like getting free water from rain.
While there are up-front costs in purchasing the components to install a skoolie solar system, once it is up and running, it is like having free, unconditional, and readily available electricity any time you want it.
The most important thing to remember when implementing your skoolie solar system is to do so with the utmost care and attention to safety details.
If you are unsure or not perfectly clear about how to properly install and wire your system, seek professional and certified help from someone who is insured and bonded to complete the installation.
We would love to hear about your electrical setup! Reach out to us on our social media or leave a comment below and tell us how you power your skoolie, van, box truck, or RV.
FTC affiliate disclosure:
We only recommend products we would use ourselves and all opinions expressed here are our own. This post may contain affiliate links. If you purchase a product, at no additional cost to you, we may earn a small commission.