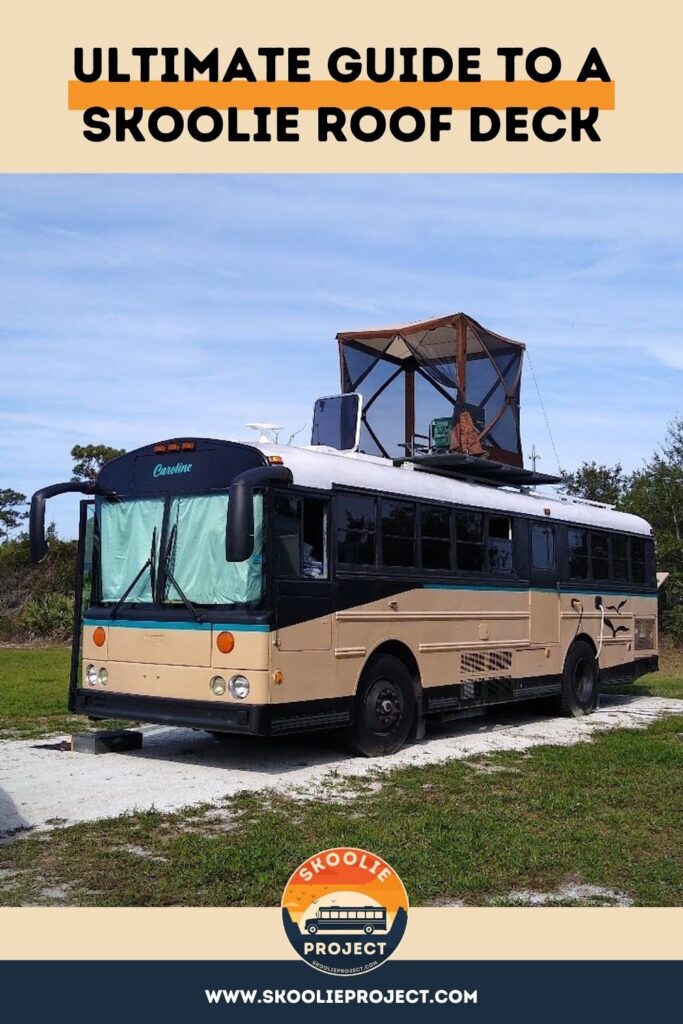
Ultimate Guide To A Skoolie Roof Deck
You have seen the Instagram pics of the skoolie roof deck backed up to the ocean and the bikini-clad woman gazing off into the horizon. Maybe it was in front of some snow-covered mountains?
The scenery may change, but all of the pictures are the same. It is the romanticized life of being a nomad with a roof deck.
We have to be honest with all of you on this one though. The Instagram, TikTok, and Facebook pics of this are not too far from reality! In fact, from our experience, we would say that they are spot on!
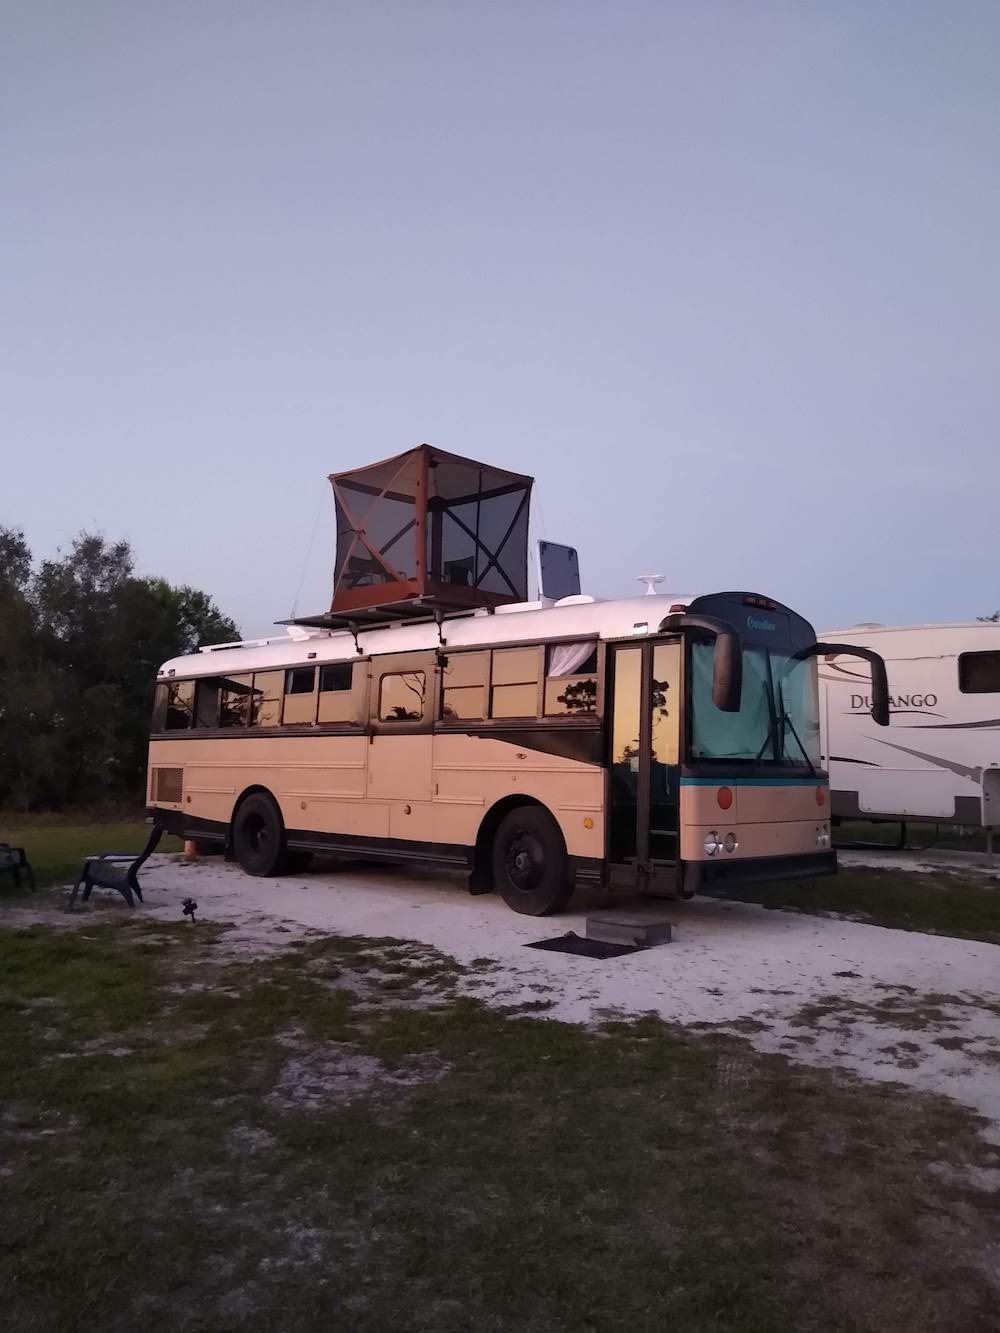
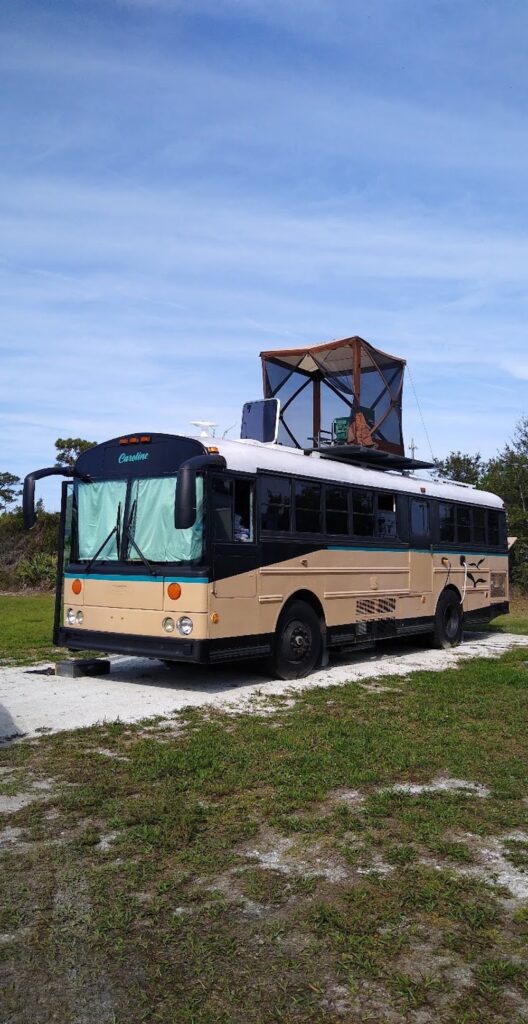
Having a skoolie roof deck is one of the best parts of any skoolie. There is just something very special and relaxing by being on top of your bus, looking out over the landscape around you.
One of our favorite things to do in our skoolie is to enjoy a cup of coffee up on top of the bus. It really doesn’t matter where we are parked, we love it.
Of course, parked next to the ocean, in front of some mountains, overlooking a lake, or just about anywhere in nature makes it all the better!
It isn’t rocket science, but, there are some construction and safety procedures to be observed before adding an awesome skoolie roof deck to your build.
How Do You Build A Skoolie Roof Deck?
For some people, this is like asking someone how to eat an elephant. First of all, we would never condone anyone eating an elephant.
Adding a skoolie roof deck is not a complicated project. It is one however that requires the utmost attention to detail and safety.
Understand, after all, you are going to be driving this bus anywhere between 55 and 75 mph. Let’s say you have a 20 mph headwind facing you.
Do the math here and you will quickly see that you have a recipe for one helluva force of wind energy on your deck, solar panels, or anything else attached to your skoolie roof.
Therefore, securing this potential wooden sail securely and safely to your skoolie is of utmost importance.
There are many different ways to secure a skoolie roof deck to your bus. In fact, there are so many ways, it would impractical to talk about all of them. So, for the sake of brevity, we will discuss how we did it.
Mounting Feet for Deck Mounting Rails
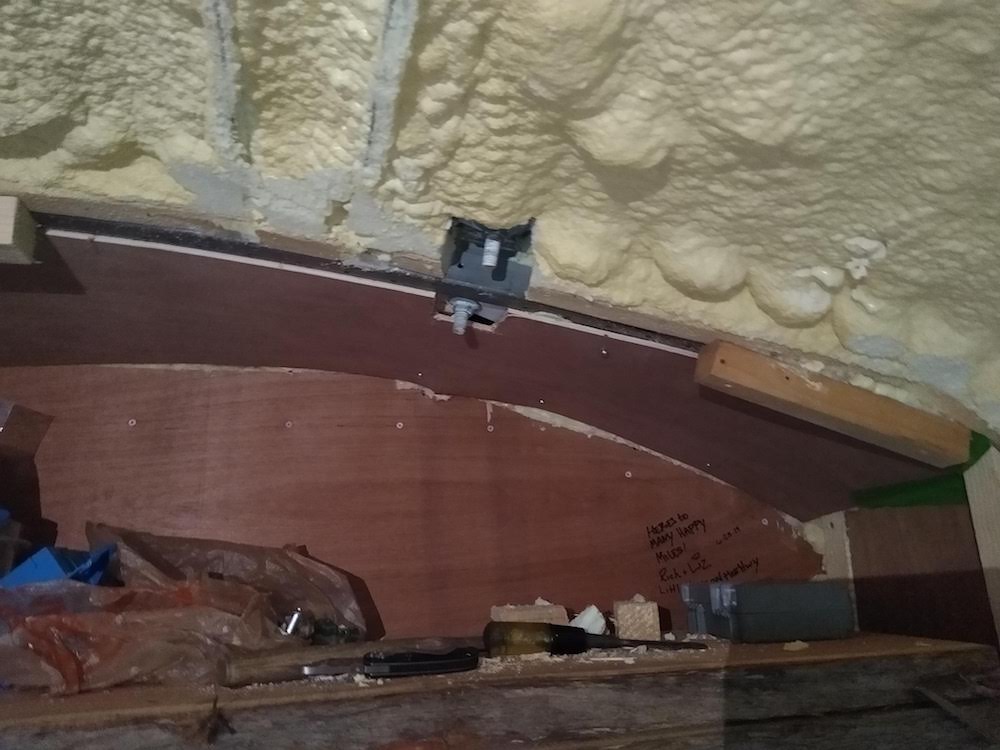
Before attaching your deck mountain rails, you need to attach some deck mounting rail feet first. This will put a couple of inches of space between your roof and your skoolie roof deck floor.
The deck mounting feet are made by cutting six to eight-inch pieces from a larger piece of the super strut. These will act as your feet to attach the larger pieces of the super strut to.
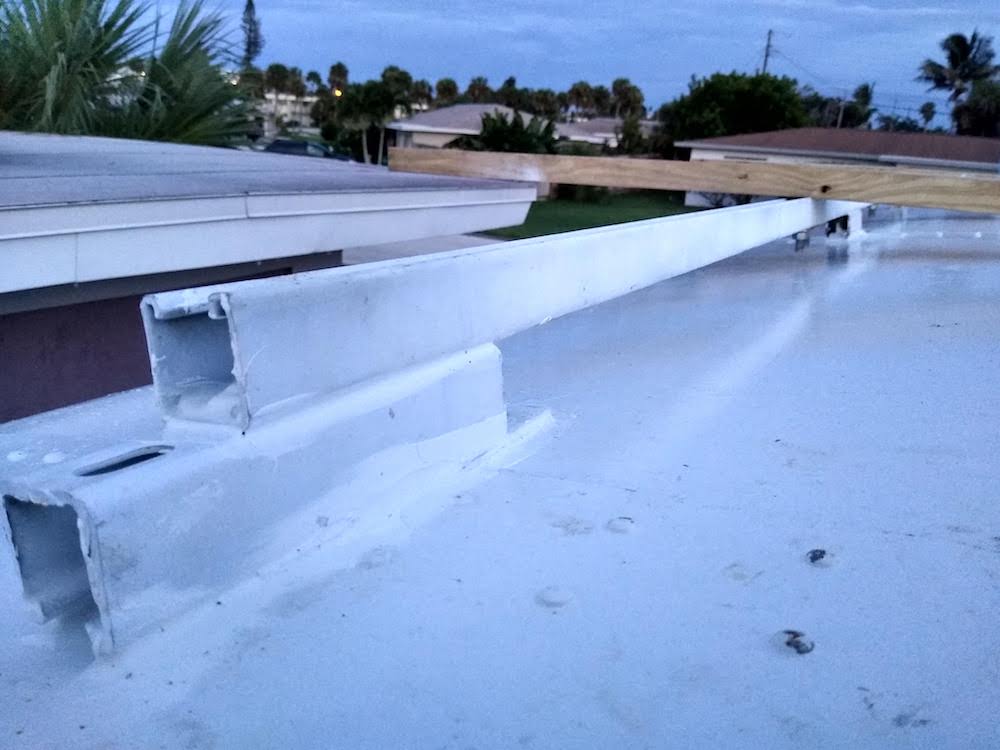
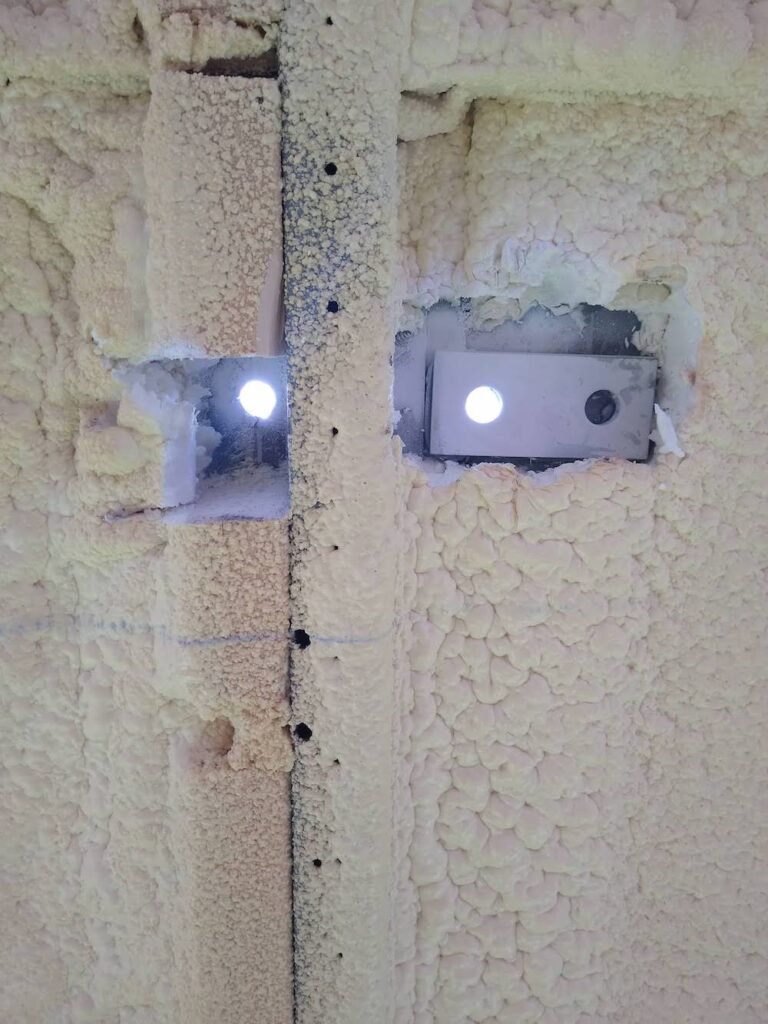
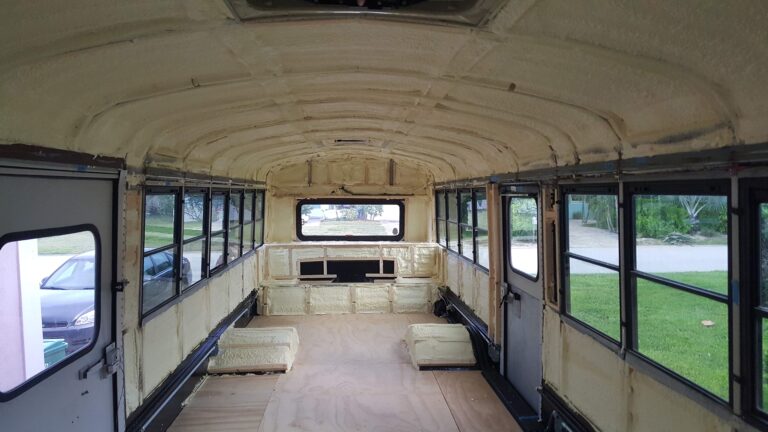
Before we spray foamed our ceiling, we drilled holes through the roof to secure the super strut with bolts through the ceiling. We didn’t just attach them to the sheet metal.
We secured the bolts and washers with the “lip” of the frame rails. This allowed us some additional resistance and security for any energy or force “pulling” the deck up and away from the roof.
Deck Mounting Rails
We used Super Strut and ⅜ inch bolts with washers, lock washers, and locknuts.
Attaching the 10-foot super-strut rails to the super strut feet was done with the hardware mentioned above. Be sure to use Loctite thread lock or something similar to prevent your nuts from coming loose.
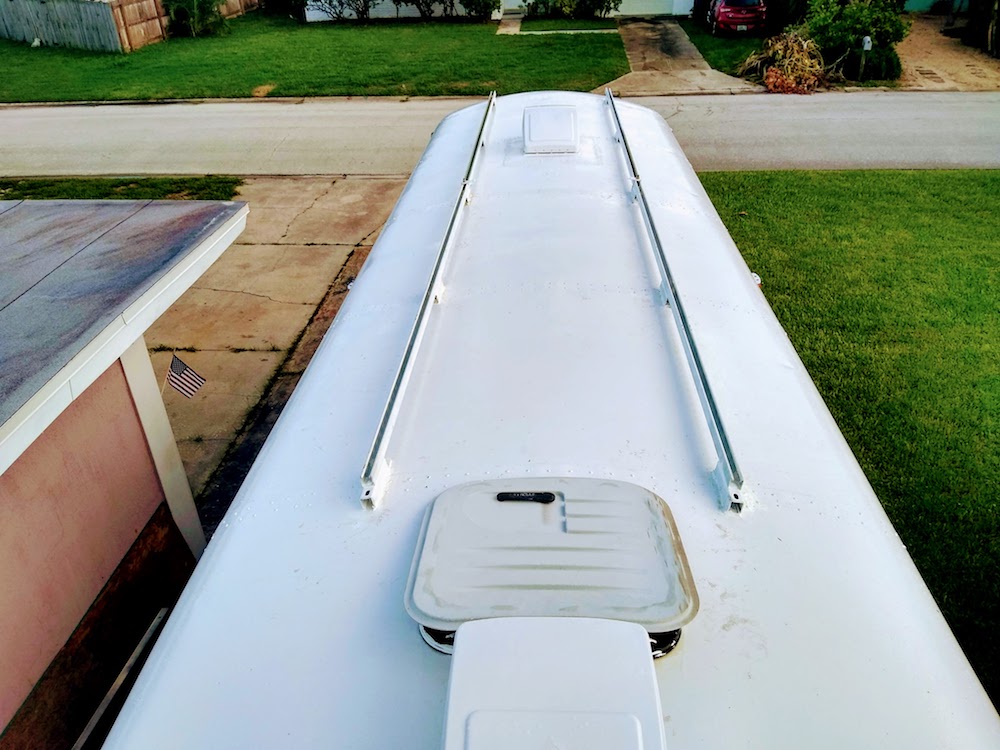
Even though you are using lock washers and lock-nuts, it’s always better to lean towards “better safe than sorry”.
Once the frame rails for the deck are secured, most of the hard work is done.
Cross Members
Once we securely attached the mounting rail feet and mounting rails, we secured 2 x 8 lumber cross members from left to right across the mounting rails.
We used four pieces of lumber. One at the top or front of the mounting rails and one at the end or bottom. We then put two more equally distanced in the middle.
Each of these 2 x 10 pieces of wood was secured to the super strut rails with ⅜ inch bolts with lock washers, washers, and locknuts.
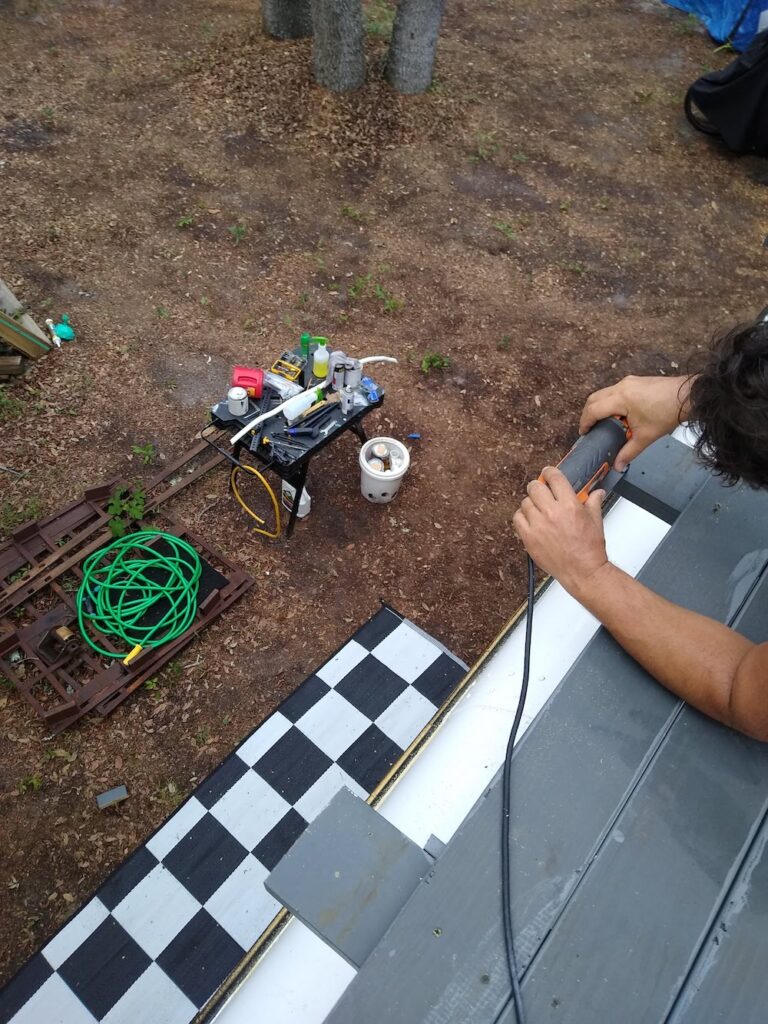
Deck Wood
Once the cross members are attached and secured, it's time to lay down some deck pieces of wood!
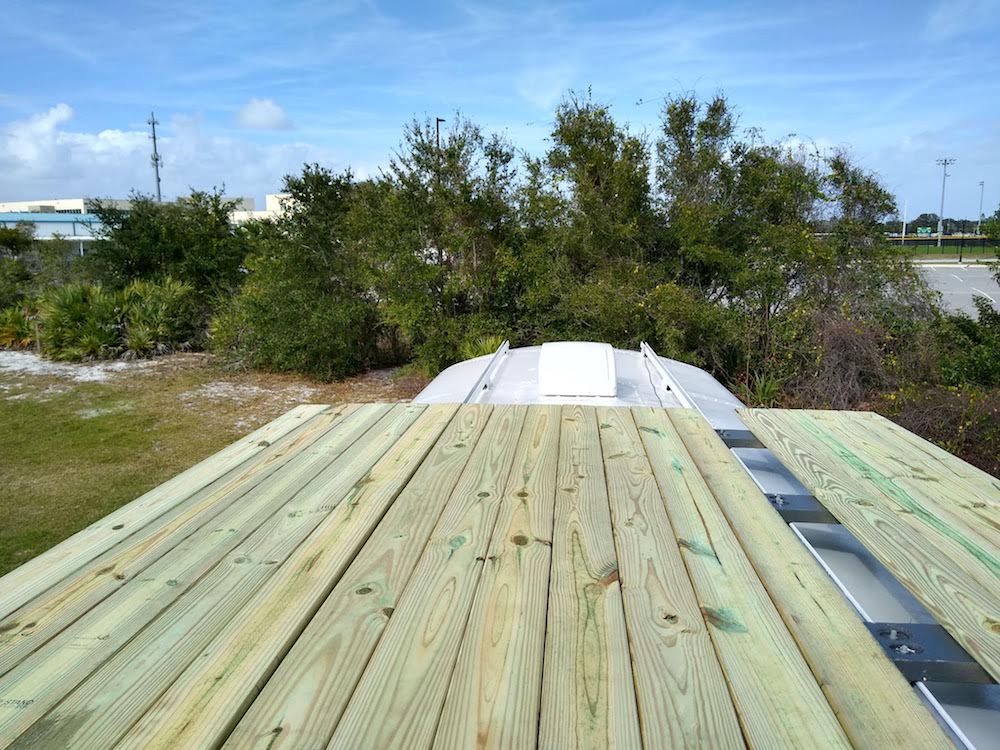
It doesn’t matter if you are using composite deck pieces or pressure-treated wood, you are going to use just about the same amount to cover your deck.
If you use pressure-treated wood, do not put a gap in between the deck boards. This pressure-treated wood will shrink up a bit as it dries out in the sun.
Once it dries out, you will have a nice ⅛ to ¼ inch gap between your deck pieces.
If you are using composite deck boards, go ahead and install them with a gap. The composite material will not shrink up in the sun. There is nothing to dry out.
We used two decking crews for every point of attachment. So, for every piece of deck board, we screwed in eight exterior deck screws. Two screws into each of the 2 x 10 cross members.
We felt this was adequate and strong enough to handle any winds we would face while traveling.
We put thousands of miles on the deck while traveling from Florida up the east coast and up to Wisconsin. Down through the midwestern states and out to Colorado into the Rocky Mountains and then down into the San Juan Valley.
Our deck was as good as it was new when we sold our bus a year and a half later.
Skoolie Roof Deck Materials
The materials we used to build our deck.
- One 10 foot super strut rail to be cut into eight pieces or feet for the 10-foot sections of the super strut to sit on top of.
- Four 10 foot super strut rails for the deck supports
- Four 2” x 10” x 7’ pressure-treated boards
- 15 pieces of 1” x 6” x 12’ decking boards
- 28 ⅜ inch 2” galvanized bolts, washers, lock washer, and nylon locknuts.
- One box of exterior decking screws 300 count
- Loctite thread sealer
- 3m Marine Caulk/Sealant 5200
- Super Strut End Caps
- Rustoleum Paint and Primer
When we built our first deck on our first skoolie, we used galvanized super strut from Home Depot. It is heavy!
A better solution for a skoolie roof deck rail would be to use an aluminum super strut. Much lighter, but about twice or more as expensive.
When you are counting your pounds towards your GAWR or GVWR, then every pound counts. Plus, the lighter your skoolie is, the better your gas mileage will be!
What is the average fuel mileage for a skoolie you ask? We wrote a piece addressing that very subject here, What Is The Average Fuel Economy of A Skoolie?
How Much Does It Cost To Build A Skoolie Roof Deck?
The cost of a skoolie roof deck all depends on the current market price for the materials.
Based on the materials list we used above, we can estimate based on current market prices at Home Depot to build your skoolie roof deck.
- One 10 foot super strut rail to be cut into eight pieces or feet for the 10-foot sections of the super strut to sit on top of.
$62 – aluminum
$25 – galvanized steel
- Four 10 foot super strut rails for the deck supports
$248 – aluminum
$100 – galvanized steel
- Four 2” x 10” x 7’ pressure-treated boards
$50 – Home Depot
- 15 pieces of 1” x 6” x 12’ decking boards
$200 to $350 depending on the quality of the composite board used
$150 to $250 depending on grade and quality of wood
- 28 ⅜ inch 2” galvanized bolts, washers, lock washer, and nylon locknuts.
$150 – Home Depot
- One box of exterior decking screws 300 count
$35 – Home Depot
$16.00
$25.00
$36.00
$24.00
The total cost for this deck as listed, not including labor if you paid someone else to construct it for you would total:
$896.00 using aluminum strut and composite deck boards
$711.00 using glavanized strut and composite deck boards
Of course, you can tweak those numbers up or down depending on the cost of materials as well as the type and amount of material used.
The above estimate is for a 7 ½ foot wide by 10-foot long deck.
Is A Skoolie Roof Deck Worth It?
Spending close to $1,000 on a skoolie roof deck might seem like a whole lot of money. However, when considering the views it will give you come sunrises and sunsets, it is most definitely worth it in our opinion.
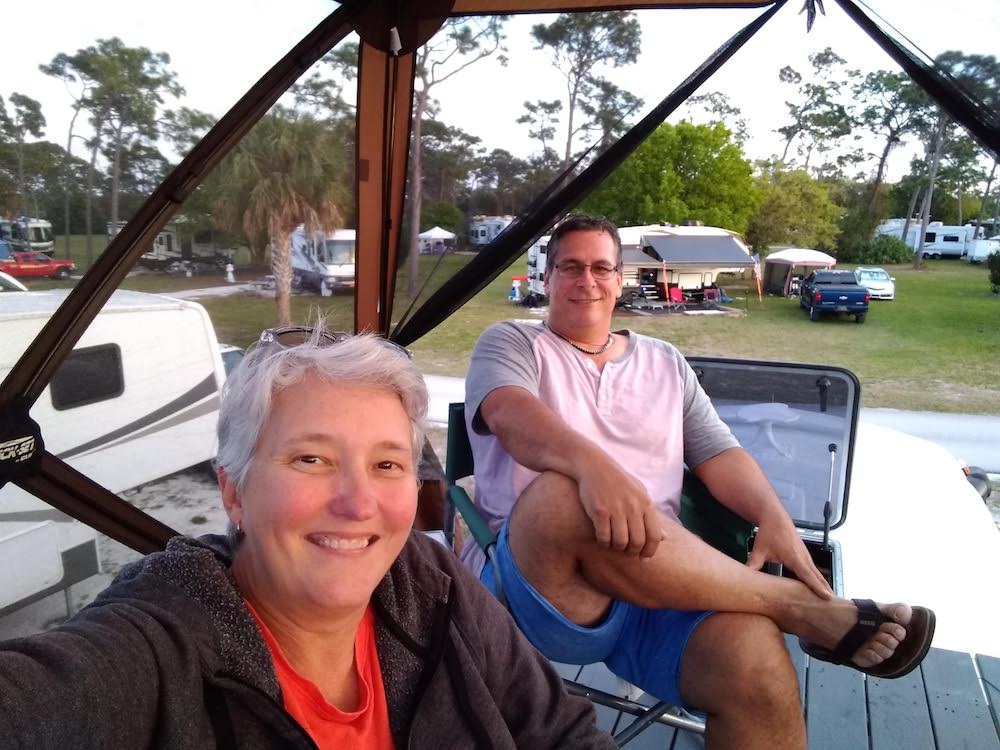
Not only is a skoolie roof deck an epic way to enjoy your morning coffee or evening cocktail, but it is also a great asset when looking around your campsite.
Imagine yourself at a Jimmy Buffet concert. We all know a Jimmy Buffet concert is just as much about tailgating all day before the evening concert as it is the concert itself.
Parrott Heads go to great lengths to show their love and support for the Mississippi boy who pledged Kappa Sigma at Southern Miss.
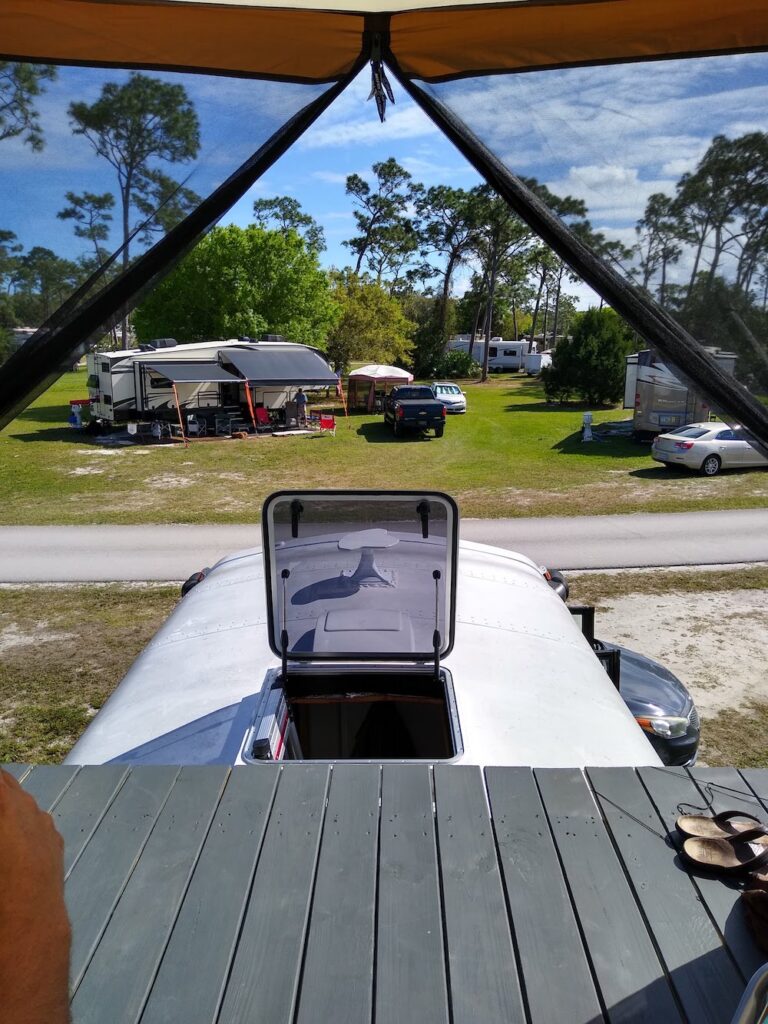
You have friends looking for your rig to come and tailgate with you, but there are hundreds and hundreds of vehicles. You get up on your roof and voila! They are able to see you and you are able to see them.
Yes, a skoolie roof deck is definitely worth it! We considered our skoolie deck our “upstairs”. It added so much to our overall living space and enjoyment.
Does A Skoolie Roof Deck count as Square Footage?
If you want to count your skoolie roof deck as additional square footage, then, by all means, go for it. There are no standards for calculating the overall living square footage of a skoolie.
That being said, as former licensed Realtors, we would say that the deck is more like a covered patio, and therefore would not be considered as a part of the overall square footage per se.
Either way, it is your living and enjoyment footprint. It is your space and it is a living area. Our deck gave us an additional 80 square feet (our deck was 8’ x 10’ on our first bus) of additional lounging and living space.
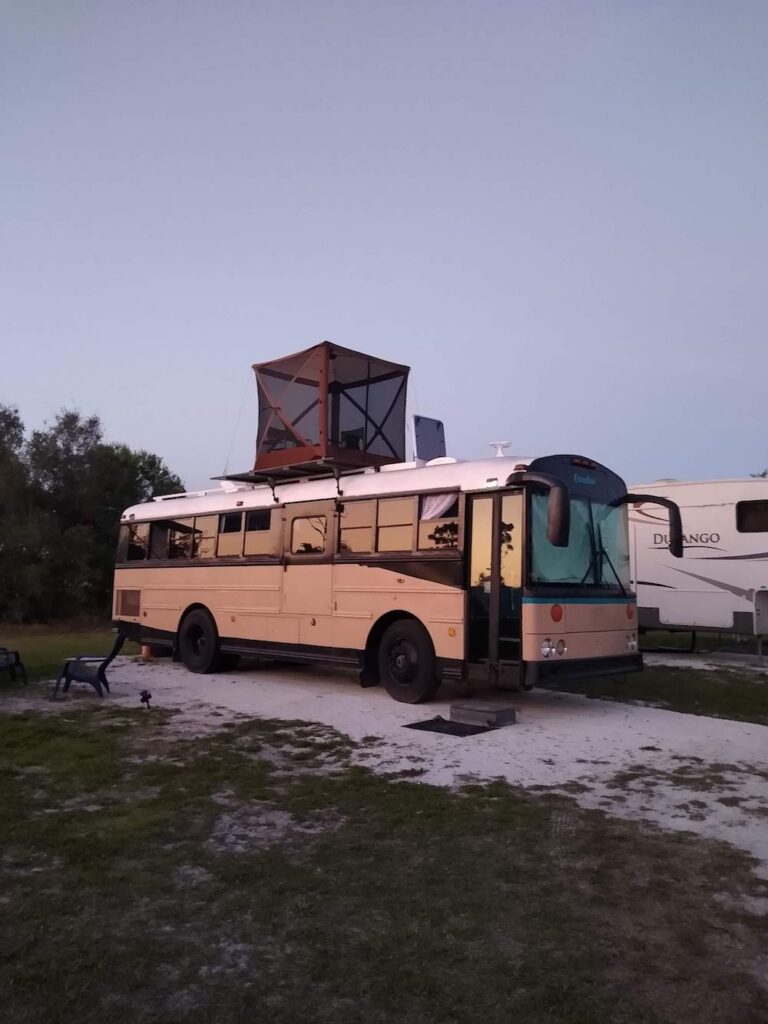
Hell, we even put a tent on top of our deck at times and could even accommodate two people sleeping up there.
We loved our deck so much, for our second build, we are going to incorporate a solar mounting deck.
Can I Insure My Skoolie With A Roof Deck
There are three skoolie build projects that are highly likely to get your skoolie rejected for insurance. That is not to say every insurance company will deny you coverage, but most of them do not like these three items.
- Roof Raise
- Wood Burning Stove
- Root top deck
The liability exposure to the insurance company is too great of a risk when it comes to a skoolie roof deck.
Insurance companies know that most of us are not structural engineers and have no idea what forces are placed on skoolie decks while driving down the road. Especially when we are driving into a strong headwind.
Besides the fact that someone has a “party on the deck with enough alcohol to get an elephant drunk.
All of a sudden, you or one of your guests has fallen or walked off the side of the deck 12 feet down to the ground.
Generally speaking, you may have a hard time getting an insurance companies underwriter to approve of a skoolie deck.
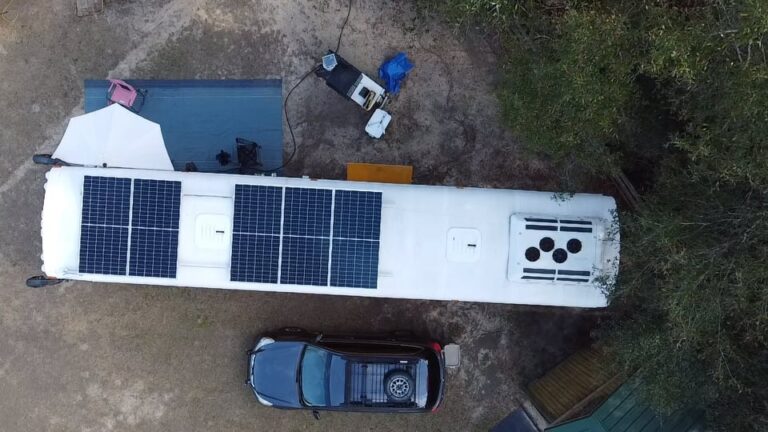
However, if you build a “platform” for your solar panels, then it is no longer a lounge or deck, it is a solar mounting platform. It is a strategic and smart idea to always have your solar panels on a tilt to follow the sun. *wink*
What Is The Difference Between Rooftop and A Skoolie Roof Deck?
Here is our skoolie project tip of the day.
You do not need to build a deck on top of your skoolie to enjoy the views around you, sunrises or sunsets.
You can just as easily enjoy all of the amazing and Instagram-worthy views around you by simply getting up on top of your bus and standing, sitting, or laying up there.
Granted, sitting on your metal roof may not be as comfortable or as safe even, but it is feasible to do so.
Your call. To have or not to have? That is the question.
Skoolie Roof Deck Ideas
A skoolie roof deck is about as cool as the other side of your pillow! People at concerts, sporting events, and Skoolie Meet Ups love to hang out on top of a skoolie!
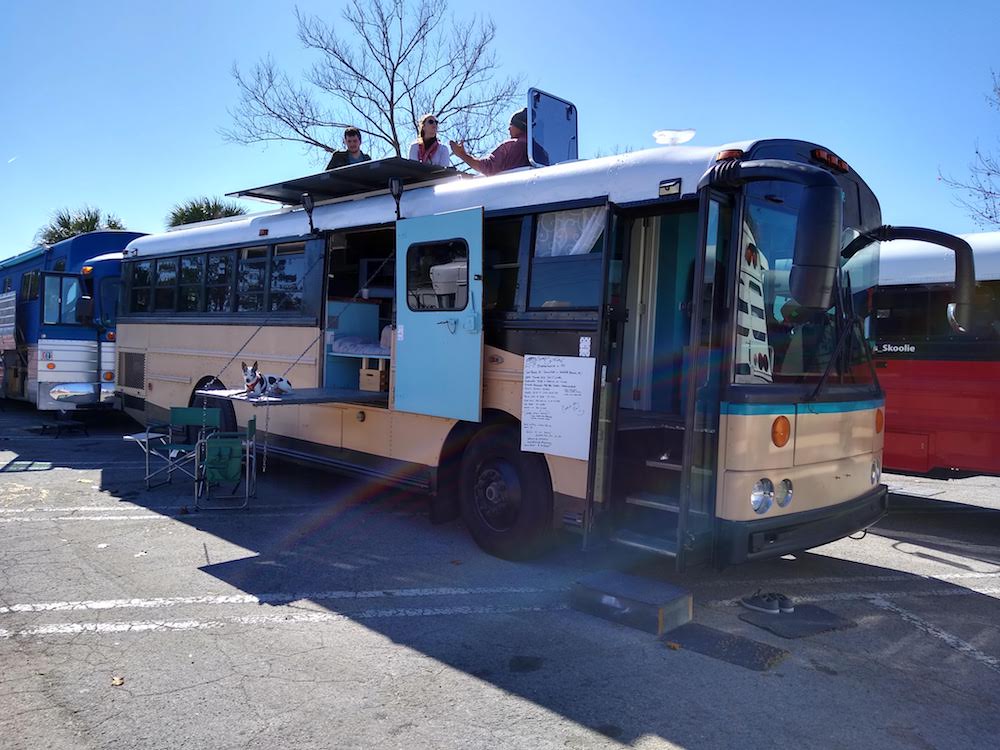
We have seen some pretty cool rooftop deck ideas.
The great thing about a skoolie project is you get to do whatever your imagination, creativity, skill sets and budget allow you to do.
Wrap Up To The Ultimate Guide To A Skoolie Roof Deck
Not to be a wet blanket here at the end, just understand that your insurance company is not going to be too keen on you having a skoolie roof deck!
That being said, on our current skoolie build, we are not installing a skoolie rood deck. We are installing a solar panel mounting platform. Our tilting solar panels need something to attach to.
There are always different paths you can take to get to the same destination.
Whether or not you decide to build a skoolie roof deck on your skoolie project is up to you. Just remember, you can always enjoy the view from the roof of your bus if you have a deck or not.
If you do, or if you don’t, always be careful and do not impair your ability to stay vertical when on top of your bus!
Show us what you have done with the top of your skoolie! Leave us a comment, or connect with us on our Social Channels.
Thanks for this. I have seen a lot of sketchy looking roof deck mounting ideas. This one actually looks well thought out and sturdy.