Skoolie Shower Ideas
Skoolie Shower Ideas is a subject that is often discussed but never fully explored when converting a school bus into a motorhome. It is usually an appetizer when planning for conversion but often set aside in the end.
There is one thing about skoolie life that we were not prepared for and that is not taking a shower every day. For our first skoolie project, we did not want to sacrifice the 9 square feet required to build a shower.
Our thought process was, why waste almost 10 square feet of living space for something we are only going to realistically do three to four times a week.
Having a shower wastes a of real estate on a very limited amount of square footage. Too many times we have toured someone's skoolie only to see the shower is used as a storage closet instead.
After having a roll-away shower in our first skoolie and an outside shower in our Sprinter conversion, we are excited to incorporate a dedicated bathroom and shower room in our current Skoolie Project Conversion.
After sacrificing the room and setting up a shower and pulling the toilet out of a cabinet, a dedicated bathroom with a shower is just what our next skoolie needs!
How Do You Put A Shower In A Skoolie?
Planning is the key here. Decide what size shower pan you want as a footprint. How much room do you personally need to comfortably and effectively take a shower?
It is best practice to place your shower on the same side of the bus as your water tank or at the very least, your water pump.
By keeping your water pump, shower, and even kitchen sink on the same side of the bus, your plumbing is going to go much easier and smoother.
Draining Your Skoolie Shower Water
Your shower is going to need to be able to drain all of that water and soap. Putting in a drain should be at the top of your planning.
Knowing where your floor cross members are placed saves you a lot of frustration and unnecessary work. Your drain should line up with just the sheet metal of your skoolie floor.
Whether you decide to drain your shower water to your grey water tank or directly to the ground is up to you. We only recommend you use biodegradable soaps if you decide to go straight to the ground.
We have decided to do both. The design allows our shower water to drain into our grey water tank when we are parked in a camp, urban boondocking, or on friends' property.
When we are camping on BLM or dispersed land, we will drain that shower water directly to the ground for mother nature to enjoy. Nothing wrong, taboo, or gross about letting your shower water go into the Earth.
Some people think it’s gross, but, they don’t really understand it is just water with natural soap ingredients. If nothing else, it is good for the ground and surrounding plants.
Walls or Shower Curtain?
Whether you decide to build walls for your shower, or just use a shower curtain to contain the water is up to you, your overall floorplan, and how complicated you want your shower to be.
If you decide to build walls, be sure to treat your wood with a waterproof coating such as Perma-Guard or WaterTite. Then, apply your shower walls and seal them up tight with a quality waterproof shower caulk.
We like the Gorilla Silicone Sealant Caulk. It is easy to apply, great for sealing and is mildew resistant.
Once your drain is in, plumbing run, shower pan, and walls or curtain installed, it’s time to get your shower own and get clean! If there is enough room for two, have a party in the shower!
How Do You Tile A Skoolie Shower and Bathroom?
Many people do it and swear by it. Of all the skoolies we have seen with tile in their bathroom showers, floors, and kitchens, they seem to hold up to the road vibrations.
Tiling a skoolie bathroom starts with having all of the floors and walls level and square. Here are the key tips on tiling a skoolie bathroom.
Tip #1 Use the Right Type of Grout
If you want your tile in your skoolie bathroom to not crack and break apart as you are chugging down the road, be sure to use a grout that is flexible.
A good flexible silicone grout will bend and flex as your skoolie does due to rough roads.
Tip #2 Use Flexible Tiles
It’s not absolutely necessary, but if you can find flexible bathroom tiles, it would go a long way with the flexible silicone grout in preventing cracking and buckling.
Tip #3 Firm Sturdy Backing
Having a solid backing to place your flexible silicone grout and tiles onto keeps your tiles from popping off when you hit a bump transition from a bridge to the road.
How Big Are Skoolie Bathrooms?
Your skoolie bathroom can be as big or as small as you design it to be. Even with a 24” x 24” shower pan, which is rather small, you still need at least two feet four inches by two feet and four inches of floor space.
For our current build, we are going “big” with our bathroom floorplan. Our skoolie bathroom will boast 22 ½ square feet. That is 3 feet deep and 7 ½ feet wide.
You make your bathroom as big or small as you want or need it to be. There is no right or wrong size for a skoolie bathroom
How Do You Plumb A Skoolie Shower?
When plumbing your bathroom, or any other plumbing needs such as your kitchen, we prefer to use Pex plumbing with either Pex connections or SharkBite connections.
We have had a very successful run with SharkBite connections. They are a bit more expensive, but they are so easy to connect and disconnect if you make a mistake or choose to change up your plumbing layout.
Plumbing your shower drain and your sink drain to your grey tank would need PVC pipe. Using PVC plumbing pipe is flexible enough to withstand the vibrations and jarring of skoolie traveling.
We wrote an in-depth piece on How To Install Your Skoolie Plumbing, give it a read if you would like to dig a little deeper into Skoolie Plumbing for your bathroom.
Types of Skoolie Showers
There is one thing about skoolie life that will make just about anyone smile. A warm shower anytime you want it. It doesn’t matter what kind of shower you have built into your tiny house on wheels, as long as it works.
Some skoolie showers are better than others. “Better” of course is a very subjective term, but seriously, some skoolie showers are better than some others.
We will examine a few of the most popular and not-so-popular shower ideas for your next skoolie project.
Stand Up Shower
A stand-up shower is just a shower inside of your skoolie. Unless you have it in the center of your bus, you may need to duck while showering unless you are well under 6 feet tall. The ceiling by the windows is a few inches shorter than in the middle of the bus.
Step Down Shower
We have seen this design in a couple of buses. To accomplish this, floor is cut out and dropped down 12 to 18 inches. This is in essence a step-down shower. This allows people who are taller than the ceiling to still be able to stand up-right and get a good shower.
Exterior Shower
Exterior showers are very popular. Not only do they eliminate taking up valuable floor space and square footage, but they also eliminate the need to capture and store the shower water in a grey tank.
The water from your exterior shower simply gets absorbed into the earth beneath you, with no mess and no fuss.
One of the negative aspects of an outdoor shower is that it has to be done outside. So, if the weather is especially cold, then it makes for a frigid experience. If the weather is rainy, you may need to put your shower off until the weather improves.
Another not-so-great thing about outdoor showers is the privacy factor. You may need to shower in your bathing suit instead of your birthday suit.
Exterior Secondary Shower
Having an auxiliary or secondary exterior shower is nice for when you just want to cool off, wash your pet(s) or clean off gear that may have gotten dirty on a hike or bike ride.
Exterior showers are tucked neatly and discreetly into a plastic compartment on the side of your bus. They make for a nice alternative to taking a shower inside of your bus.
We love to take outside showers, especially when we are camping alone on BLM or dispersed land.
Hide-Away Shower
What is a hide-away shower you ask? It is a shower design we came up with while designing our first skoolie. We already had a bathroom that housed our composting toilet.
A place was needed for our shower though.
We knew we didn’t want to take up any more floor space for a shower than we needed to. Our bus was a 32’ foot diesel pusher that gave us around 25’ feet from behind the driver's seat to the back of the bus.
Our bus had no extra room for an additional 9 square feet required for a 32” x 32” inch shower pan.
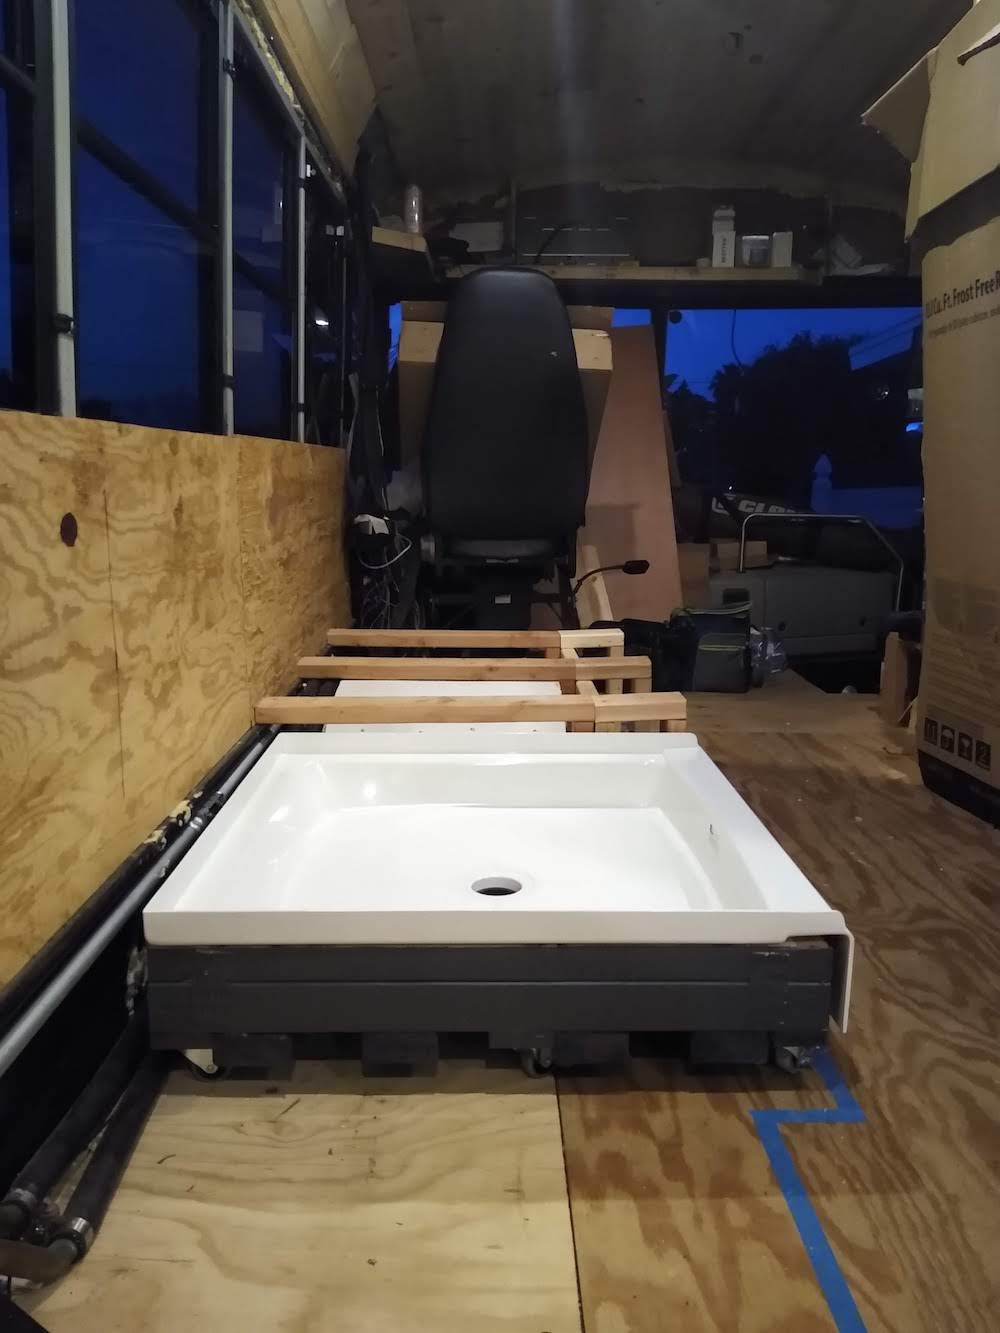
The inspiration for the hid-away shower came from a van conversion actually. We designed a shower on roller wheels that would roll under our sofa when not in use.
When we wanted to take a shower, we rolled it out from underneath the couch into our hallway. We had put a shower drain right in the middle of our floor, but you really could not tell when it was not in use.
The shower curtain collapsed inside of the shower pan and attached to hooks in the ceiling onto a copper rod. The plumbing and hardware slide out from a wall on drawer slides.
It was a very discreet and simple setup. We loved being able to take a shower inside.
Oh, by the way, the shower sat right under our marine hatch skylight. We could take showers with the hatch open or closed, day or night. That was another excellent design of our inside, hide-away shower.
Outdoor Portable Shower Tent
One more option that is worthy of mentioning. An outdoor portable shower tent is a great space-saving alternative. It will still allow you to shower just about anytime you like.
An outdoor portable skoolie shower tent is going to restrict your shower times due to weather and climate. Unless of course, you enjoy taking a shower in freezing temperatures.
This skoolie shower uses a separate and independent water source for your shower. Whether it is a pump-canister or a shower head with a battery-operated pump.
They are all viable options that can give you a refreshing shower to keep all of your parts clean and smelling fresh!
Wrap Up to Skoolie Shower Ideas
Taking a shower in your tiny house on wheels anytime you feel the urge is a luxury of life we will never take for granted again!
We are looking forward to building our next skoolie shower and have a very special design planned. It will be a shower we have never seen in another skoolie or any other type of nomadic vehicle.
It will be special. All we have to do now is get to that part of our skoolie project and build it. We can’t wait to share the finished project with all of you!
If you would like to connect with us to discuss skoolie showers, leave us a comment. We will reach back out to you!



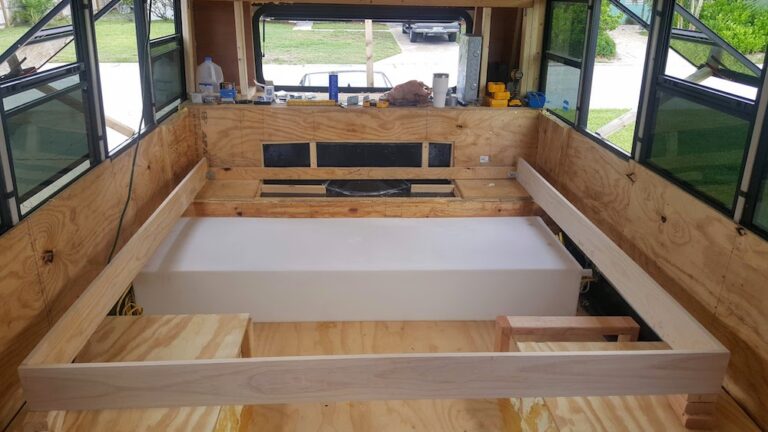
My schoolie shower is a round 200 gallon plastic water tank, 31 inches in diameter. I have to cut the top out as the tank was 84 inches high. This tank will be easy to clean as there is no corners. I will cut a door out of the side of the tank. Shower curtain on inside of tank. I haven’t heard of anyone using my idea.